Showcase and discover digital art at yex

Follow Design Stacks

Subscribe to our free newsletter to get all our latest tutorials and articles delivered directly to your inbox!

Stylish Rectangles

This tutorial is a simple Photoshop tutorial for adding stylish rectangles in a sig or other artwork
to give a touch up to it.
it’s very simple and in my opinion it has a great effect sometimes!
you should try it, I show you how! Good luck!

Well … We start with a background that you’re going to use for you sig or other piece.
I started a new file (350*100) a great sig resolution in my opinion.
Start making your background, with brushes, filters or whatever.
I came up with this:

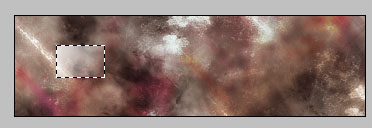
Now we want to add our stylish rectangles
to give it a techy, stylish look. Now take you rectangular marquee tool.

Now make a small rectangle with it in a new layer. Make sure the feather is 0px!
you can check the feather above. So make a rectangle like this:

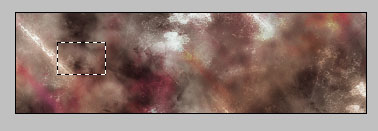
Now take the gradient tool.

And make sure your settings are like this:


Now draw your gradient in the selection like this:

Now don’t remove the selection and do this: edit – stroke – (1px – center – white ).
You can remove the selection now (ctr-d). Without the stroke it sometimes looks even better!!!
You should have something like this now:

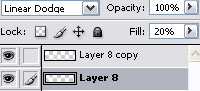
Now it’s almost finished. We only have to add some blending options.
Set the blend mode to Linear dodge, I have opacity:100% – Fill:20%.
Like this:

Now just play around with the fill and opacity and duplicate the layer a coupl eof times
and place them in front of eachother, just don’t be scared to mess around. Like this:

Here’s an example where I used that effect.But I did it without the stroke!

Comments