
CellShading Effect
Cell-Shading
The is the first tutorial on MickM.com on how to cell-shade your photo’s just like in games like Zelda:Windwaker or XIII. It may take some time and tries, but the result is worth dying for…
Make Vector-cellshading your everyday business with this tutorial!
-
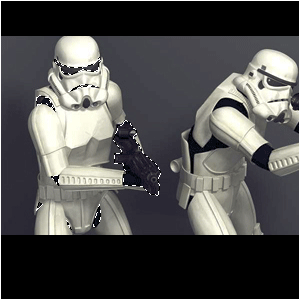
Step 1 Open up a picture you want to cell-shade/vectorise;

-
Step 2 First select all the parts that have the similar color;

Note:I USED THE COLOR BLACK FIRST.
-
Step 3 You must use the Polygonal Lasso-Tool for this all;
Note:I WOULD HIGHLY SUGGEST TO USE THIS TOOL, BECAUSE IT GIVES A MUCH BETTER RESULT.
I USE THE PEN-TOOL A LOT, BUT IN THIS CELLSHADING-CASE, IT’S BETTER TO GET POLYGONAL SHAPES THEN TO GET CURVED SHAPES!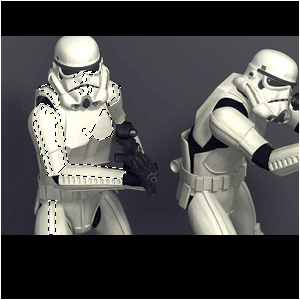
-
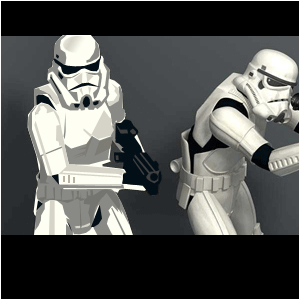
Step 4 When you select one color, make a new layer and just fill it with that color;
Note:IF YOU DON’T KNOW WHICH COLOR-CODE IS THE COLOR YOU WANT, JUST GET OUT THE EYEDROPPER AND CLICK IT ON THE COLOR YOU WANT TO CELLSHADE.
-
Step 5 When you’re done, you should have A LOT of layers with all different colors;
-
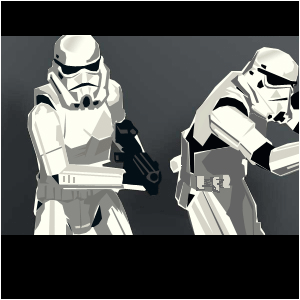
Step 6 It is a lot of work, but it pays off…
REMEMBER: You don’t need to use EVERY COLOR, just the basic, the shadow and the shining-part!!!
Check out below how the Polygonal Lasso-Tool works;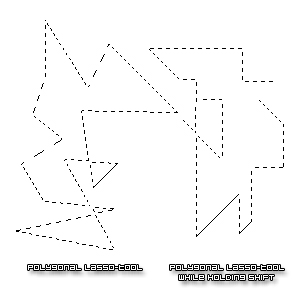
Author : MICK MOOLHUIJSEN
HomePage : http://www.mickm.com
Comments