
Stylish Phone Icon
December 2, 2006 | 0 comments
Open a new file, that would have 450×470 px and 300dpi.

Take the next instrument  and try to represent a circle like that one indicated next picture.

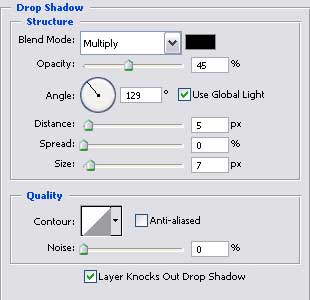
Blending Options-Drop Shadow

Blending Options-Inner Glow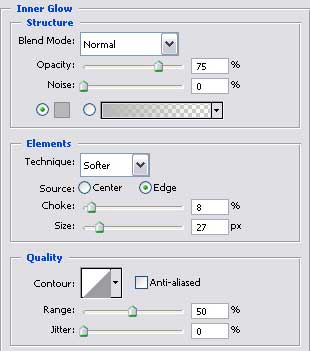
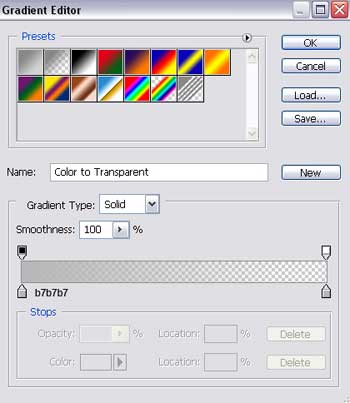
Gradient’s parameters.
Copy this new made layer and apply Free Transform option to minimize it. Fill 0% on the layers and make everything look like it is demonstrated below. Keep the same parameters also.

Blending Options-Gradient Overlay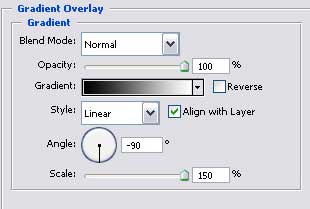
Comments