
Create Icons tutorial
December 9, 2006 | 0 comments
Open a new file with 236×470 px and 300 dpi. Paint it in black color.

Using this instrument  , create a circle colored in 454401. Then apply this tool
  with the parameters from the next table:

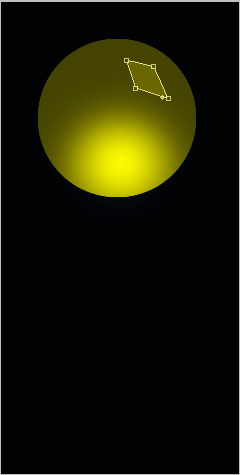
Decolorize the lowest part of the circle the same way it is done below.


Apply now the instrument  and try to represent a figure colored in 6A6700.

Make the same way several other elements with the same color.

Merge down now all the layers composing those four rhombs of one color in a group. Copy this new group and apply Free Transform selection to turn it around on 180 degrees. Place it the same way it is done below.

Apply the instrument and represent a circle with the color 6F6D00.

Page: 1 2
Comments