
Portfolio Web Layout
April 18, 2007 | 0 comments
Learn how to create a web layout with services, portfolio, careers and others.
Select File>New option with 800×720 px and 72 dpi. Select the Rectangle Tool (U) to represent the background of the site to be next:

Make the necessary adjustments on the layer’s parameters in the layers’ panel:
Blending Options>Gradient Overlay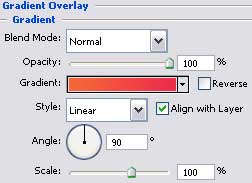
Gradient’s parameters: 
Using the Rounded Rectangle Tool (U), try to represent the primary layer reserved for the site’s panel:


The layer’s parameters:
Blending Options>Gradient Overlay

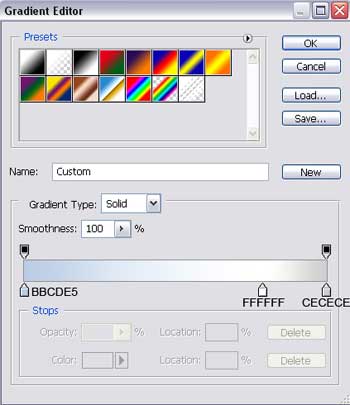
Gradient’s parameters:
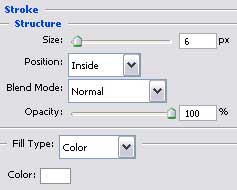
Blending Options>Stroke
Comments