
Professional Security Icon
April 26, 2007 | 0 comments
A step by step guide to design a Professional Security Icon.
Begin by creating a new file (File>New) with 450×450 px and 72 dpi.
Try to represent now the primary layer of the next sphere we want to draw on the central part of the picture. Use the Ellipse Tool (U) for this operation.

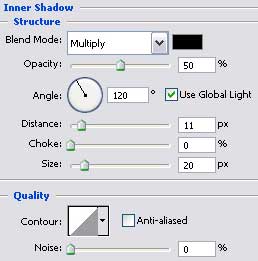
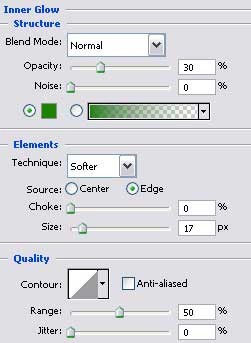
The layer’s parameters:
Blending Options>Inner Shadow
Blending Options>Inner Glow

Blending Options>Gradient Overlay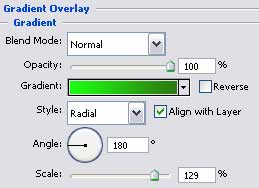
Gradient’s parameters: 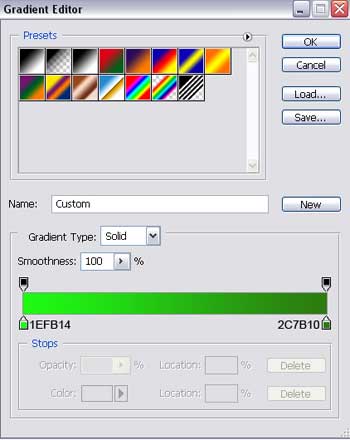

Comments