
Professional Modern Web Layout
This tutorial will show you how to create a modern web portfolio layout.
Create a new file (File>New) having 800×700 px and 72 dpi. Apply now the Paint Bucket Tool (G) to fill the background with color #131313

Using the Ellipse Tool (U), try to represent an element reserved for the site’s header to be that would have the white color.

The layer’s parameters:
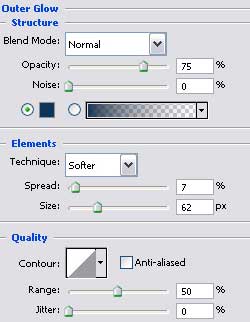
Blending Options>Outer Glow


Applying the previous instrument, try to make the next layer belonging to the site’s header, which corrections can be made with Convert Point Tool.

The layer’s parameters:
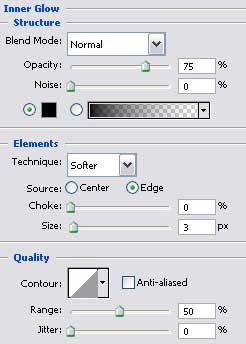
Blending Options>Inner Glow
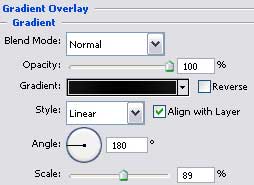
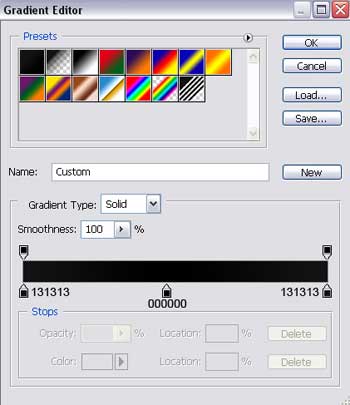
Blending Options>Gradient Overlay

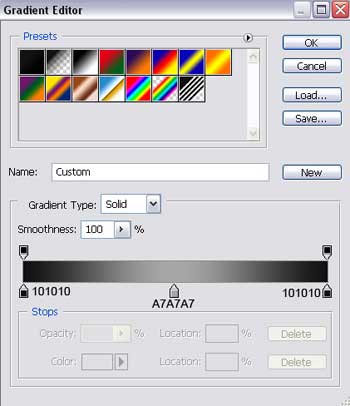
Gradients parameters:

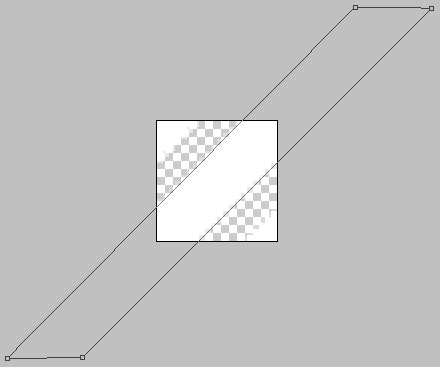
Make a copy of the new made layer and select the Free Transform option to narrow a little the copy and stretch it out a little the way it is shown below (change the layer’s parameters).

The layer’s parameters:
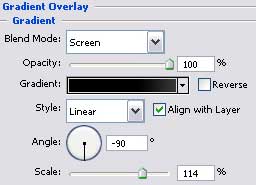
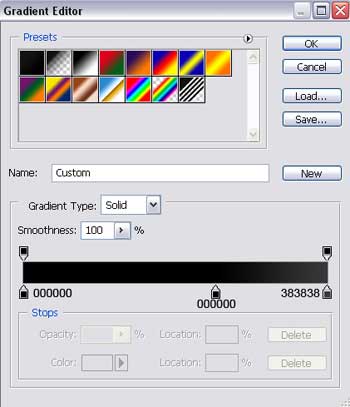
Blending Options>Gradient Overlay
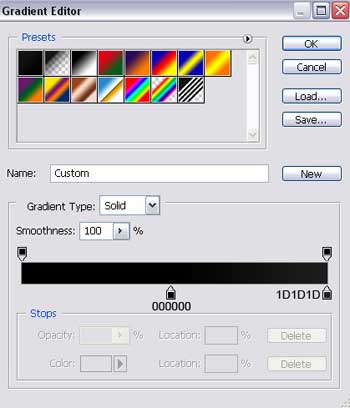
Gradient’s parameters:

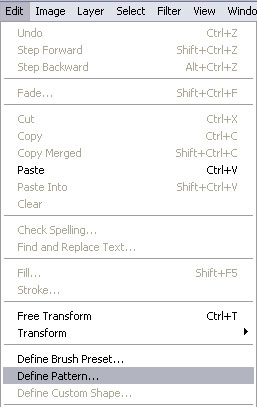
Create a new layer having 20×20 px and 72 dpi and then apply the Rectangle Tool (U) about three times and turn over the copy with Free Transform option to create a kind of pattern of white color.

Save the Pattern!
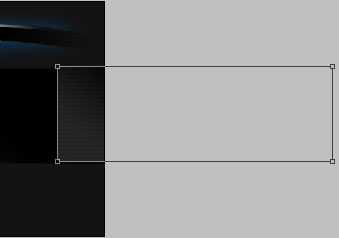
Create a new layer and use on it the Rectangle Tool (U) to represent a wide stripe looking like a part of the site’s background.

The layer’s parameters:
Blending Options>Gradient Overlay
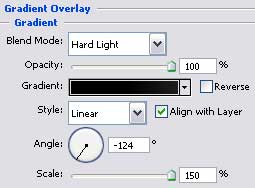
Gradient’s parameters:
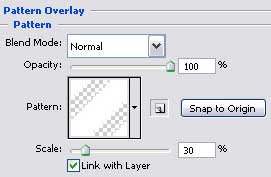
Blending Options>Pattern Overlay

Make a copy of the recently created layer and select again the Free Transform option to move the copy to the right side and lift it up a little the way it is demonstrated on the picture.

Using the Rounded Rectangle Tool (U), represent the lowest layer reserved for the buttons’ panel on the site’s header’s menu, colored in #010101


The layer’s parameters:
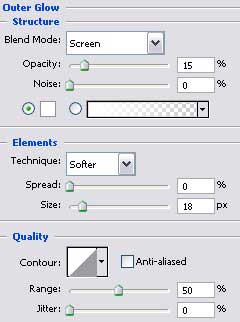
Blending Options>Outer Glow

Make a copy of the new made layer and select the Free Transform option to make it smaller a little and apply for this copy different parameters:

The layer’s parameters:
Blending Options>Gradient Overlay
Gradient’s parameters:

Comments