
Create Stylish Logo
May 11, 2007 | 0 comments
Using this tutorial, you will learn how to design a nice looking stylish logo with this tutorial.
Open a new file (File>New) having 450×450 px and 72 dpi.
Next step includes representing the first layer of the logo we want to picture out, selecting two instruments.
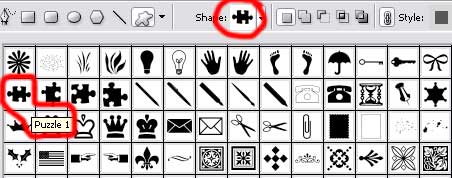
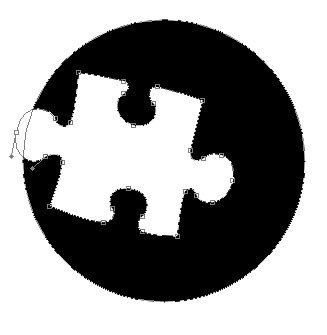
First we need to take the Ellipse Tool (U) and draw a circle and then the Custom Shape Tool (U) may be helpful in cutting out a kind of puzzle, like that one demonstrated below, keeping pressed in the same time the Alt button between the layers.
The layer’s parameters:
Blending Options>Drop Shadow 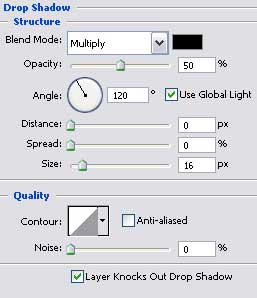
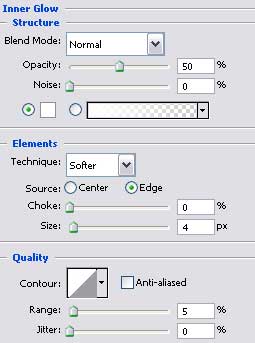
Blending Options>Inner Glow

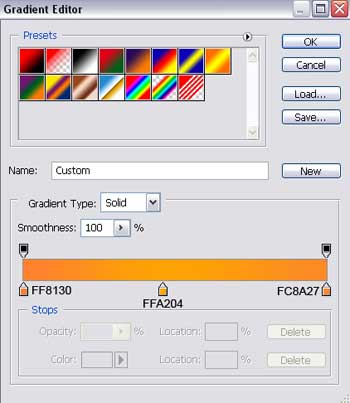
Blending Options>Gradient Overlay
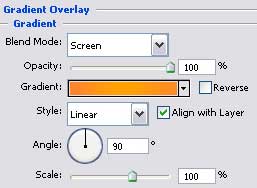
Gradient’s parameters:

Comments