
Futuristc Desktop Wallpaper
In this tutorial you will learn how to create a high quality futuristic desktop wallpaper.
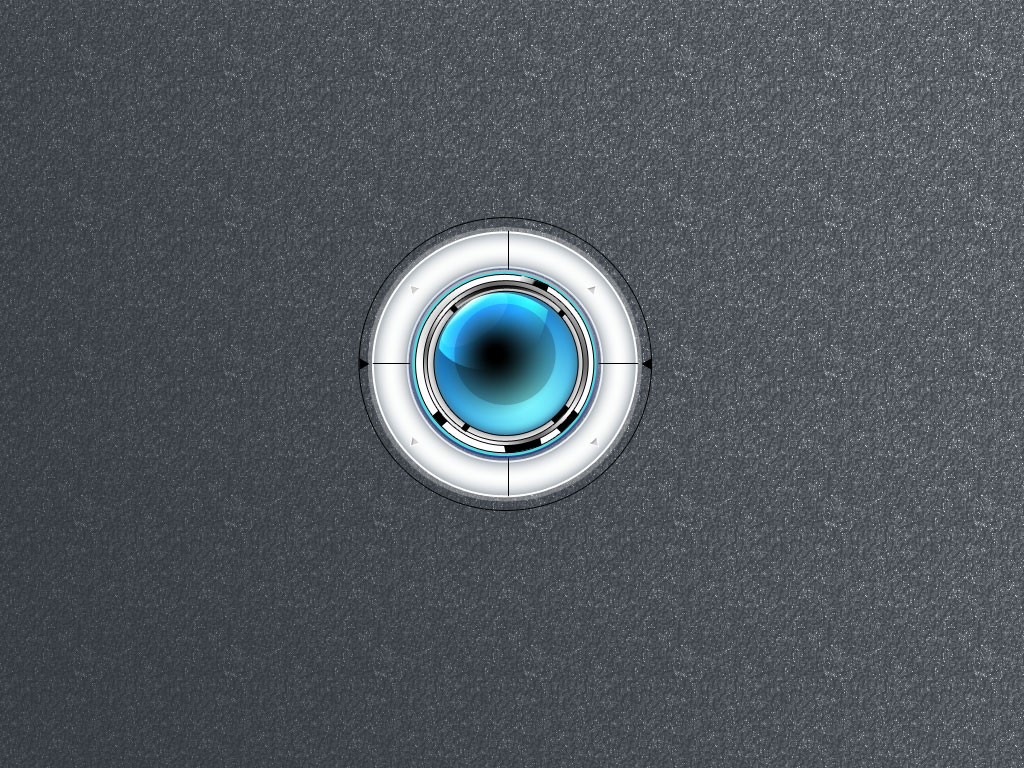
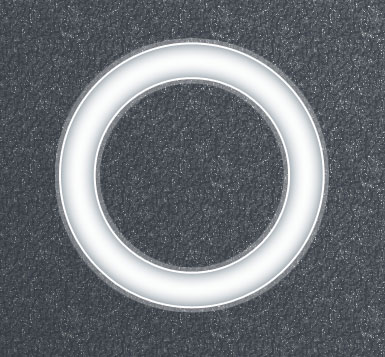
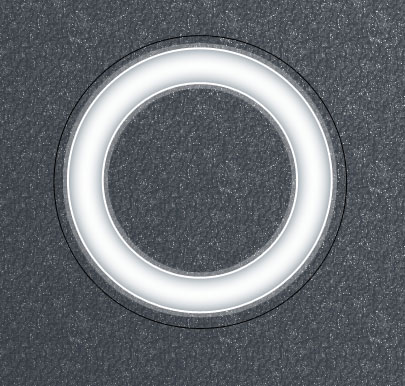
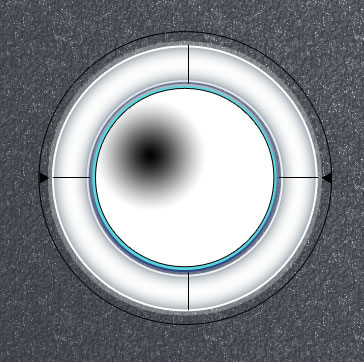
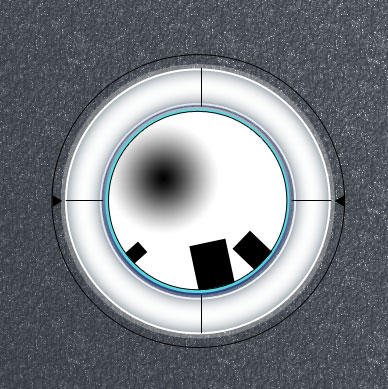
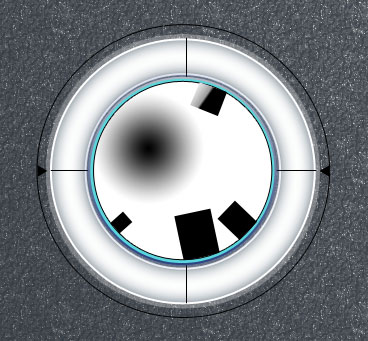
Final Image Preview
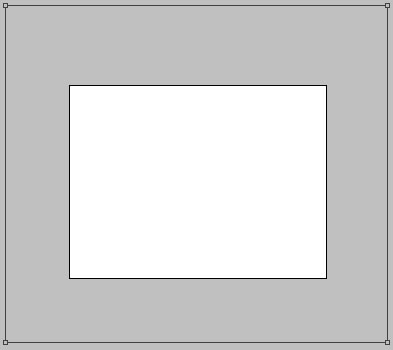
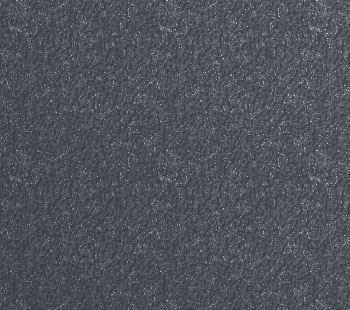
Start by creating a new file (File>New), having 1024×768 and 72 dpi. Select after that the Rectangle Tool (U) to create the background of the picture we want to represent next.
The layer’s parameters:
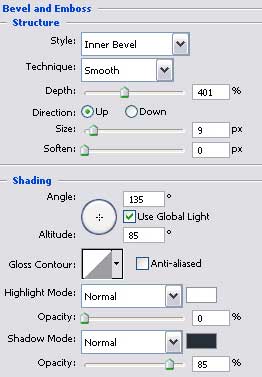
Blending Options>Bevel and Emboss

Blending Options>Bevel and Emboss>Texture
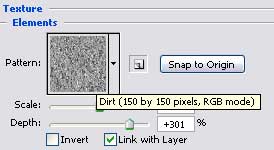
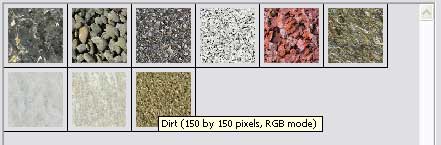
Pick up the texture we need from the Rock Patterns/Dirt.
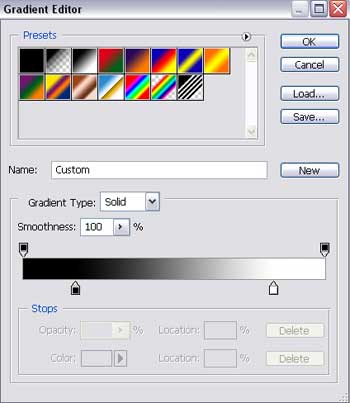
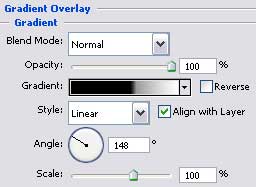
Blending Options>Gradient Overlay
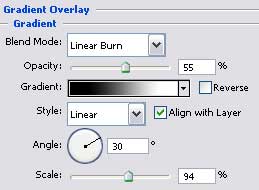
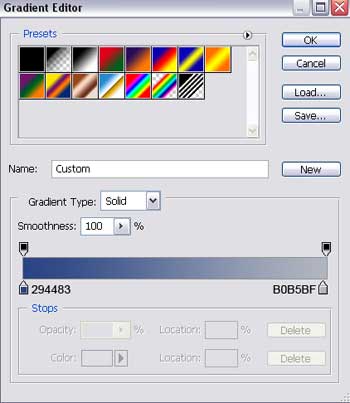
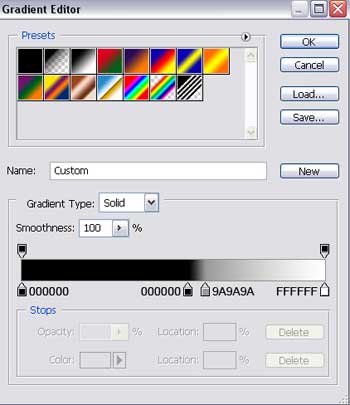
Gradient’s parameters:
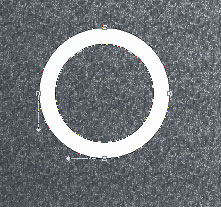
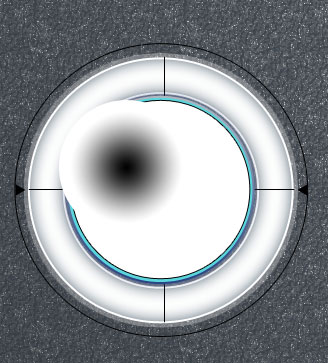
 Try to draw now on the central picture’s part a circle, colored in #FCFDFD. It should be considered the primary layer reserved for the buttons. The operation may be done with the Ellipse Tool (U). Represent firstly the outside edges and then press Alt button to cut out the ring’s middle part, applying the same Ellipse Tool.
The layer’s parameters:
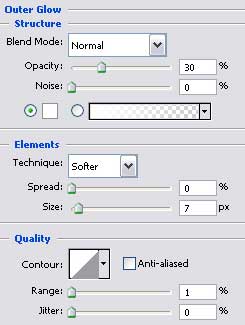
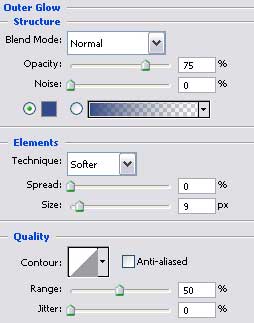
Blending Options>Outer Glow
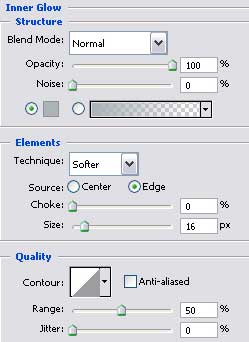
Blending Options>Inner Glow
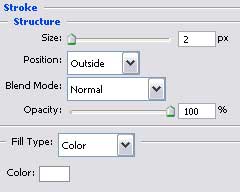
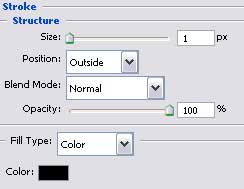
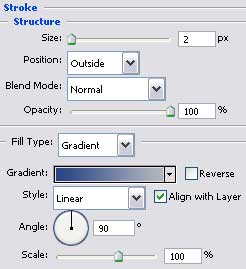
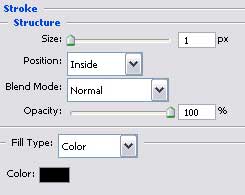
Blending Options>Stroke
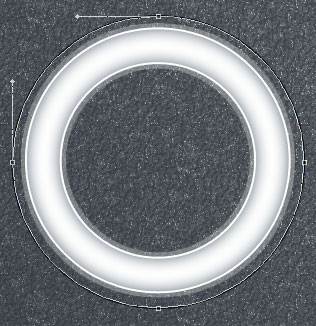
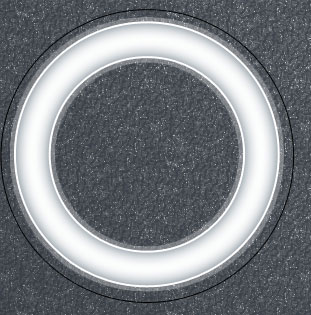
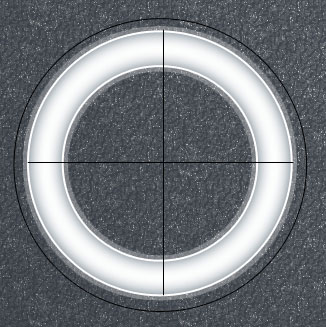
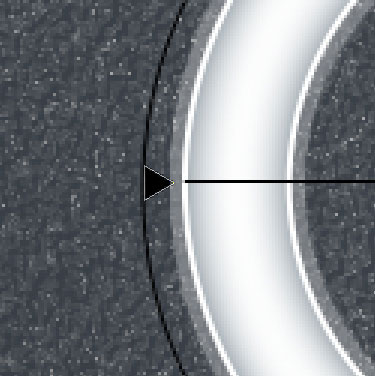
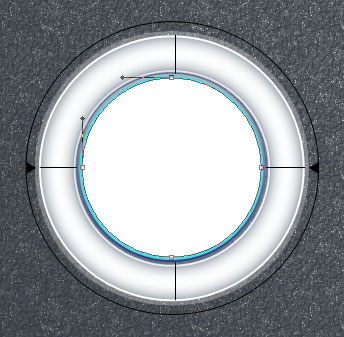
Now we have to represent a very thin circle around the already made one, using the same Ellipse Tool (U).
The layer’s parameters:
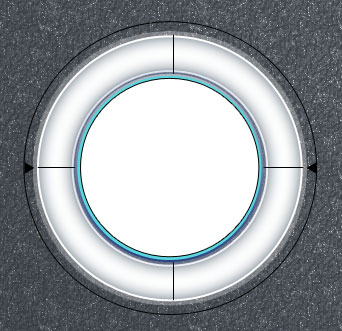
Fill 0% on the layers.
Blending Options>Stroke
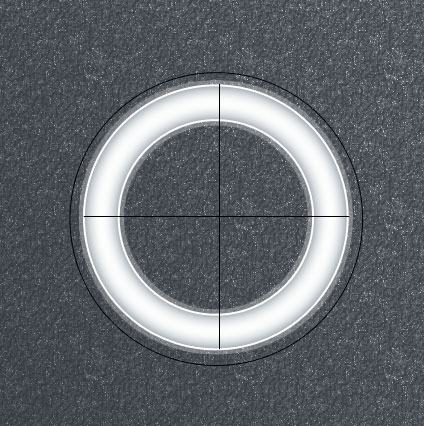
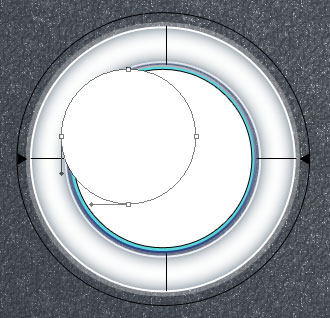
Using the Line Tool (U), represent now two stripes: vertical and horizontal ones, crossing the central ring’s part. The stripes should have black color.
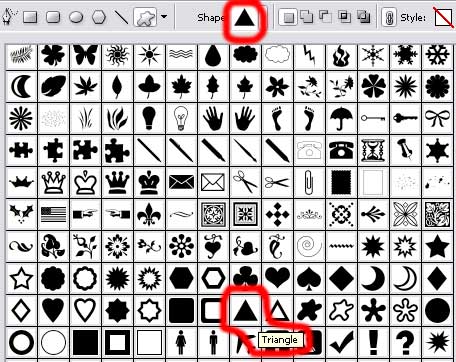
Applying the Custom Shape Tool (U), we may represent now a black triangle.
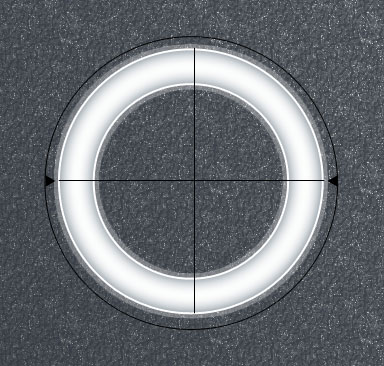
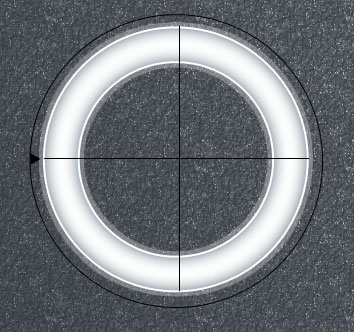 Make a copy of the last made layer and select the Free Transform option to turn the copy over, the way it is demonstrated below.
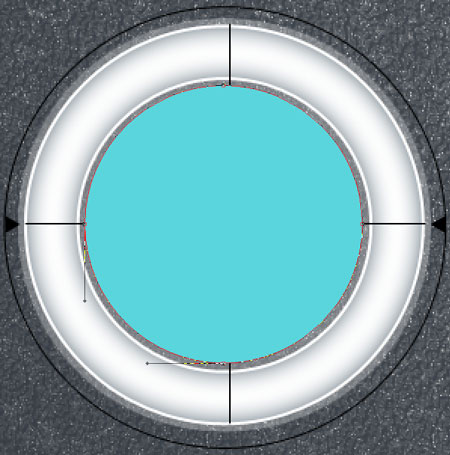
Using the Ellipse Tool (U), try to make the next layer reserved for the buttons, colored in #5AD5DC
The layer’s parameters:
Blending Options>Outer Glow
Blending Options>Stroke
Gradient’s parameters:
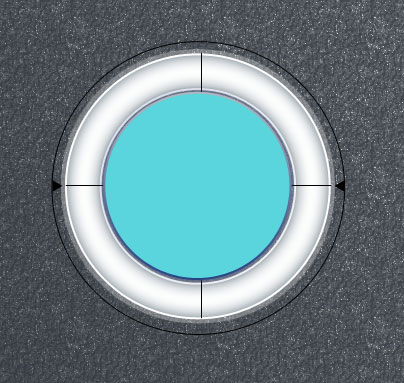
Make one more layer on the surface of the recently made one, selecting the Ellipse Tool (U) of white color.
 The layer’s parameters:
Blending Options>Stroke
Now we have to represent a rounded shadow on the next layer, choosing the previous instrument too.
The layer’s parameters:
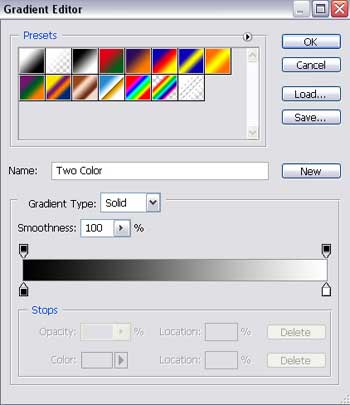
Blending Options>Gradient Overlay
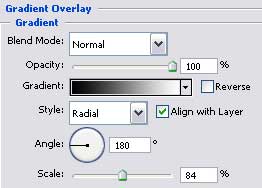
Gradient’s parameters:
Click on the Alt button and make simultaneously a mouse’s click between the shadow’s layer and the previous one for he shadow’s layer to be applied in the limits of the previous layer.
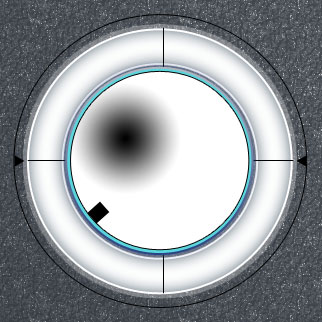
Take the Rectangle Tool (U) and set one black triangle’s side on the inside part of the blue ring (a part of the inside ornament).
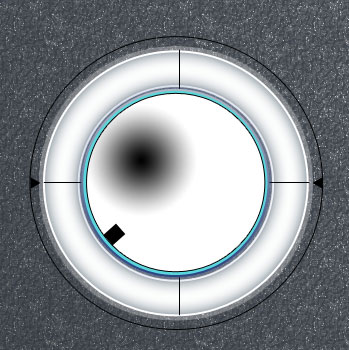
Turn it over and place one side on the inside circumference of the blue ring. The operation can be made with Free Transform option.
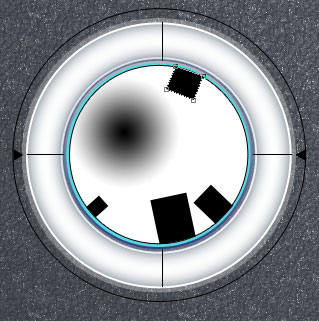
Make three copies of the last made layer and select Free Transform option to enlarge the copies and place them the way it is demonstrated below.
Two copies:
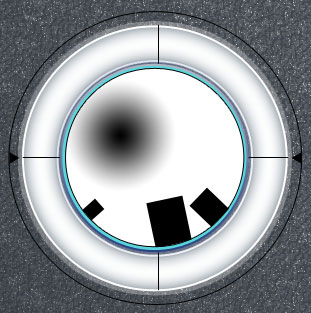
The third copy:
The layer’s parameters:
Blending Options>Gradient Overlay
 Gradient’s parameters:
Page: 1 2
Comments