
Casino Royale Logo
Create an effective logo that can be used for a casino site.
Final Image Preview

Create a new file of 450×470 px and select then the Paint Bucket Tool (G) to paint the background in #0B5F07
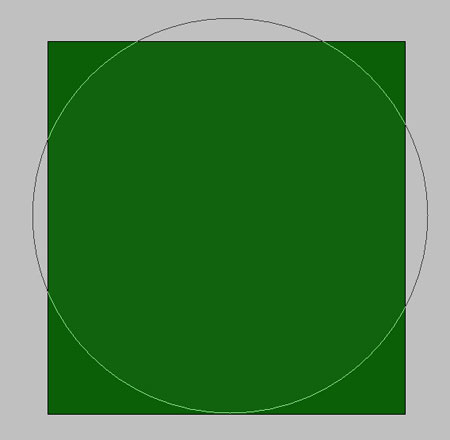
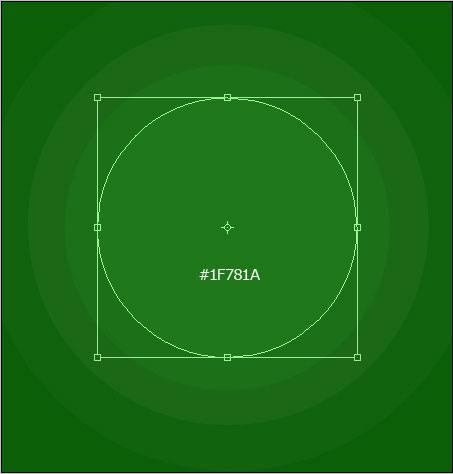
Next step includes selecting the Ellipse Tool (U) and representing a kind of roundness, colored in #11630E. Place them the way it is demonstrated next picture.

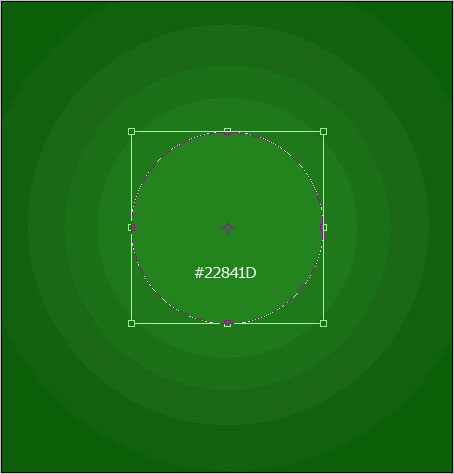
Make a copy of the roundness’ layer, changing its color in #1A6916. Next we’ll apply the Free Transform option to make the copy smaller, the same way you may see below.
We have to make this operation several times more, changing the colors for each case on those indicated below.
Make another copy of the roundness and paint it in black color, minimize it and place it on the central picture’s part, as you may see below.
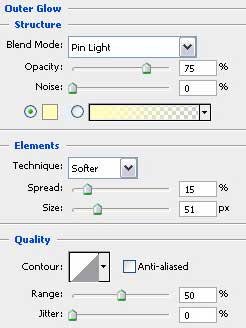
 Next we’ll select next option Blending Options>Outer Glow to set the parameters the way it is shown next table.
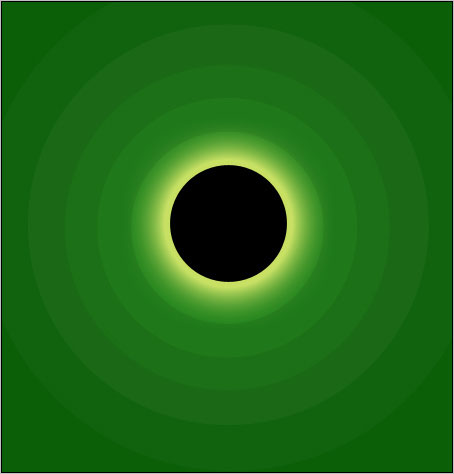
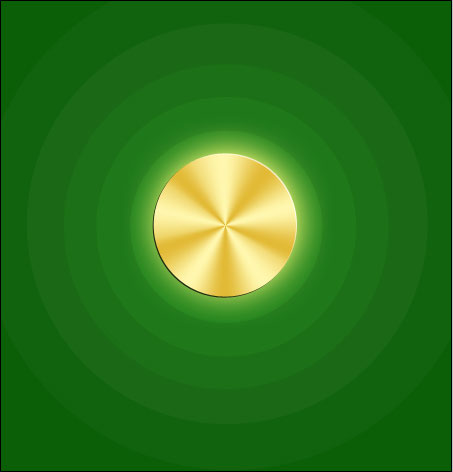
That is what we should get on this stage:
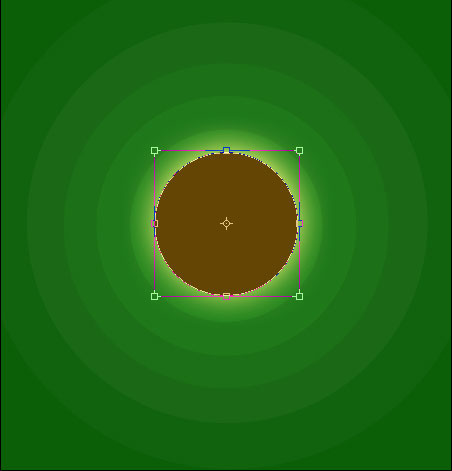
Make a copy of the black roundness, changing this time its color on # 644505. Enlarge the copy and move off the Outer Glow option.
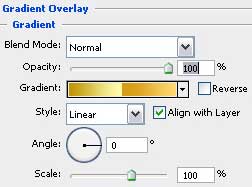
Make one more copy of the previous layer and select again the Blending Options>Gradient Overlay with next adjustments:
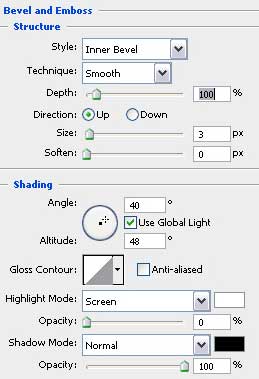
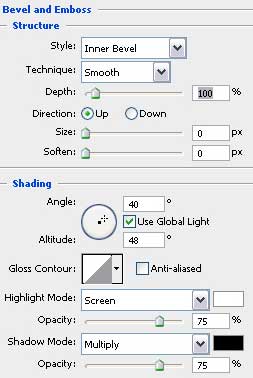
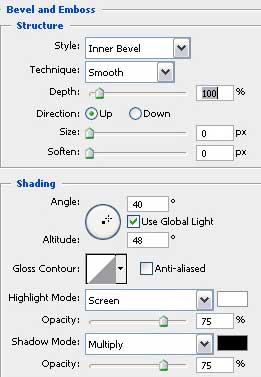
Blending Options>Bevel and Emboss adjustments:
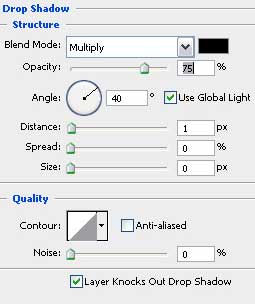
Blending Options>Drop Shadow adjustments:
 That is what we should get:
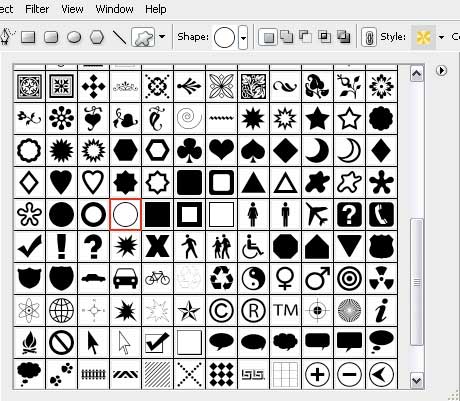
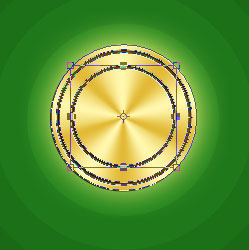
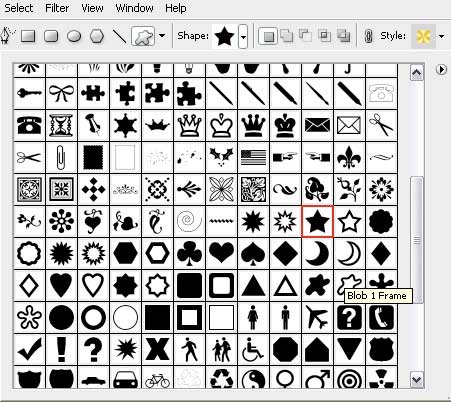
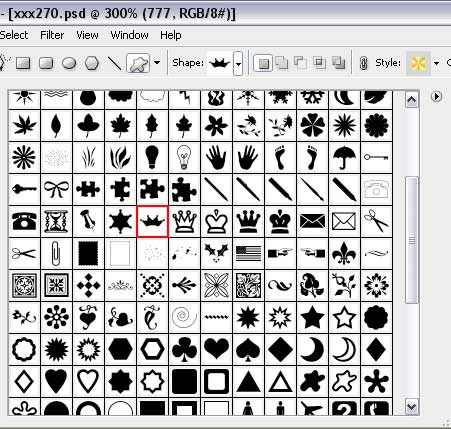
Next we’ll choose the Custom Shape Tool (U) and will select the Circle Thin frame from the next list:
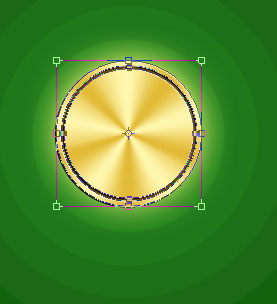
Press on next combination of buttons Alt+Shift and make a circle, like it is shown next picture:

Take next the Direct Selection Tool (A) and mark out the inside points, pressing on Shift button and then choose the Free Transform option to enlarge the radius of inside roundness, as you may see below:
Make a copy of this layer and make the copy smaller:
We have to choose next the Custom Shape Tool (U) that would help us to select form the next table a star shape:
Press on this combination of buttons Alt+Shift and represent small stars between those two circles:
 Try to represent the figure 7, choosing a nice style for it:

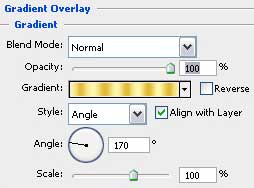
Select Blending Options>Gradient Overlay
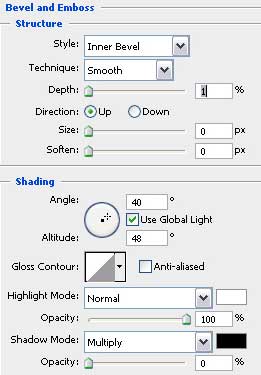
Blending Options>Bevel and Emboss
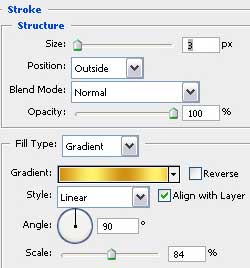
Blending Options>Stroke
We should get such a nice picture like that one from below:
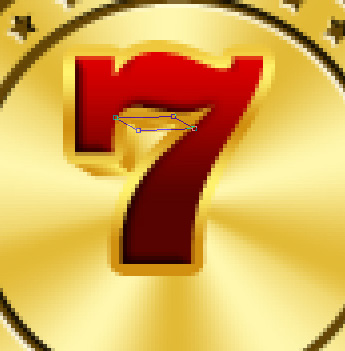
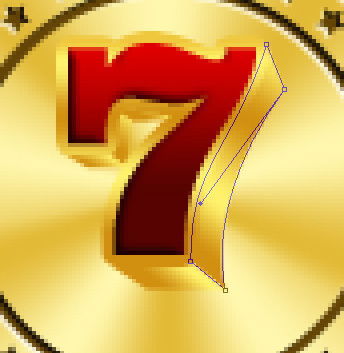
 Take the Pen Tool (P) to give more volume for the figure:

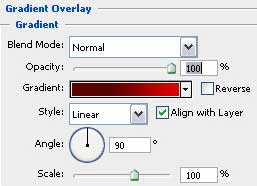
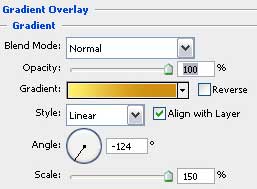
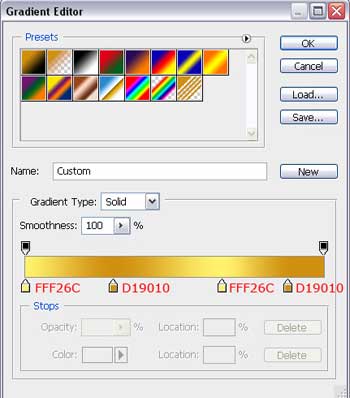
Select next parameters Blending Options>Gradient Overlay:
Represent one more thin stripe, applying the same Blending Options>Gradient Overlay

Continue by representing one more this stripe, setting the previous adjustments for Blending Options>Gradient Overlay:
One more stripe should be drawn on the bottom (having the same parameters):

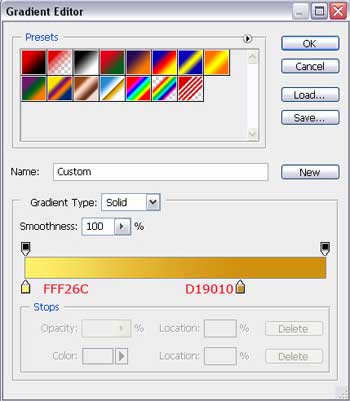
The last one should be represented on the lateral side, but this time the Gradient Overlay will be different this time.
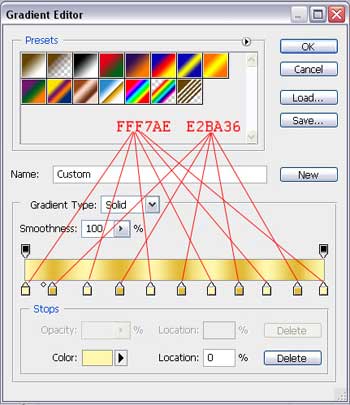
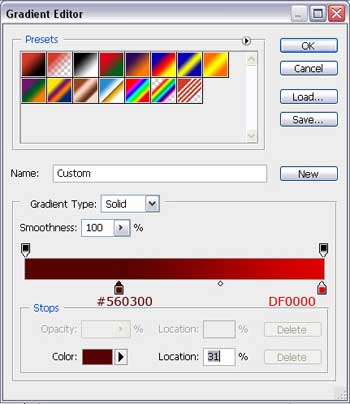
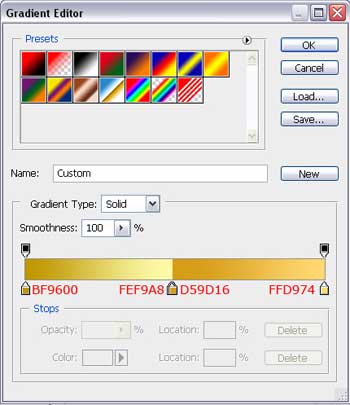
 Select the Gradient editor and set the options, like it is shown next table:
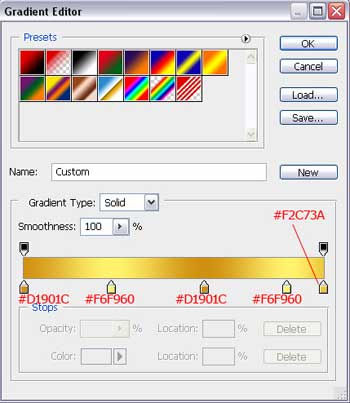
Make two copies of the figure, make the copies smaller, placing them on the lateral side of the big one:

Take the Custom Shape tool (U) and select Crown 1 shape from the next list:
Place the crown on the top, like you may see below:
.jpg)
Apply next the Blending Options>Gradient Overlay with the setting from below:
 Apply next option too: Blending Options>Bevel and Emboss
This is the picture we should get on the final stage:

Let’s make nicer our composition by choosing again the Custom Shape Tool (U) and select the Ornament 5 from the next list:
.jpg)
The shape must be colored in #FFD676 and place them on both crown’s sides:

Set Blending Options>Bevel and Emboss:
The lesson is finished already!
Comments