
Sound System Studio Web Layout
In this tutorial you will learn how to create a nice looking layout.
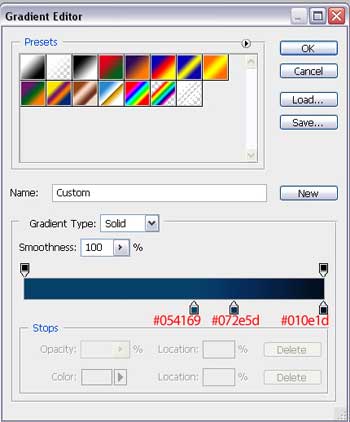
Firstly we need to open a new file (File>New) of 800×800. The first layer will represent the site’s background. After that we need to select the Rectangle Tool (U) and use it on the entire page. Set the here shown parameters of Blending Options> Gradient Overlay>Gradient Editor
We must get the same result as it is demonstrated next picture:

Take now the Rounded Rectangle Tool (U) and represent an element like that one from below, placed in the middle of the picture.


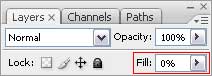
Fill 0% on the right side on the layers’ palette, for our picture to get a transparent gradient.
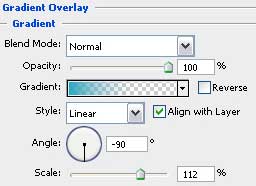
Set next parameters in the Blending Options> Gradient Overlay
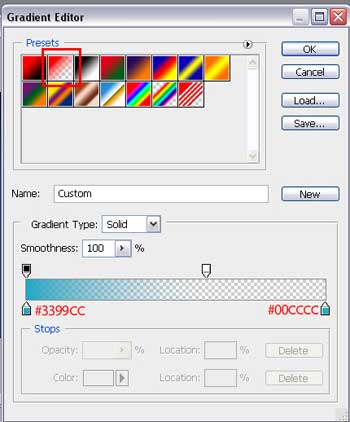
Select Blending Options> Gradient Overlay>Gradient Editor and choose here Presets transparent gradient’s type. Set the same parameters, like those from next table.
We should get that:

Continue by working with the next element. Select for the beginning the Custom Shape Tool (U) where we have to choose the Thin Frame.
Comments