
Thailand Beach Wallpaper
Learn in this tutorial how to design awesome wallpaper.
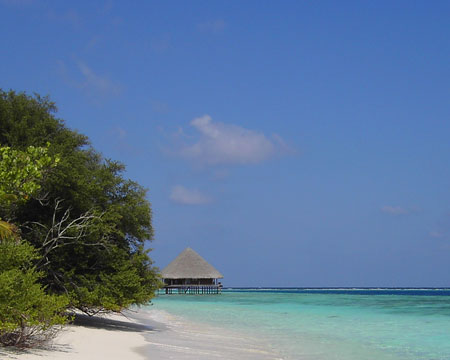
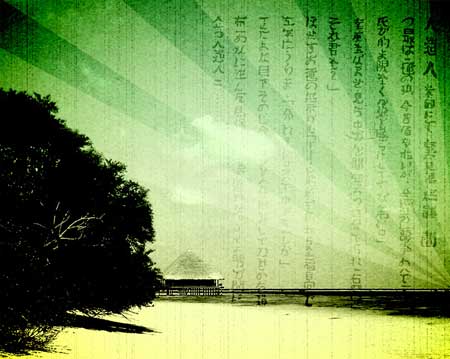
Final Image Preview

The next lesson I’ll tell you how is it possible to represent interesting wallpapers for the desktop. For the beginning we have to create a new file (File>New) with 1280х1024px and 72dpi. Choose next a picture on your own wish, having represented on it the ocean’s littoral or the sea – coast and insert it on the created file already.
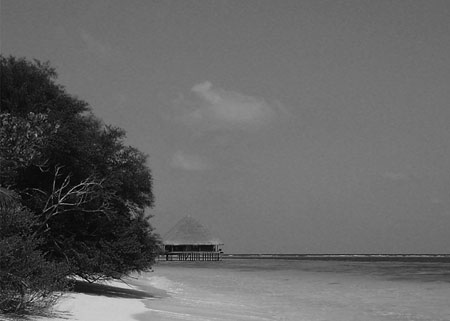
Create a new layer and press the next combination of buttons: Shift+Ctrl+U for the picture to get a black and white nuance.

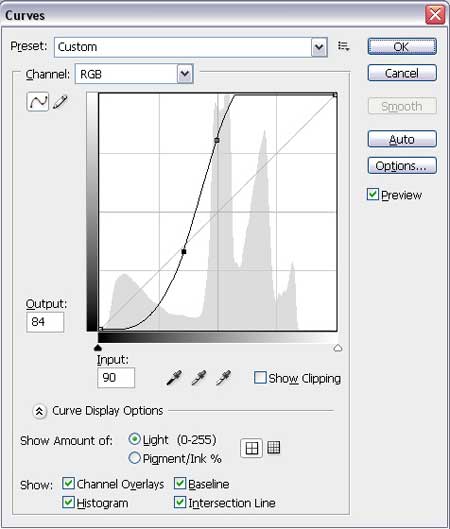
We have to raise the contrast a little, which is why we’ll need the Curves Dialog Box for changing contrast and brightness.
Press on the next buttons’ combination Ctrl+M and set everything the way it is shown next picture:
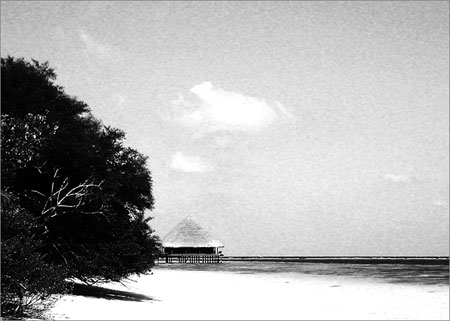
The picture from below is the primary result we should get:
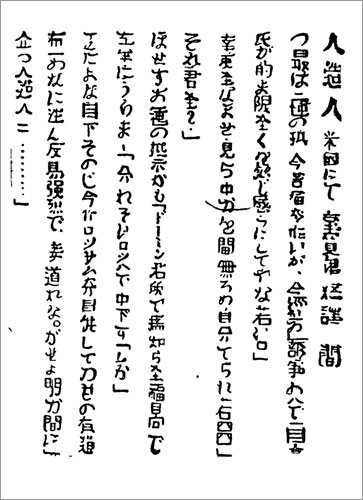
Find in Internet any hieroglyphs you like:
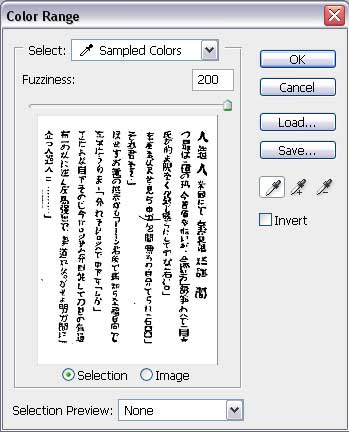
Using the Color Range option, provoked when pressing the right mouse’s button, we may get the picture from below. We’ll get a marking and then press the button’s Delete for the white background to disappear:
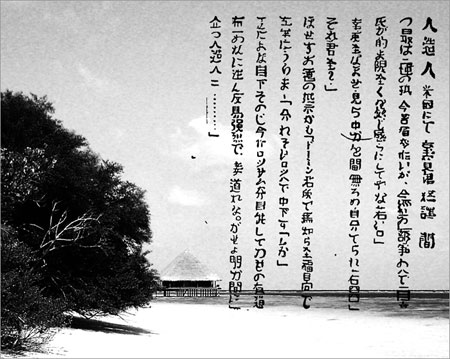
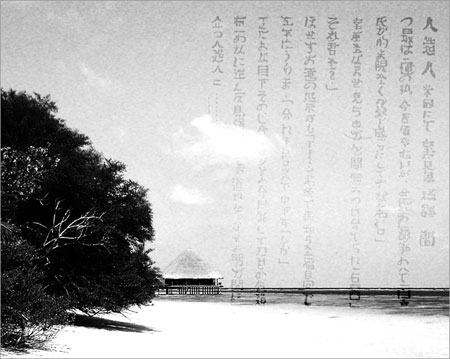
Next the cut out hieroglyphs must be inserted on the picture:
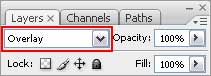
The hieroglyphs’ layer should get the next layer’s parameters:
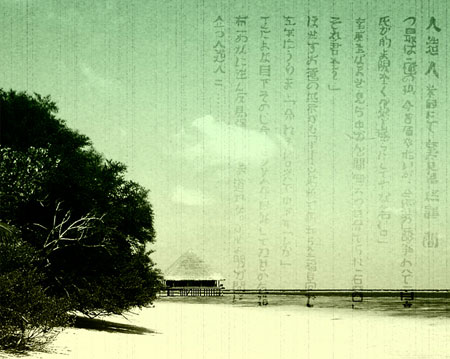
 It’s the next result we should get:
Next step includes creating a new layer and use on it the Gradient Tool (G) to make the layer look, like the next picture indicates it:
Enter the next options Filter>Texture>Grain… to set the parameters, shown below:

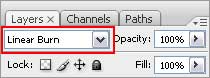
Apply the next parameters for this layer too:
That is what we should get:
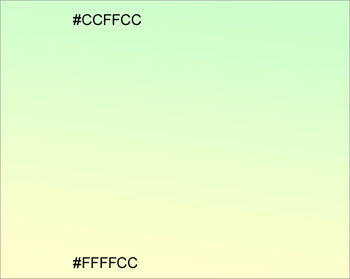
Choose now the Pen Tool (P) and try to represent four rays, having the color #FFFFCC
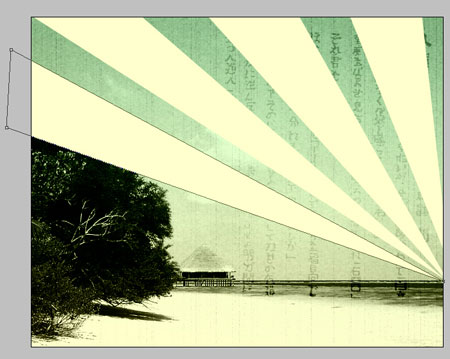
Set the next parameters for this layer:
It’s what we get at this stage:
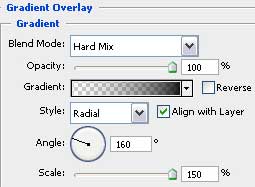
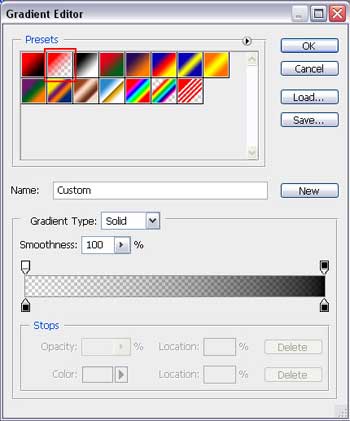
 Select after that the Rectangle Tool (U) and apply it on the whole page. We’ll also set the adjustments in the Blending Options>Gradient Overlay.
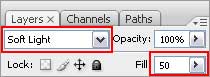
Select the same parameters indicated below for this layer:
The next picture is what we get now:
Select the option shown below from the lowest layers’ palette:

Page: 1 2
Comments