Retro Lighting – Ford Mustang
September 2nd, 2007 by ART-D Posted in Adobe Photoshop, Photo Editing
I love to draw cars. I get inspired by retro magazines and 70′s lifestyle. My works are powerful, stylish and full of bright colours. I love to work with vectors, I think vectors can create amazing images with a clear and modern look.
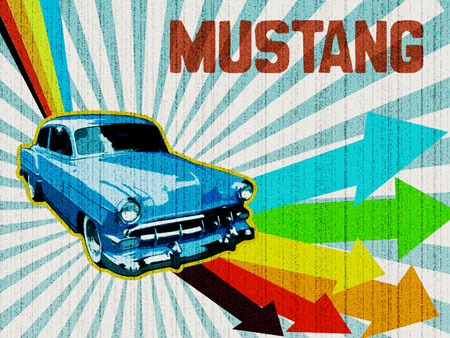
Final Image Preview

Begin by creating a new file (File>New) that would have 1024×768 px and 72 dpi. Apply on this layer the Paint Bucket Tool (G) for coloring it in the next presented color – #FCF5ED

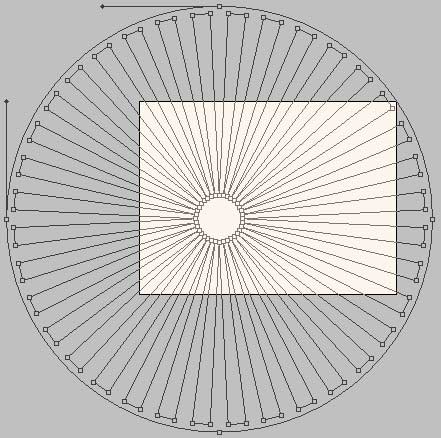
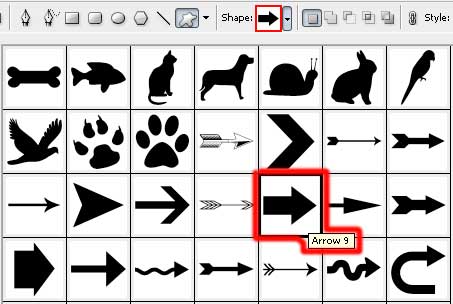
Using the Custom Shape Tool (U), it’s possible to select the next shape as it is demonstrated below.

The shape must be changed a little with the Free Transform selection by stretching it, as it is shown next picture.

We need also to apply for the shape the Blending Options>Gradient Overlay

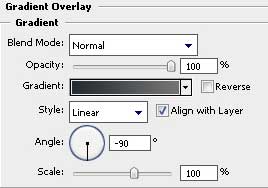
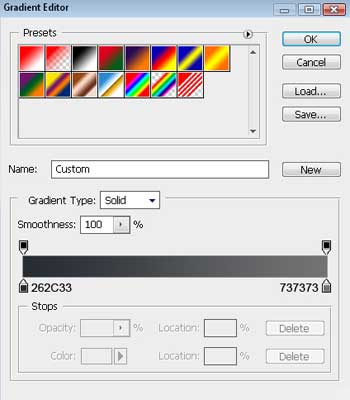
Gradient’s parameters:


The new processed layer should have Opacity of 29%.

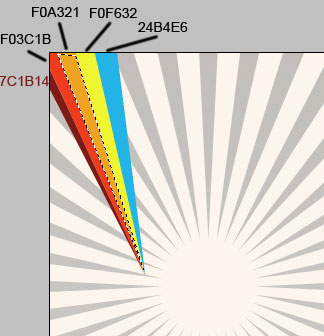
Choosing the Polygonal Lasso Tool (L) now, we need to represent 5 rays, filling each of them with the appropriate color, applying in this case the Paint Bucket Tool (G).

Select again the Custom Shape Tool (U) and represent an arrow, colored with #FF9403, inclining it with the Free Transforme option. Its shape may be corrected with the Convert Point Tool.


robb
11/09/2009
just what i’m looking for.
thx for sharing.
AzizuanAziz
13/09/2009
thanks for the tuts
check out mine
http://bit.ly/TeP6s
Koji@ ebook cover software
20/09/2009
Very nice Post! Really love it your post! thank you very much for your Information
Sasha Gusain
20/10/2009
Hi..
Thanks for that brilliant tutorial. I tweaked it a bit for my blog’s twitter profile: http://www.twitter.com/ilivehealthy
Appreciate it
Cheers!
kim-i
21/10/2009
Thats a great tutorial. very clear.
Worked for me perfectly!! Thank you
Pat
10/12/2009
soooo….you like to draw cars, but you haven’t realized that that’s not even CLOSE to being a Mustang?
student
14/12/2009
Im sorry, but you are really bad at explaining your tutorial. I am new to photoshop, and everywhere i look, they always think that i am a pro at it or something. I like your technique, but you cannot explain it at all, and i am not getting the same results as you are. explain things better please…need i say it again?
Bright-Tutorials
21/12/2009
Great tutorial thanks!
Carolina
07/01/2010
I cant change the shape like you, neather apply the gradient. Please answer me.
Thanks.
coolhotrod
12/01/2010
That’s not a mustang, it’s not even a Ford. Its a 1954 Chevy BelAir.
HaHaHa
23/03/2010
Mustang huh?
LMAO – oye.
kageska
11/05/2010
Yeah! You could at least use a real Mustang!
Yuri
15/10/2010
People, why most of you is concentrating on what car is it. The tutorial is GREAT. Easy to use and understand.
Regarding car – use what you own!
Thank you to the author. Good job!
TheSHadow
11/11/2010
Yeah Awesome tutorial.well done.By the way from where can i get those custom shapes.
one suggestion :from next tutorial just provide the link for the elements used
nicely
26/01/2011
nice…. but hard to represent 5 rays use Polygonal Lasso tool.
somebody pls help…
Thx
Dave
21/02/2011
The overall images looks pretty good here, but not only is that not a Mustang, it’s not even a Ford. That is a ’53 Chevy Coupe.
Gary
06/06/2011
can you tell me why there is only half a tutorial, wheres the rest of it
admin
07/06/2011
@Gary above the Users Comments you have Post Pages for navigation
Kate
08/07/2011
Hi, using CS5 and my photoshop only has ‘Registration Target 1′.. which doesn;t help at all, so I don’t even have the shape needed.. Is there a download I can get so I can have it? Cause I am doing a design course and I LOVE retro, this is an effect I would love to use…
thanks
Kate
09/07/2011
figured it out!!
Mike
24/02/2012
Actually its a 54′ chevy, I have one. 54 ( 5 Teeth grill ) a 53 has ( 3 Teeth grill) but definitely not a Mustang
Nitin
07/03/2012
The shape must be changed a little with the Free Transform selection by stretching it, as it is shown next picture
having problem with this step :/ ,,,,,, plzz anybody help me
Jonnie
09/04/2012
Man, really cool but……unfortunately you need to explain it more for newbies. Few years ago I d be frustrated but thankfully I got some experience so I knew at what you were referring to.
@Nitin you should explain better your problem. I did that step by using the marquee tool, then Ctrl+t (or Apple+T) and stretching it randomly.
Noa
03/01/2013
amazing! thank you!