
Merry Christmas Greeting
In this very detailed tutorial I will show you how I made a Merry Christmas greeting card with Photoshop.
Final Image Preview

Create a new file (File>New), having 600×800 px and 72 dpi.
Using the Rectangle Tool (U), try to make the background of the picture we want to represent next.

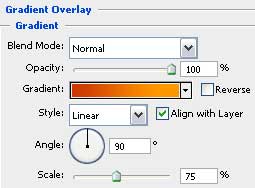
Apply for the made layer the next parameters by making a click on the same layer on the layers’ panel.
Fill 0%
Blending Options>Gradient Overlay
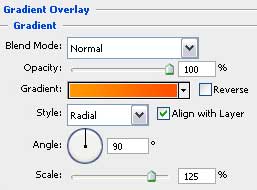

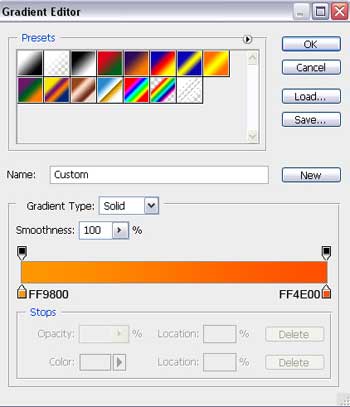
Gradient’s parameters:

Select now the Pen Tool (P) to draw a ray of white color which shape may be corrected with the Convert Point Tool.

Using the same tool and the same method, draw one more ray of white color.
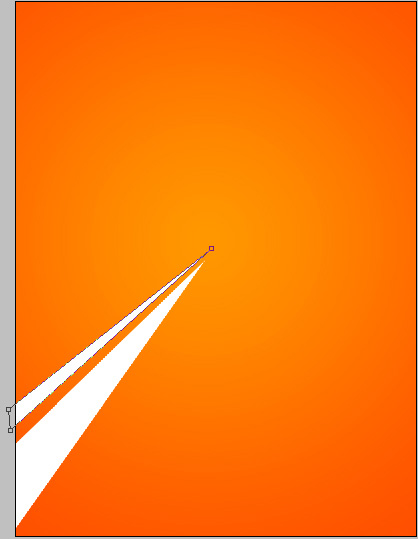
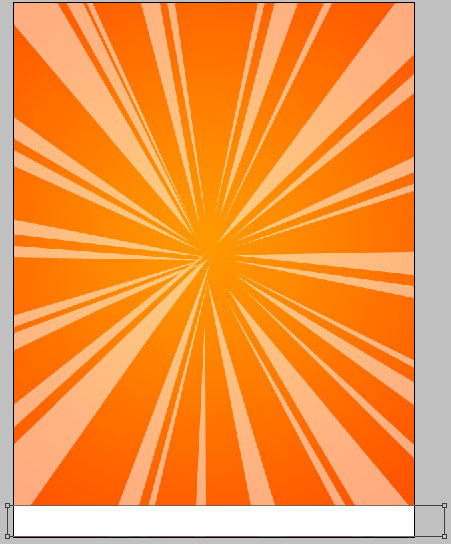
Take the Pen Tool (P) to represent several rays of white color too, as in the picture below:

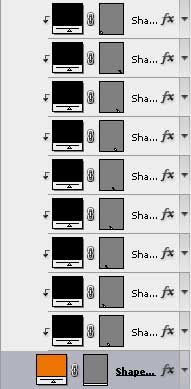
Getting a better result it’s possible when combining in a group all the layers containing the white rays (press Ctrl button to mark out the corresponding layers and hold on left mouse’s button when taking the marked layers on Create a new group selection). Apply for the made group the following parameters: Opacity 50%

Choosing the Rectangle Tool (U), try to make the primary layer of the pattern’s element:
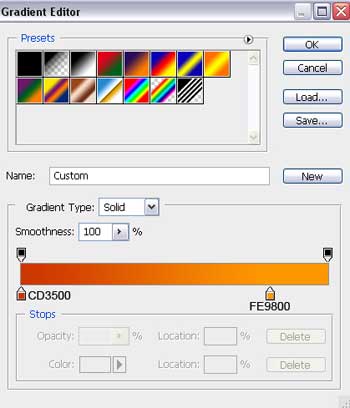
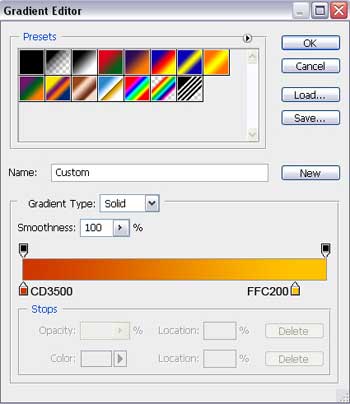
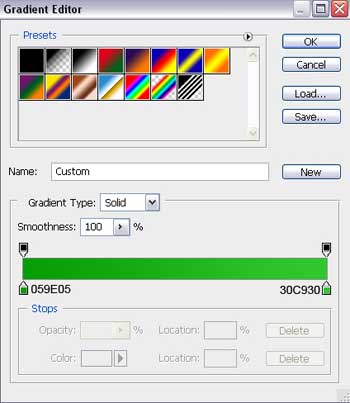
The layer’s parameters: Blending Options>Gradient Overlay
Gradient’s parameters:
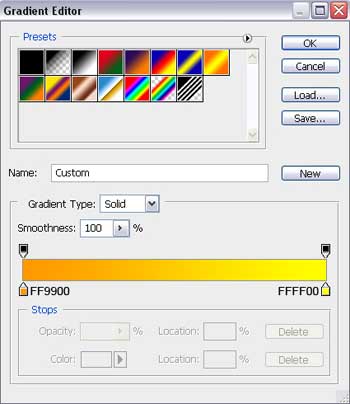
 Make a copy of the last layer, changing on the made layer’s copy the next parameters: Blending mode-Lighter Color
Blending Options>Gradient Overlay
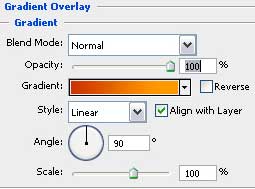

Using the same instrument, draw now an inclined line which shape should be corrected again with the Convert Point Tool.

The layer’s parameters: Blending Options>Gradient Overlay
Gradient’s parameters:
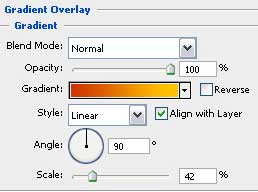
Blending Options>Stroke

Gradient’s parameters:

Make eight copies of the inclined line and choose the Free Transform option to place the copies as it is indicated below:

Hold on Alt button and make a mouse click between the layers that contain the inclined lines and the layer containing the horizontal line (on the layers’ panel). As a result the layers with the inclined layers are applied in the limits of the horizontal line.

Start representing the Christmas tree now. Firstly we’ll take the Pen Tool (P) to represent the tree’s top that may be corrected with the Convert Point Tool.

 The layers’ parameters: Blending Options>Gradient Overlay
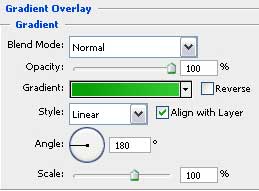
Gradient’s parameters:

Using eth last instrument, try to represent now the next part of the tree, this time of white color. Place this layer lower than the layer containing the tree’s top (on the layers’ panel).

Next we have to draw the next tree’s layer, colored with #036803, a layer that must be placed lower than the previous one (on the layers’ panel).

Apply for the last layer the next parameters: Blending mode-Luminosity


Comments