
We wish you a Merry Christmas illustration
In this tutorial we will learn how to made an illustration for Merry Christmas.
Final Image Preview

Start by creating a new file (File>New) with 1925×1218 and 200 dpi.
Using the Rectangle Tool (U), represent the background of the picture that we ant to get finally.

The layer’s parameters may be set by clicking on the processed layer on the layers’ panel:
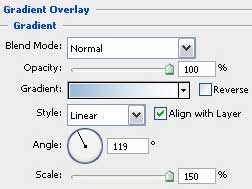
Blending Options>Gradient Overlay
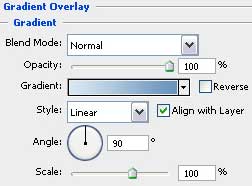

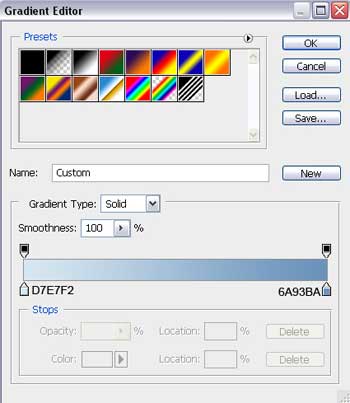
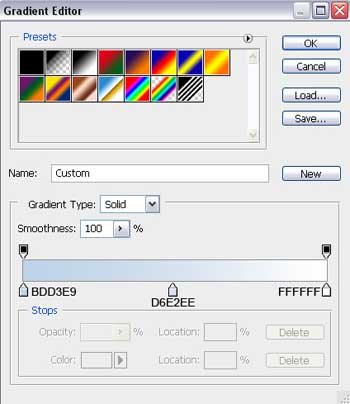
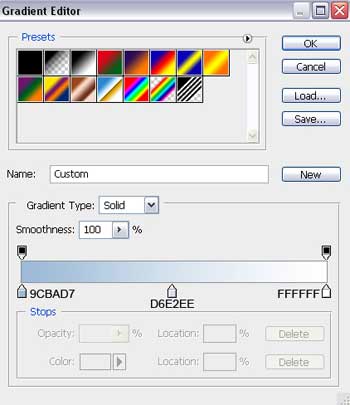
Gradient’s parameters:

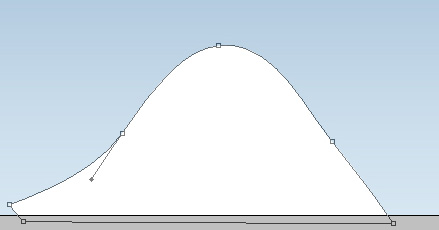
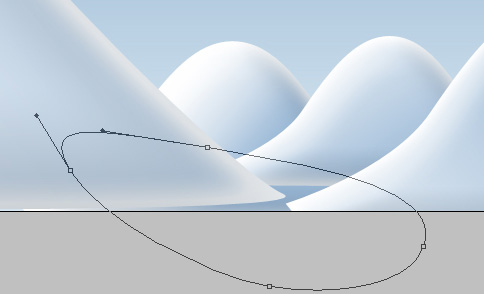
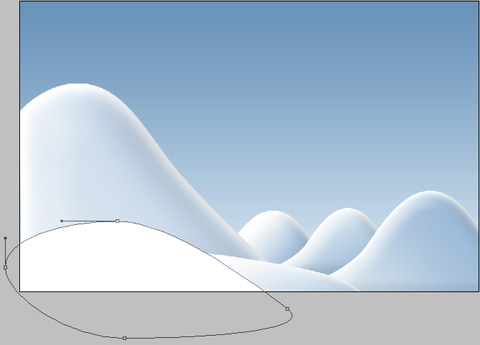
Using the Pen Tool (P), try to represent a snow hillock, which shape is possible to change with the Convert Point Tool.
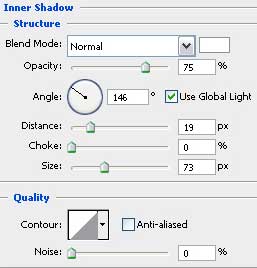
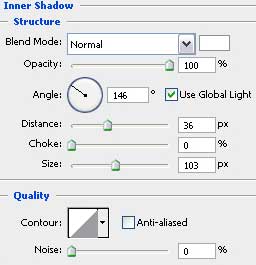
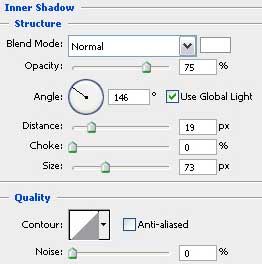
The layer’s parameters: Blending Options>Inner Shadow
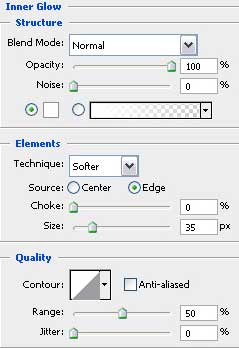
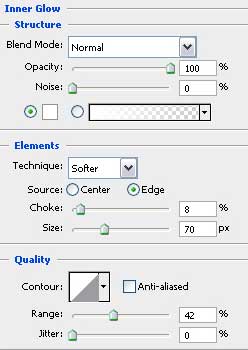
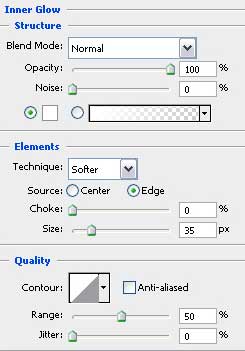
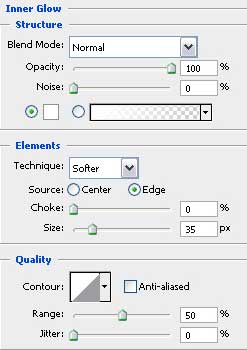
Blending Options>Inner Glow
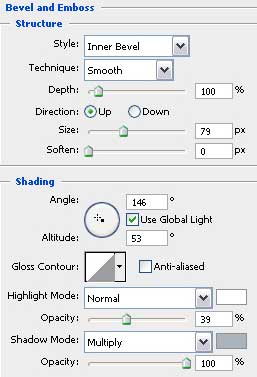
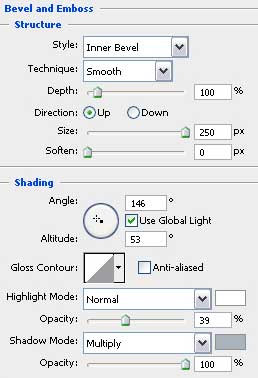
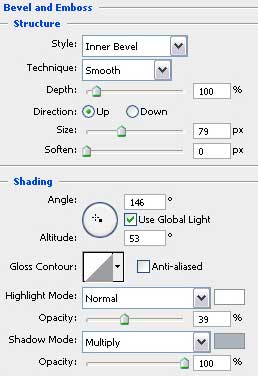
Blending Options>Bevel and Emboss
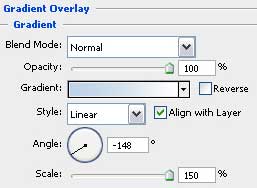
Blending Options>Gradient Overlay
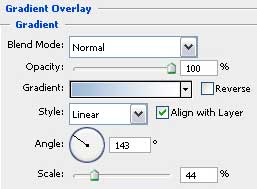
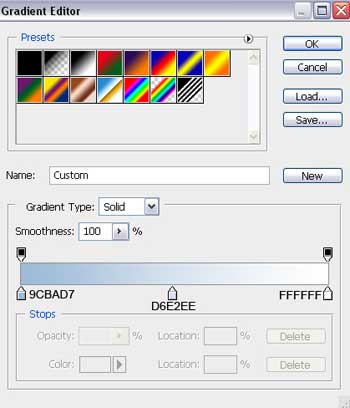
Gradient’s parameters:

Make two copies of the last made layer and choose Free Transform option to make the necessary changes on the copies’ sizes and their placement on the picture:
 Using the same instruments, Pen Tool (P) and Convert Point Tool, try to represent another snow hillock.

The layer’s parameters: Fill 0%
Blending Options>Inner Shadow
Blending Options>Inner Glow
Blending Options>Bevel and Emboss
Blending Options>Gradient Overlay
Gradient’s parameters:

Next we’ll make another snow hillock, applying the already known instruments: Pen Tool (P) and Convert Point Tool, for making the corresponding corrections on the element’s shape.
The layer’s parameters: Fill 0%
Blending Options>Inner Shadow

Blending Options>Inner Glow
Blending Options>Bevel and Emboss
Blending Options>Gradient Overlay
Gradient’s parameters:

Using the earlier described method, try to make the next element, representing also a snow hillock.
The layer’s parameters: Blending Options>Inner Shadow
Blending Options>Inner Glow
Comments