
We wish you a Merry Christmas
Design a cool Christmas wallpaper from scratch. A Well explained & Easy to follow Tutorial!
Final Image Preview

Create a new file (File>New) that would have 600×800 px and 72 dpi.
Take the Rectangle Tool (U) and represent the background of the picture we want to get on the final stage.

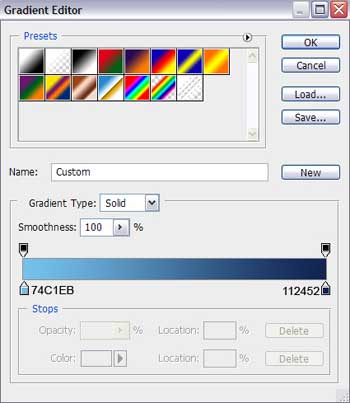
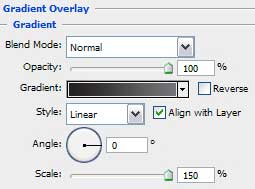
Set the next parameters for the made layer by making a mouse click on this layer on the layers’ panel: Blending Options>Gradient Overlay
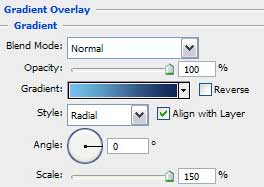

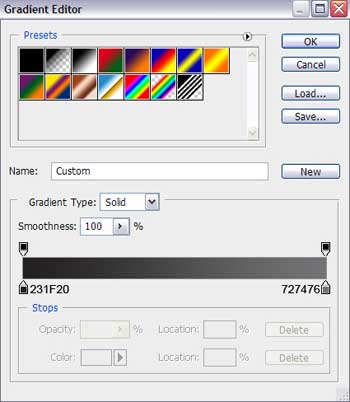
Gradient’s parameters:

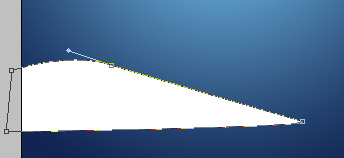
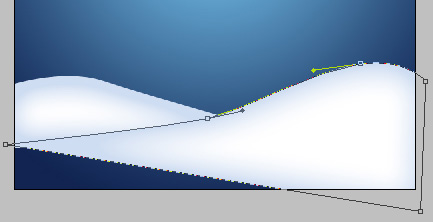
Using the Pen Tool (P), try to make now a snow hillock of white color which shape may be corrected with the Convert Point Tool.
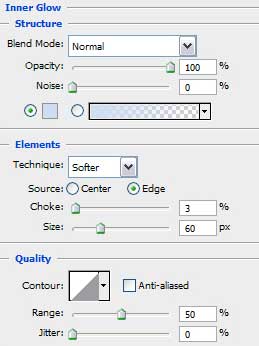
The layer’s parameters: Blending Options>Inner Glow

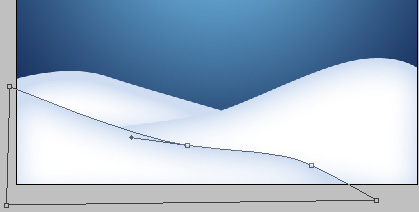
Applying the previous instrument, it’s possible to picture two more snow hillocks, having the same parameters:
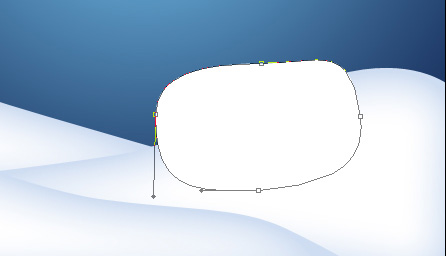
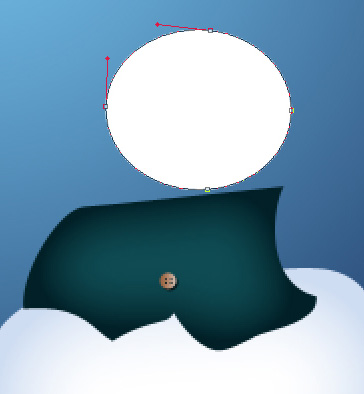
Select the Ellipse Tool (U) for drawing the primary layer of a snowman of white color, which shapes may be corrected with the already known Convert Point Tool.
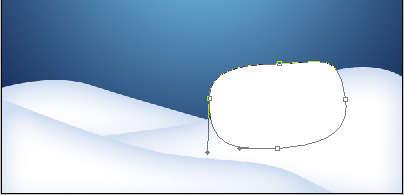
The layer’s parameters are the same with those of the snow hillocks. Blending Options>Inner Glow

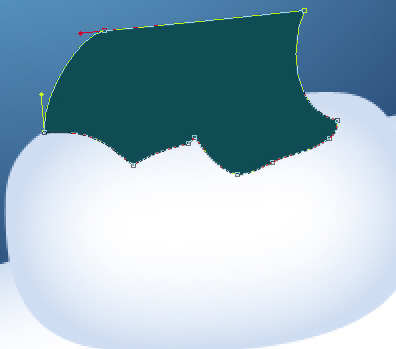
Using the Pen Tool (P) and the Convert Point Tool for appropriate corrections, try to draw now the snowman’s jacket, having the color #0F4C54
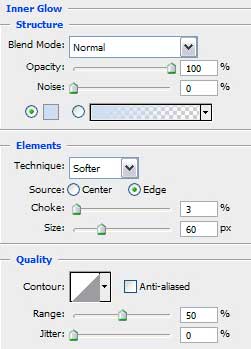
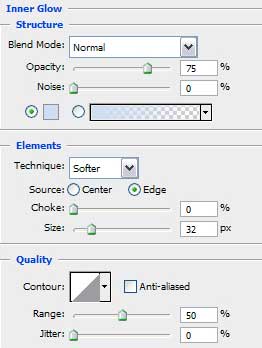
Set the next parameters for the last made layer: Blending Options>Inner Glow


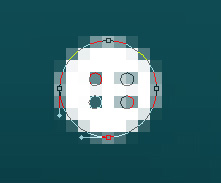
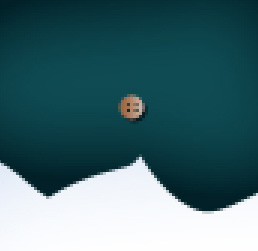
It’s time to insert the button on the drawn jacket, applying the Ellipse Tool (U). Firstly we need to represent the button itself and then, pressing Alt button while using the same instrument, we have to make four cuttings on the button, as it is represented below:

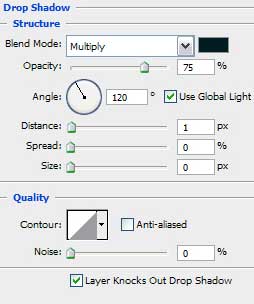
The layer’s parameters: Blending Options>Drop Shadow
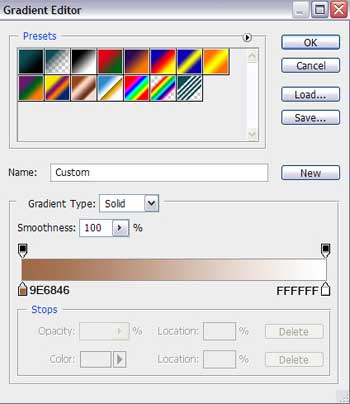
Blending Options>Gradient Overlay

Gradient’s parameters:
Select the Ellipse Tool (U) to represent the snowman’s head of white color too.
The layer’s parameters: Blending Options>Inner Glow
 Using the last applied instrument, on this stage we’ll draw the snowman’s eye:
The layer’s parameters: Fill 0%
Blending Options>Gradient Overlay
Gradient’s parameters:

Comments