
Flower Desktop Wallpaper
This tutorial will show you how to create camomile desktop wallpaper.
Create a new file with 1024×768 px and 72 dpi.
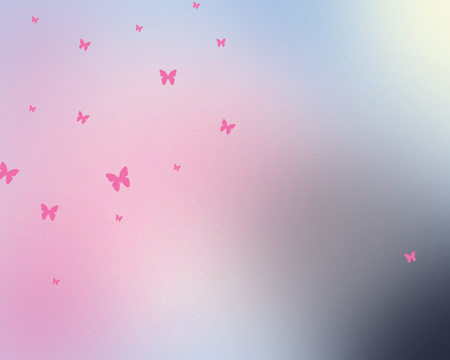
Create a new layer and select the Brush Tool (B) with blurred edges, Opacity of 30% to represent the picture shown below. The color in this case is #A2BFE2

Create another new layer (Create new layer) and use on it the same Brush Tool (B) and the color #F7B3D0

Create new layer once again and select one more time the Brush Tool (B) and the color #FDFCE4. This time we need to light up a little the upper corner of the picture:


On the next layer (Create new layer) we’ll apply the same Brush Tool (B) and the color #292D3D for darkening out the right lowest corner:

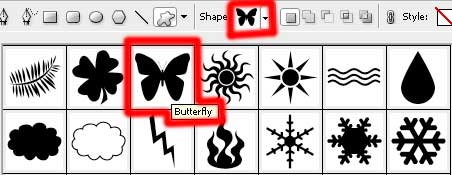
On the next layer we’ll apply the Custom Shape Tool (U) and the color #F06EAA to represent several butterflies of different sizes (keeping pressed the SHIFT button).
Find in Internet a picture representing the sky with the clouds:

Insert it on our basic picture, applying the next parameters for the layer: Blending mode-Hard Light

Find in Internet a picture having flowers on it:

Cut them out and insert the elements on the picture. Select Free Transform option to turn over the layer the way presented below:

Apply the next parameters on the layer: Blending mode-Linear Burn

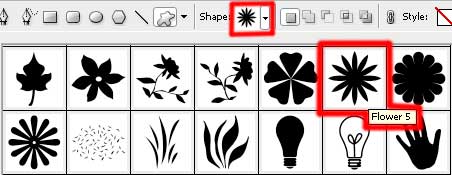
Next we’ll select the Custom Shape Tool (U) and the color #89D5ED. We need the instrument to represent several small flowers of different sizes (keeping pressed the SHIFT button).
Comments