
Futuristic Beetle
Create this polished finished product of a Futuristic Beetle.
Start working by creating a new file (File>New), having 1024×768 px and 72 dpi.
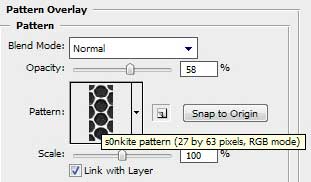
Find in Internet and download the next pattern – s0nkite Spiderman pattern.
Save it in the directory: Adobe Photoshop>Presets>Patterns.
Use the Rectangle Tool (U) to draw the background of the picture we want to have in the end.
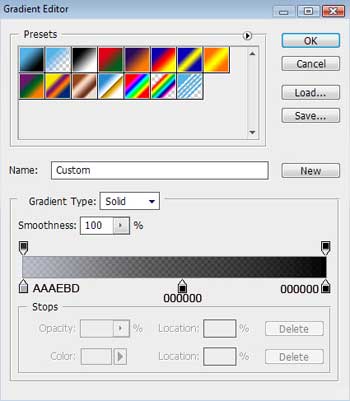
Apply on the made layer the parameters indicated below by making a mouse click on the processed layer on the layers’ panel. Blending Options>Gradient Overlay 
Gradient’s parameters:

Blending Options>Pattern Overlay

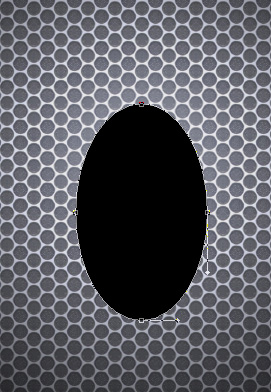
Select the Ellipse Tool (U) to represent the abdomen of a metallic beetle, having black color.
The layer’s parameters: Blending Options>Drop Shadow

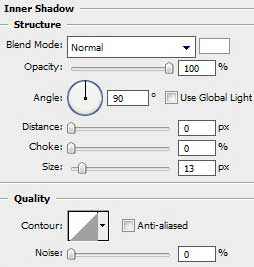
Blending Options>Inner Shadow
Blending Options>Bevel and Emboss 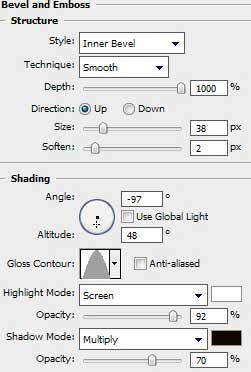
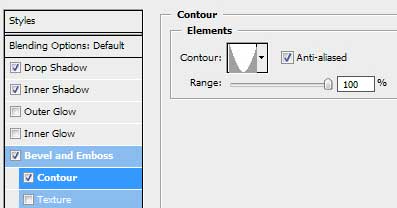
Blending Options>Bevel and Emboss (Contour)
Comments