
Fresh desktop wallpaper
In this tutorial you will learn how to create a desktop wallpaper.
Begin by creating a new file (File>New), that would have 1024×768 px and 72 dpi.
Next we have to select the Rectangle Tool (U) and draw the background of the picture finally to be.
Choose the next demonstrated parameters for the already made layer by making a mouse click on the layer we work with on the layers’ panel. Blending Options>Gradient Overlay
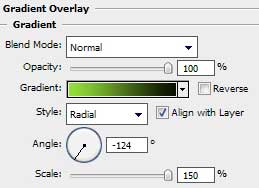

Gradient’s parameters:


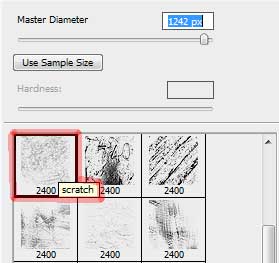
Download out of Internet a set of ready to use brushes for Adobe Photoshop, named rons__scratches (large)
Next we shall create a new layer and apply the Brush Tool (B) out of the above mentioned set of brushes.
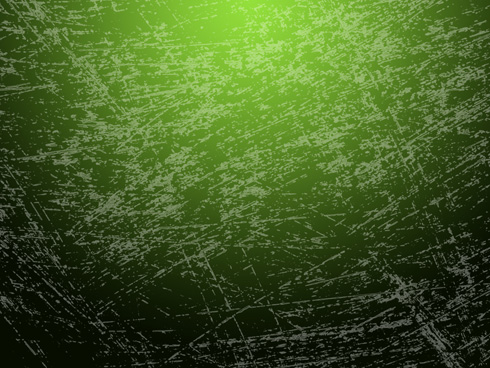
The layer’s parameters: Fill 37%
Blending mode-Vivid Light

On the next new layer we shall use the brush from the same set (rons__scratches (large)). The brush’s color this time is white.
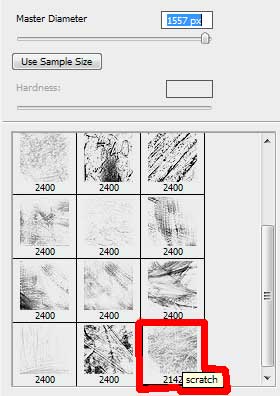

The layer’s parameters: Fill 7%
Blending mode-Lighter Color

Now we shall create a new layer again and apply on it Filter>Render>Clouds
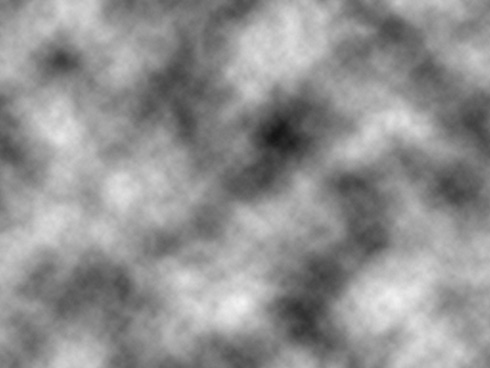
We need to apply the next option on the same layer: Filter>Stylize>Find Edges 
Page: 1 2
Comments