
Poker Gaming Club
See how you can create your very own card-based poker wallpaper or logo from scratch.
Create a new file (File>New), having 1024×768 px and 72 dpi.
Using the Rectangle Tool (U), make the background of the picture we want to have.

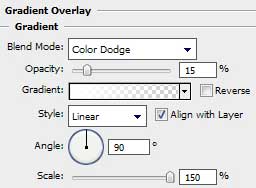
Use the next demonstrated parameters on the made layer by making a mouse click on the layer we work with on the layers’ palette. Blending Options>Gradient Overlay


Gradient’s parameters:


Create a new file (File>New) of 2×1 px and select the Pencil Tool (B) (brush 1 px) of black color to make a kind of pattern, like the next one:

Edit>Define Pattern
Use again the Rectangle Tool (U) and continue representing the background of the picture.

The layer’s parameters: Fill 0%
Blending Options>Pattern Overlay 

Using the same Rectangle Tool (U), it’s time to illuminate the central part of the picture.

The layer’s parameters: Fill 0%
Blending Options>Gradient Overlay
Comments