
Stylish web navigation template
This tutorial will teach you how to create a beautiful dark menu that actually looks different from the usual normal web 2.0 styles displayed across the web while keeping a minimalistic, clean feel.
Begin by representing a new file of 800×600 px and 72 dpi. Select then the Paint Bucket Tool (G) to fill the new file with black color.

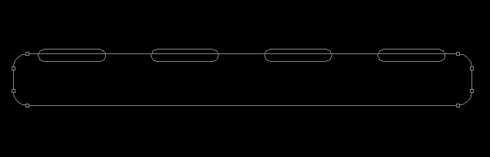
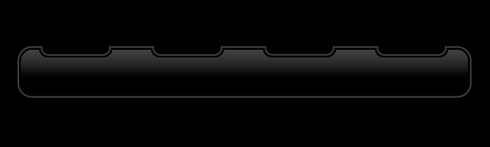
Next we shall choose the Rounded Rectangle Tool (U) with a radius of 20 px to draw the menu’s panel and then press Alt button while using again the same tool, but this time with a radius of 10 px to cut out 4 openings the same way demonstrated next picture:
Select the next parameters by making a mouse click on the processed layer on the layers’ panel. The layer’s parameters: Fill 0%
Blending Options>Inner Glow 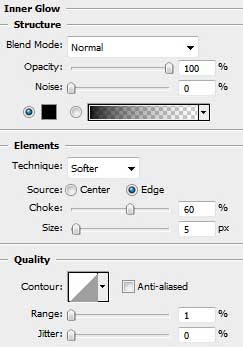

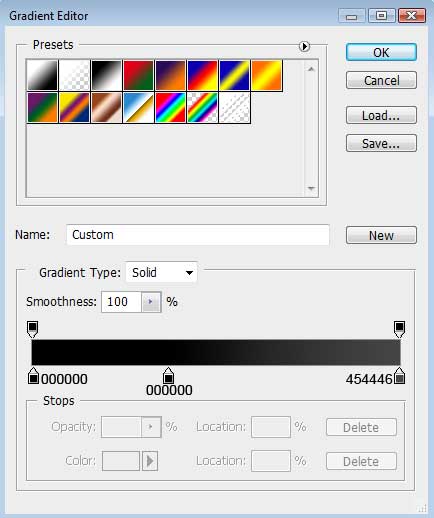
Blending Options>Gradient Overlay
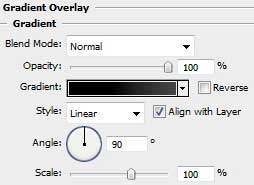
Gradient’s parameters:
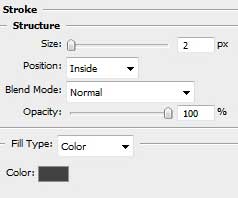
Blending Options>Stroke
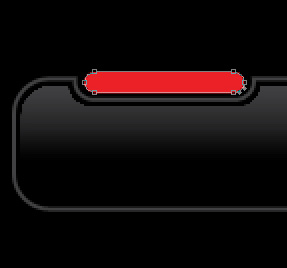
Using the earlier applied Rounded Rectangle Tool (U) (radius of 10 px), it’s possible to represent the indicator of switching on menu’s button. The layer’s color is #EB2127
Make three copies of the indicator’s layer, changing the color of the copied layers on #58595B.
Select Free Transform option to place the copies the same way shown below:

Using the Rounded Rectangle Tool (G) (radius of 15 px), try to draw a highlight on the indicator representing the switching on button.

The layer’s parameters: Fill 0%
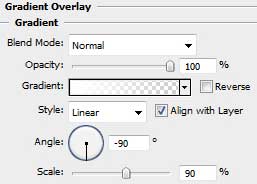
Blending Options>Gradient Overlay
Page: 1 2
Comments