
Sound system design
In this tutorial we will learn how to create a cool music design. We will use vector shapes and layer styles use vector shapes and layer styles.
Create a new file (File>New), having 1280×1024 px and 72 dpi.
Applying the Rectangle Tool (U), try to make the background of the picture to be.
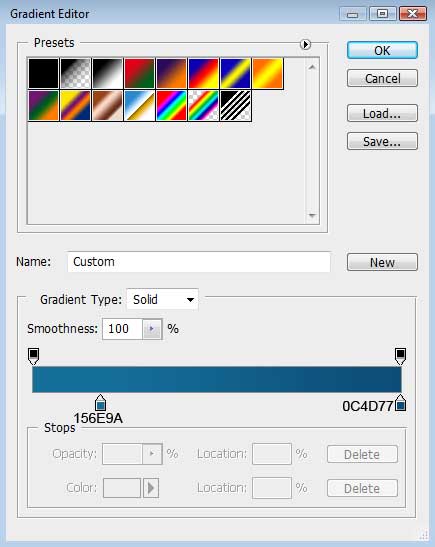
Set the next demonstrated parameters by making a mouse click on the layer we work with on the layers’ palette. Blending Options>Gradient Overlay
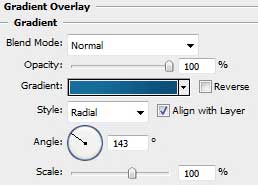

Gradient’s parameters:

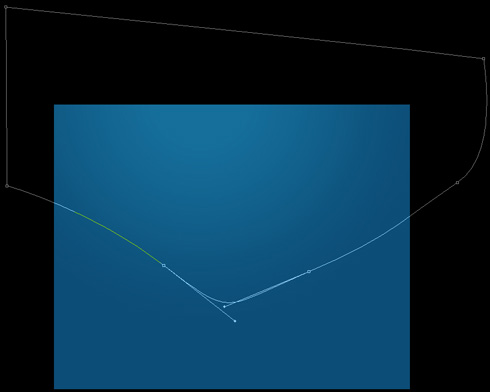
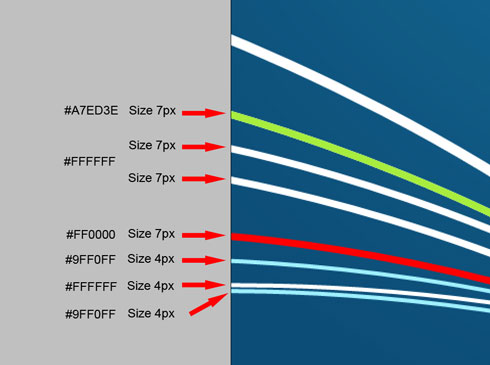
Let’s represent a ribbon. In this case we need to select the Pen Tool (P) and the Convert Point Tool for making the appropriate corrections on the element’s shape.
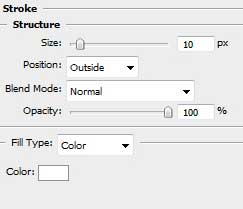
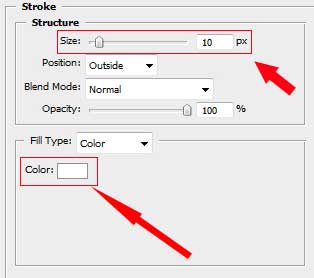
The layer’s parameters: Blending Options>Stroke

Next we shall make eight copies of the last made layer and select the Free Transform option to turn over the copies, changing also the parameter Blending Options>Stroke for the copies.

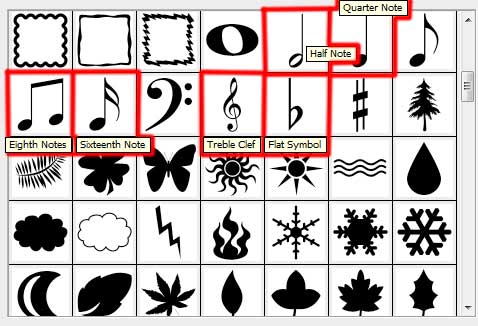
Using the Custom Shape Tool (U), let’s represent the musical symbols on the picture. Their sizes and inclining angle may be changed with Free Transform selection.
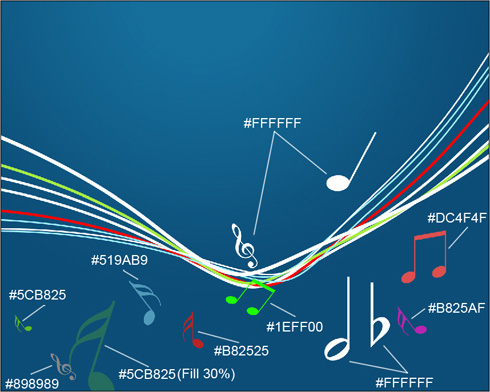
Select the same tool to insert several more circles.
Comments