
RSS button
In this lesson I’ll teach you how to represent a RSS button.
Firstly we need to create a new file (File>New) of 512×512 px and 72 dpi. Place there a rectangle that may be made with the Rounded Rectangle Tool (U) (radius of 25px)

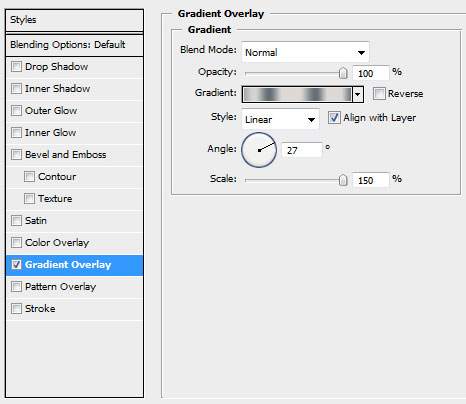
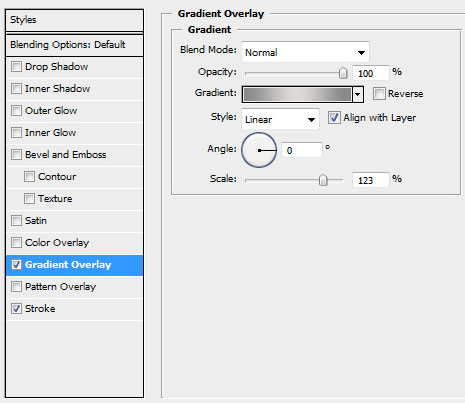
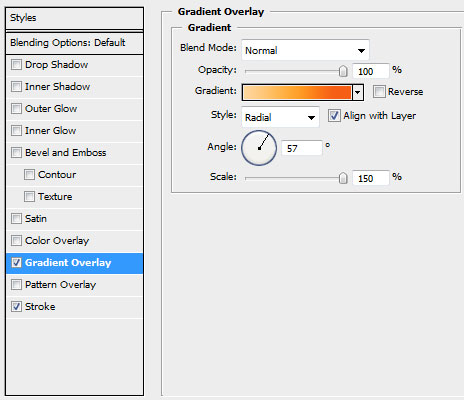
The rectangle should have the next indicated Blending Options>Gradient Overlay parameters by making a mouse click on this layer on the layers’ panel.
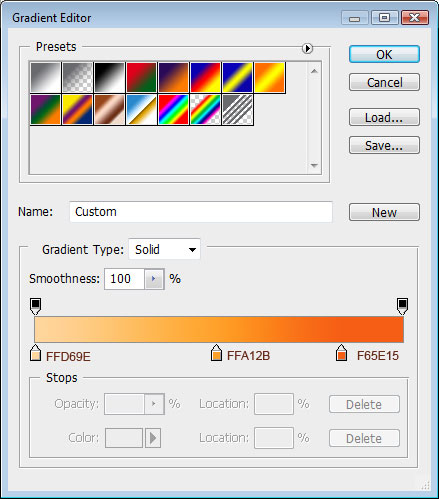
Gradient Editor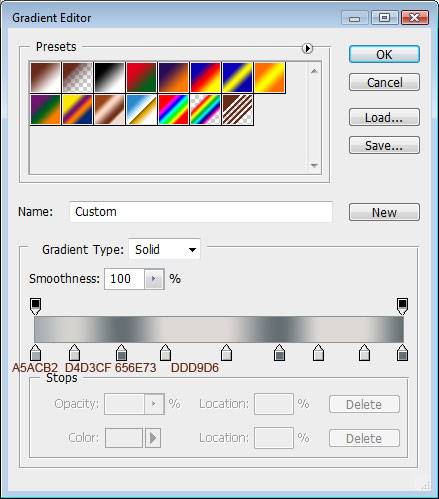

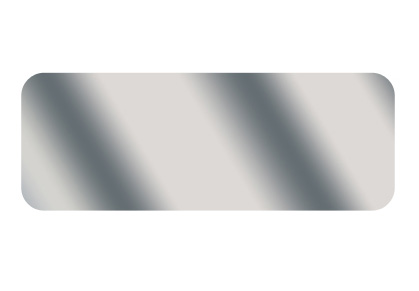
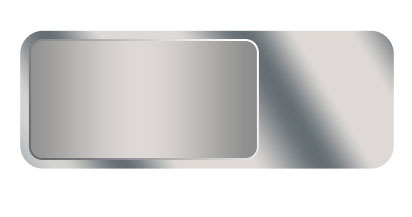
You’ll get the next picture:
Then we have to make another rectangle that will be placed the same way as below:
Set next demonstrated Blending Options>Color Overlay.
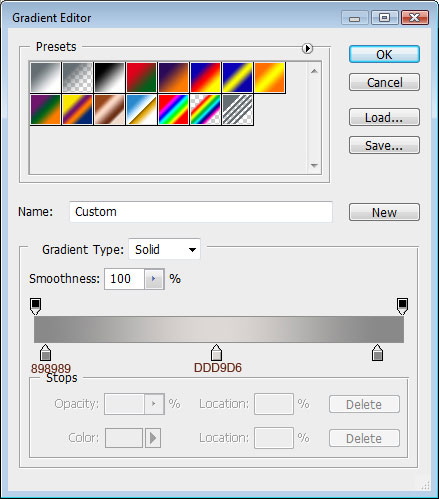
Gradient Editor
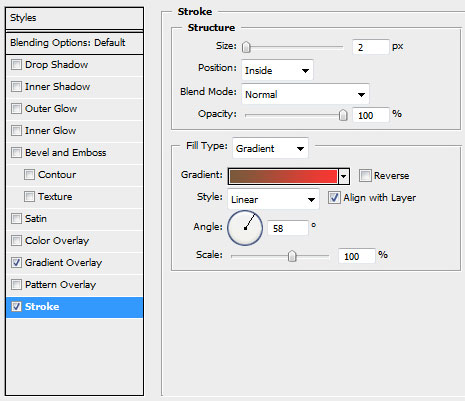
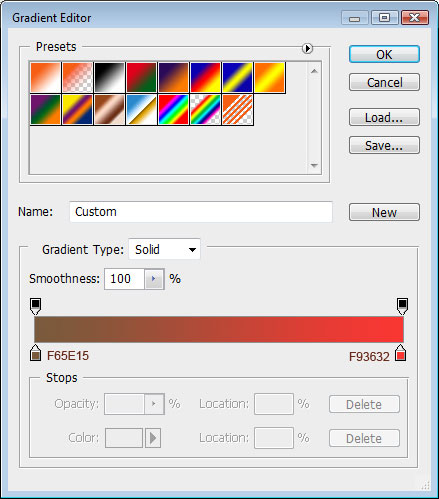
Blending Options>Stroke 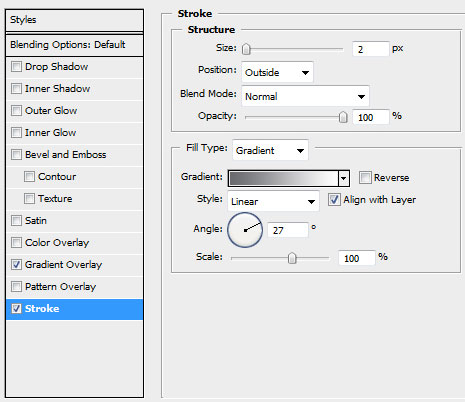
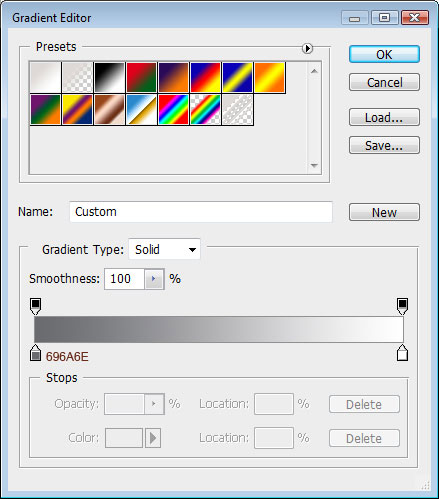
Gradient Editor
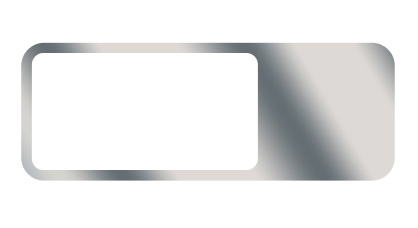
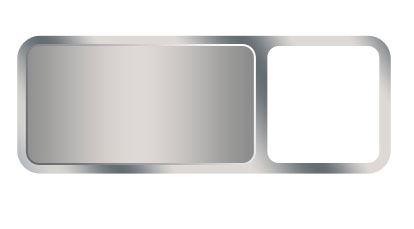
We’ll get the next picture:
Now we have to represent one more rectangle near the previous made one.
Do the same operation we did with the previous rectangles: Blending Options>Gradient Overlay
Gradient
Blending Options>Stroke
Gradient
Page: 1 2
Comments