
Halloween Pumpkin Icon
This tutorial will show you how to draw a pumpkin, with a scary cut out face for Halloween.
For the beginning we need to represent a new file (File>New) of 512×512 px and 72 dpi. Next try to give the new file with the next demonstrated color, using the Paint Bucket Tool (G).

Using the Ellipse Tool (U), try to make a circle as the next picture indicates it.

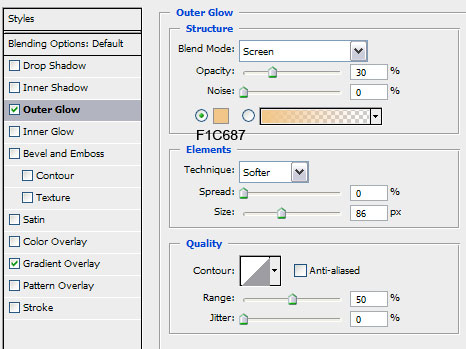
Find after that Blending Options>Outer Glow by making a mouse click on this layer on the layers’ panel. Set the next shown parameters:

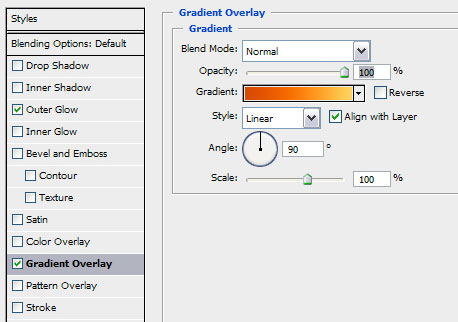
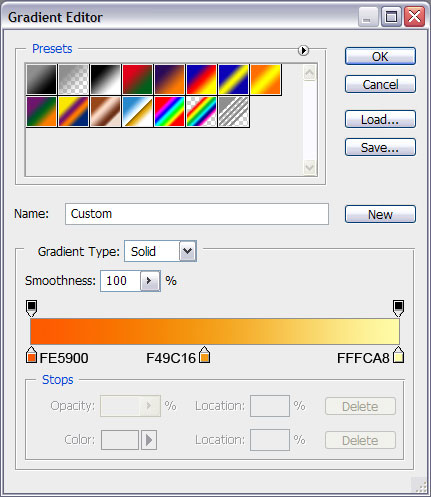
Set the appropriate gradient now:
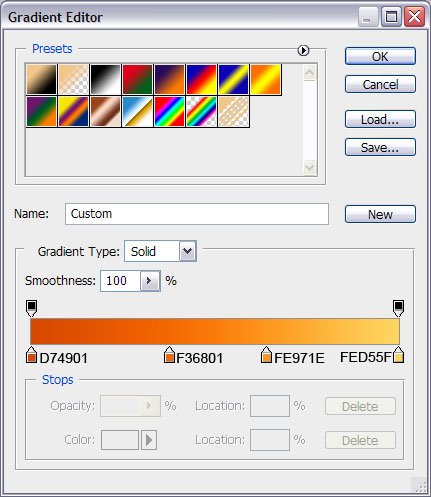
You may see below the gradient’s composing colors:
You must get the same result demonstrated next image:

After that we’ll represent another circle, placing it the same way demonstrated below:

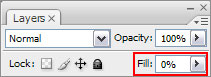
Fill 0% for this layer on the layers’ panel:
Set the Stroke for the made circle, following the parameters from below:
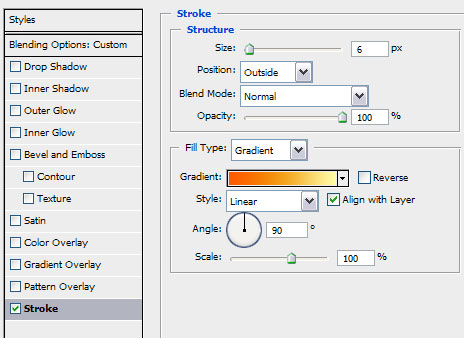
We should get a kind of gradient outline, like on the next image:

Page: 1 2
Comments