
Christmas Balls
In the following tutorial you will learn how to use shapes, Ellipse Tool, and Gradients in Photoshop to create greeting card with Christmas baubles. You can use these techniques and elements to create your own greeting card!
Final Image Preview

Inspired from Vector Illustration of three Christmas Balls by Ann Triling.
Start working by creating a new document (Ctrl+N) in Adobe Photoshop with the size 1280px by 1024px (RGB color mode) at a resolution of 72 pixels/inch. Take now the Rectangle Tool (U) and draw a rectangle on the whole canvas.
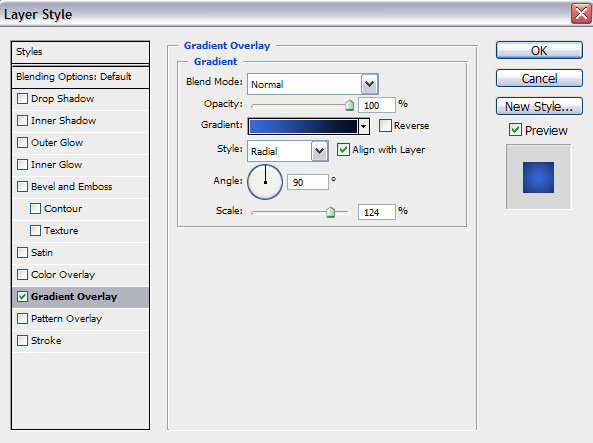
Click on Add a layer style icon from bottom part of the Layers panel and select Gradient Overlay.

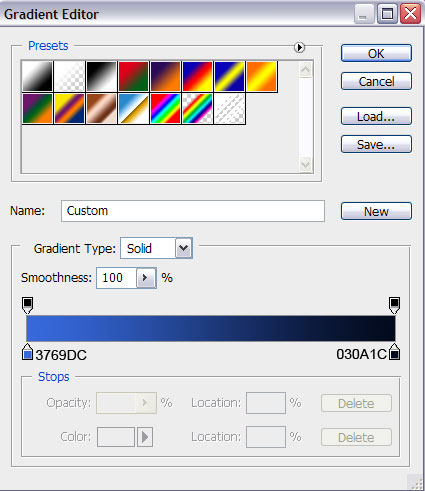
Click in the color bar to open the Gradient Editor and set the color stops as shown. Click OK to close the Gradient Editor dialog box.
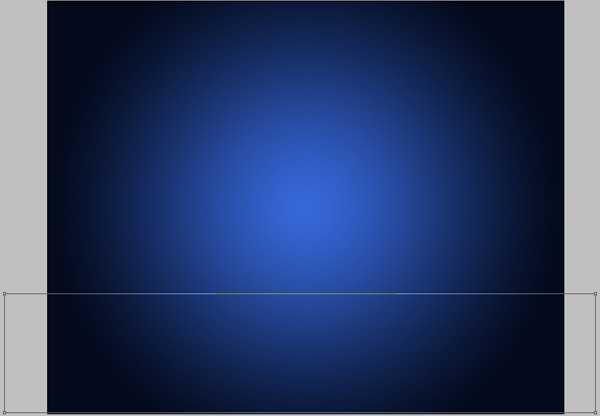
We’ve got the next background:

Next represent a kind of plane on the bottom part of the background, applying the same tool.
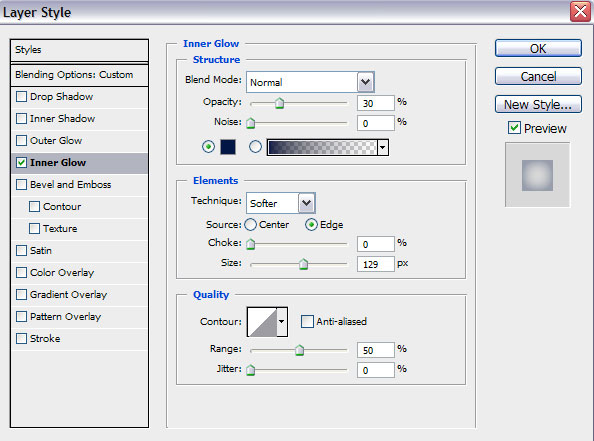
Set Fill to 0% for this layer and click on Add a layer style icon from bottom part of the Layers panel, select Inner Glow.
We’ve got the next result:

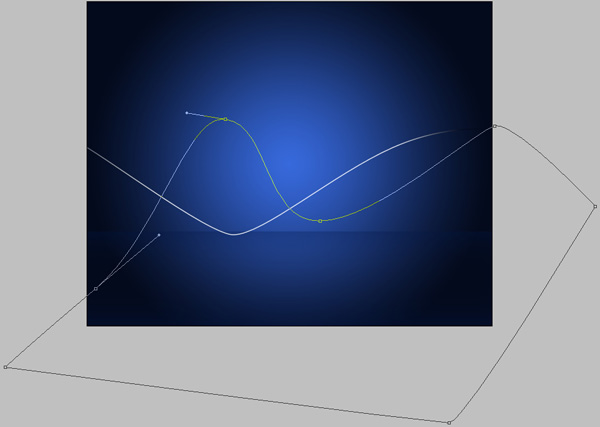
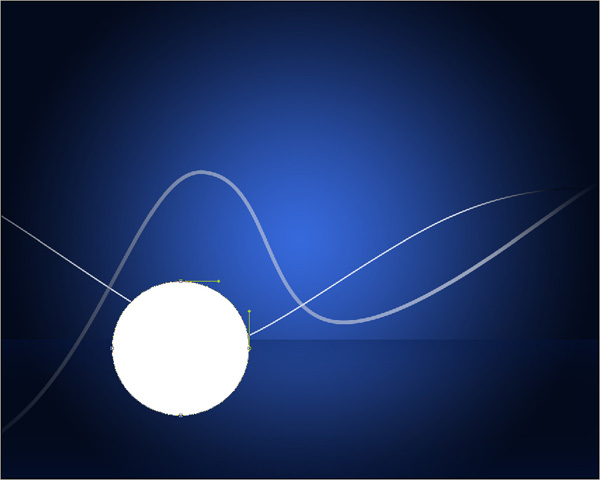
Choose the Pen Tool (P), set the drawing mode on Shape Layers in Options bar and draw the next shape as shown.

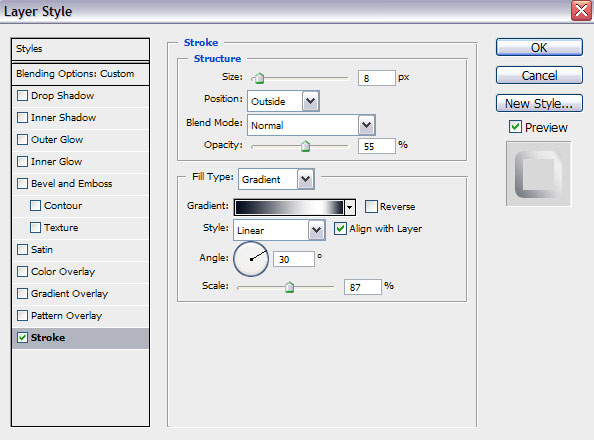
Set Fill to 0% for this layer and click on Add a layer style icon from bottom part of the Layers panel, select Stroke.
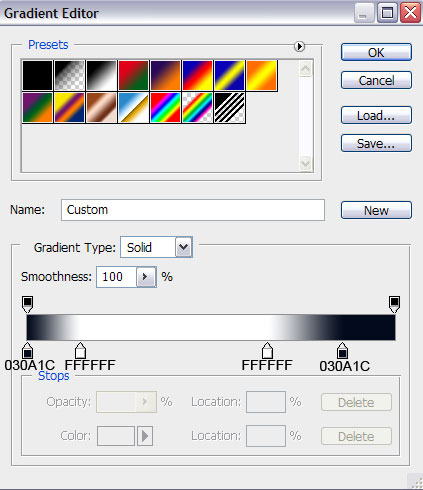
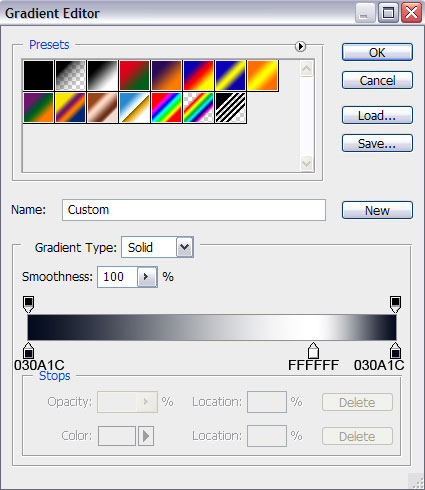
Select Fill Type – Gradient, click in the color bar to open the Gradient Editor and set the color stops as shown. Click OK to close the Gradient Editor dialog box.
We’ve got the next ribbon:

Create one more shape, applying the previous tools (Pen Tool (P)).
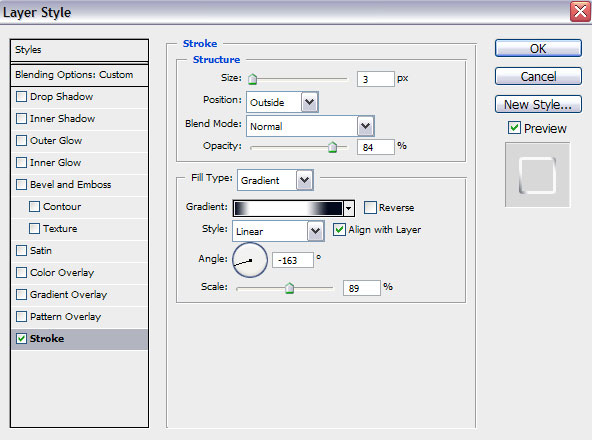
Set Fill to 0% for this layer and click on Add a layer style icon from bottom part of the Layers panel, select Stroke.
Select Fill Type – Gradient, click in the color bar to open the Gradient Editor and set the color stops as shown. Click OK to close the Gradient Editor dialog box.
We’ve got the next result:

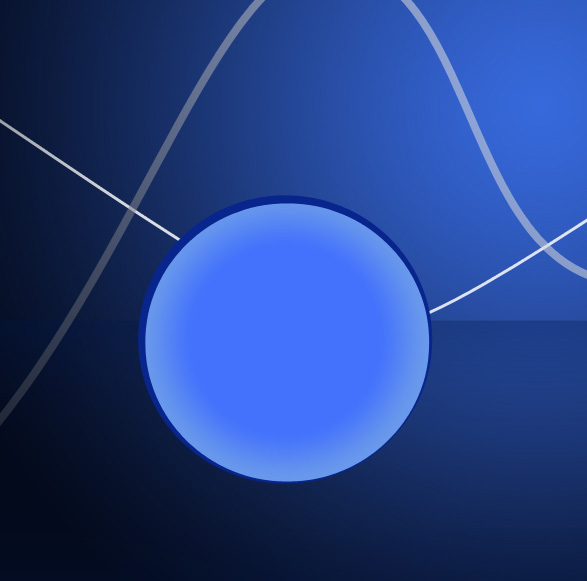
Use the Ellipse Tool (U) to draw the next ellipse as shown.
Click on Add a layer style icon from bottom part of the Layers panel and select Inner Shadow.

Apply Gradient Overlay
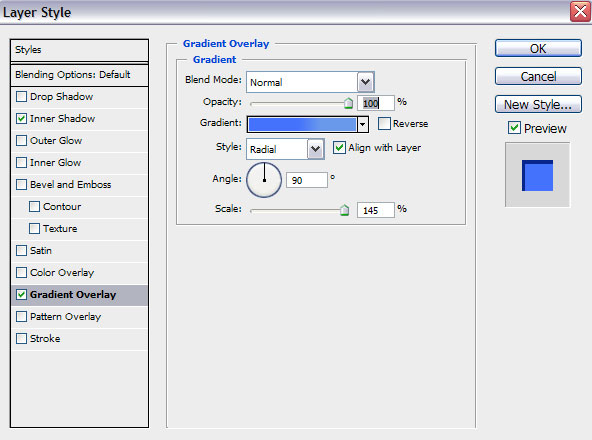
Click in the color bar to open the Gradient Editor and set the color stops as shown. Click OK to close the Gradient Editor dialog box.
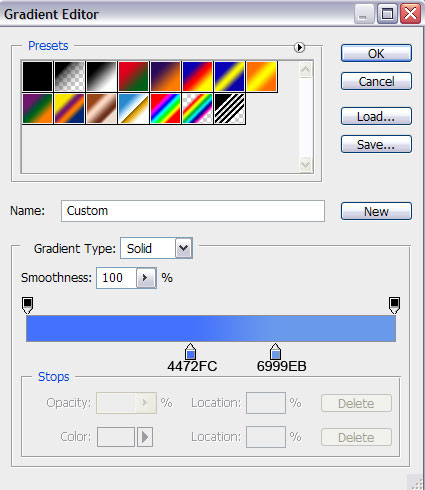
We’ve got the next result:
Comments