
Christmas Tree
Final Image Preview

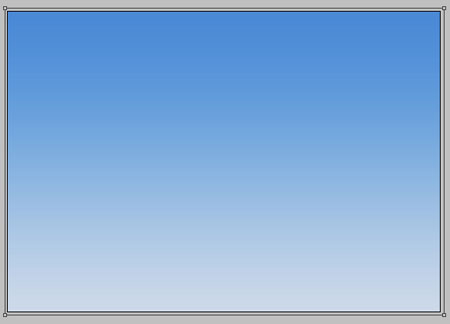
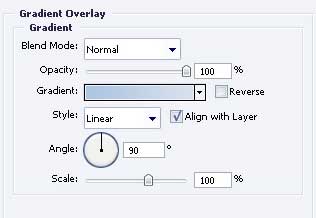
Open a new file, having 800×600 px and 72 dpi. Using the instrument  , mark out the same zone like it is indicated below, applying the parameters from the next image.
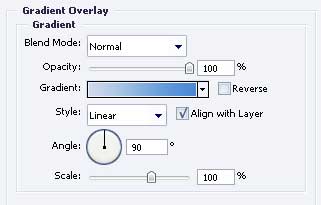
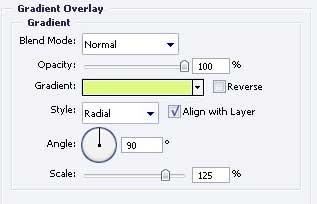
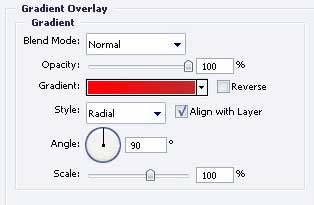
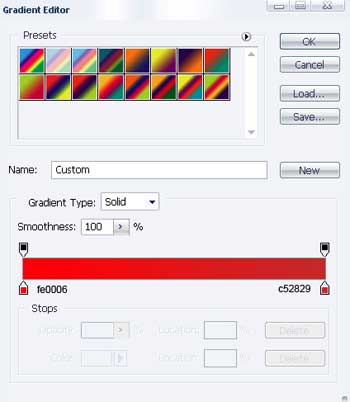
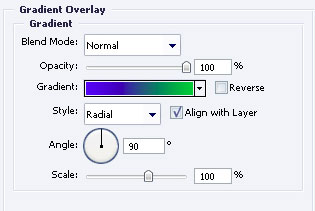
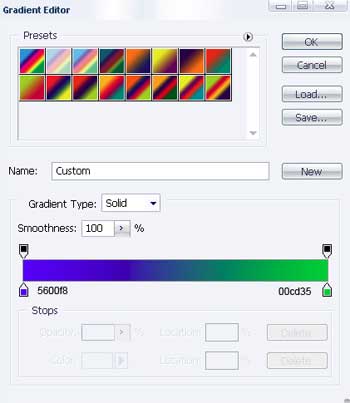
Blending Options-Gradient Overlay
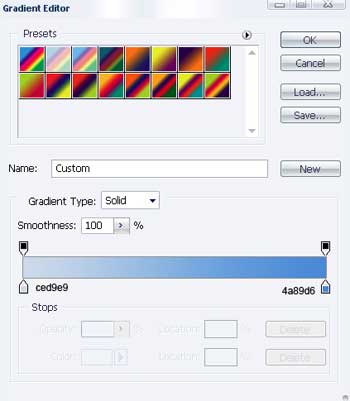
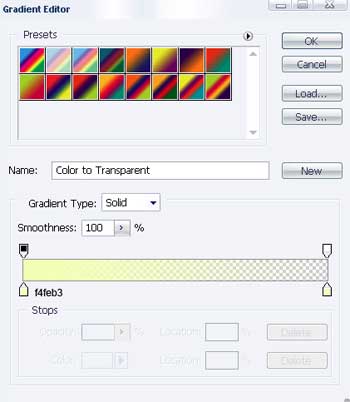
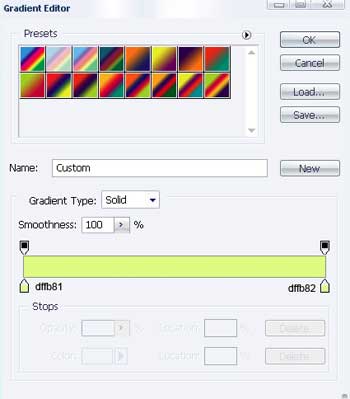
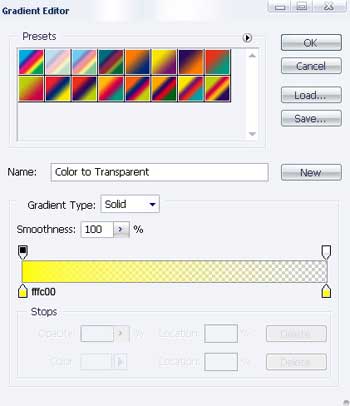
Gradient’s parameters.

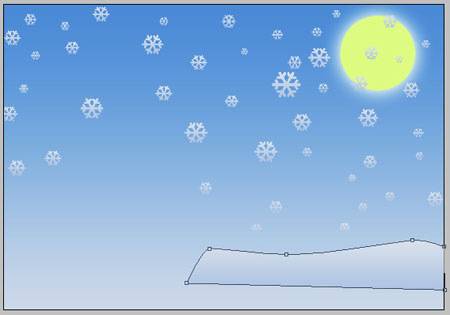
Take the next instrument  to picture the Moon that would have the next indicated sizes.

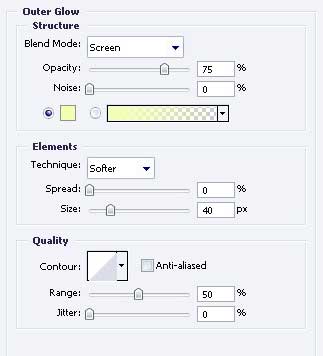
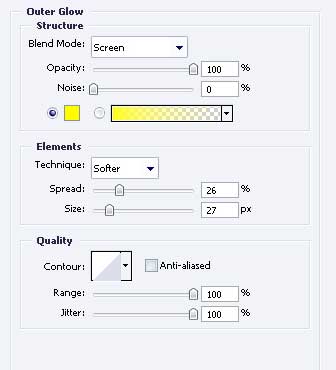
Blending Options-Outer Glow
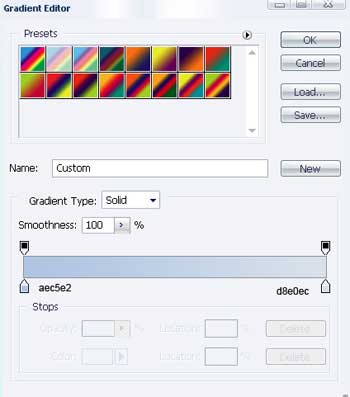
Gradient’s parameters.
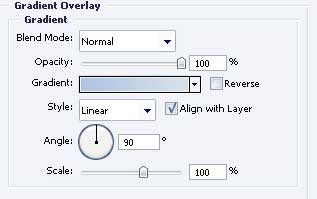
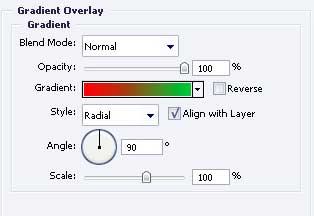
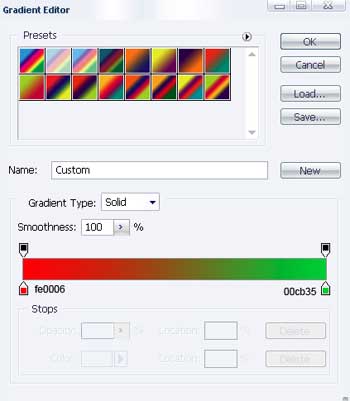
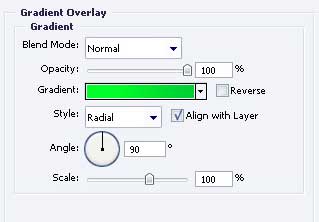
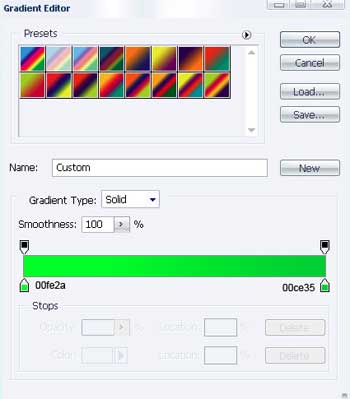
Blending Options-Gradient Overlay
Gradient’s parameters.
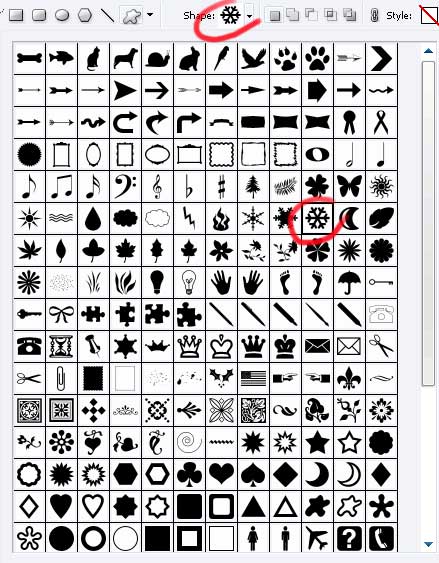
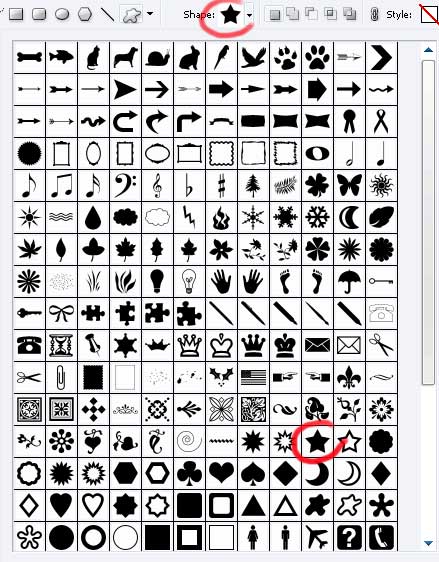
The next tool  will help us to choose the appropriate cliché from the next table.
Apply the demonstrated parameters next picture.
 Blending Options-Gradient Overlay
Gradient’s parameters.

Copy the new made layer several times and use Free Transform selection to minimize the necessary places. Don’t forget to place everything out like the next picture indicates it.

Take the following tool  and insert a figure, like the next one.
Fill 0% on the layers.
Blending Options-Gradient Overlay
Gradient’s parameters.
Having the previous instrument, picture now another figure of white color.

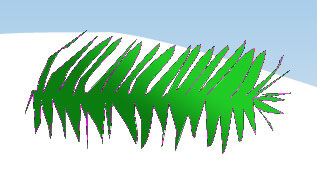
Take the same instrument and represent a fir-tree branch’s silhouette with the shown sizes next step.
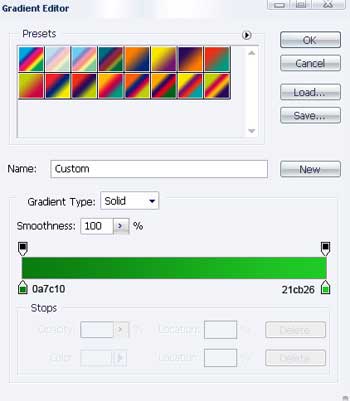
Blending Options-Gradient Overlay
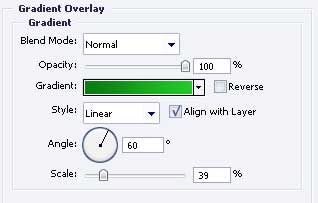 Gradient’s parameters.
Copy the new created layer 31 times. Minimize then five of the copied layers, applying Free Transform option. Place them like the next picture shows it.

Merge now all 5 first copied layers in a group. Copy then the new created group and apply free Transform option again to turn it around on 180 degrees, like it is done in the next image.

Change the gradient’s direction on the layers from new made group to look exactly like next picture.
The rest of the copied layers must be changed also, using Free Transform option. Place them the same way it is done below.

Take the instrument and represent the tree’s lights, composed of white circles of the same sizes, like in the next picture.

Having the same instrument , represent now a fir – tree’s ball (circle) with the indicated parameters.

Fill 0% on the layers.
Blending Options-Gradient Overlay
Gradient’s parameters.
Copy the recently created layer 3 times and apply Free Transform again where it is necessary. Maximize, minimize and place everything out like it is demonstrated next step.

Take the following instrument and make one more fir-tree ball with the shown parameters.

Fill 0% on the layers.
Blending Options-Gradient Overlay
Gradient’s parameters.
Copy the new made layer 6 times and apply Free Transform selection again where it is necessary to minimize or maximize the picture. Place then everything out like it is demonstrated next picture.
 The last instrument will be helpful in representing one more ball and it must have the same sizes from next image.

Fill 0% on the layers.
Blending Options-Gradient Overlay
Gradient’s parameters.
Copy the last layer 7 times and apply again Free Transform option to process the sizes if it is necessary.

The same instrument will be helpful in picturing another fir –tree ball with the indicated parameters next step.

Fill 0% on the layers.
Blending Options-Gradient Overlay
Gradient’s parameters.
Get to another instrument to choose the recommended cliché from the next table.
Apply the parameters form below:
Blending Options-Outer Glow
Gradient’s parameters.
Finally we’ll get the next:
The final result!
Comments