
Harley Davidson Wallpaper
Learn how to combine shapes and Layer Styles in Photoshop CS3 to create a Harley Davidson poster in this step-by-step guide. Layered PSD file included. Let’s get started!
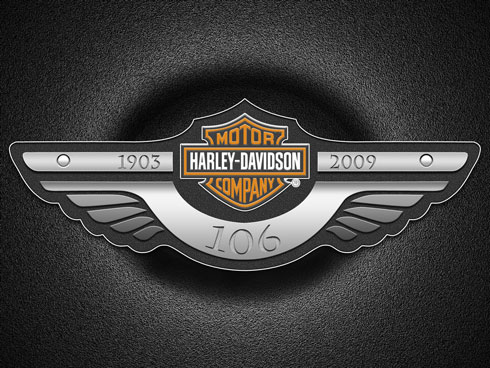
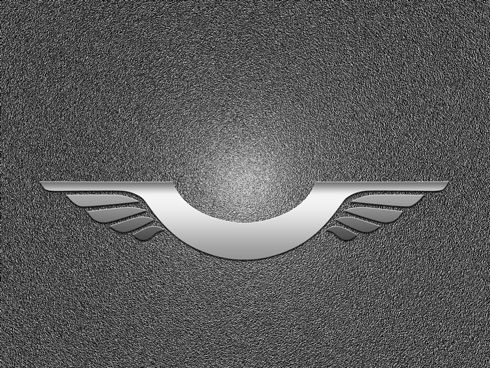
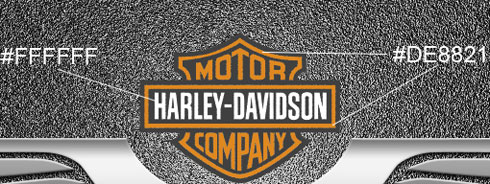
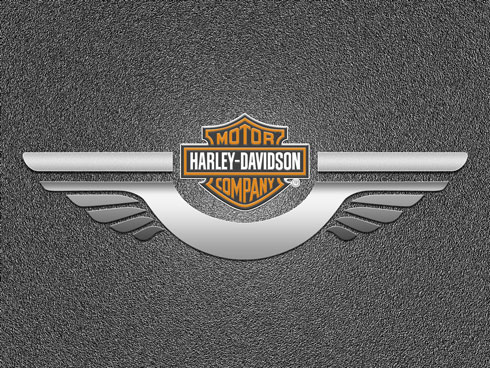
Final Image Preview
Start working by creating a new document (Ctrl+N) in Adobe Photoshop CS3 with the size 1600px by 1200px (RGB color mode) at a resolution of 72 pixels/inch. Use the Paint Bucket Tool (G) to fill with #707070 color the new background layer.

We’ll apply for this layer the next filter – Filter>Noise>Add Noise
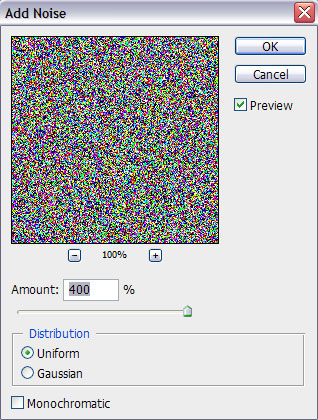
We’ve got the next result:


…and also Filter>Render>Lighting Effects
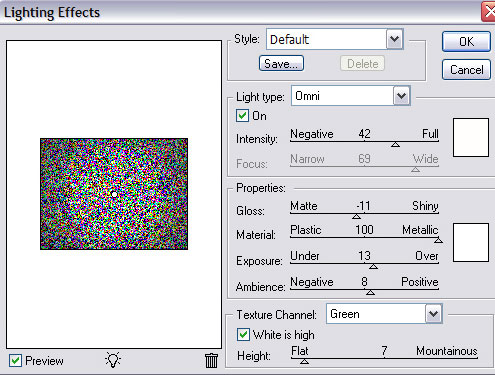
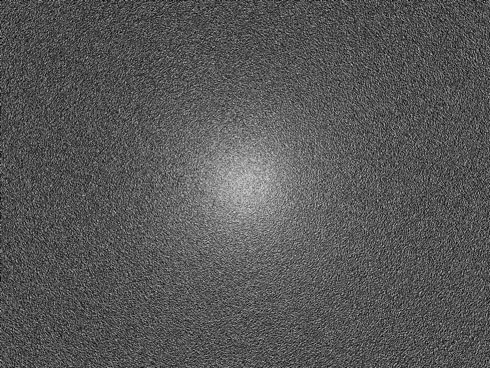
We’ve got the next result:

Press CTRL+SHIFT+U to Desaturate this layer.

Click Create new fill or adjustment layer from bottom part of the Layers panel and click to Curves to adjust the curve shape as shown to make a little color corrections.
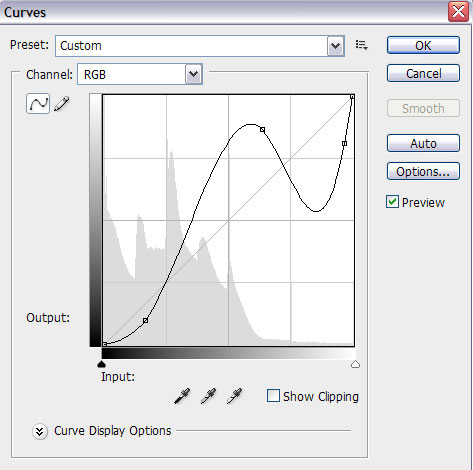
We’ve got the next result:
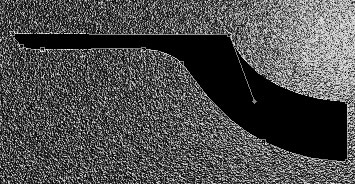
Choose the Pen Tool (P), set the drawing mode on Shape Layers in Options bar and draw the next shape as shown to represent the left half of the logotype’s element we want to have in the end. The color in this case should be selected the black one.
Make a copy of the recent made layer and select the Free Transform (Ctrl+T) command to turn around the copy, placing it the same way indicated below.
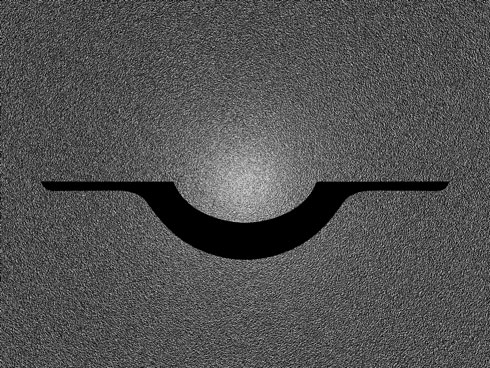
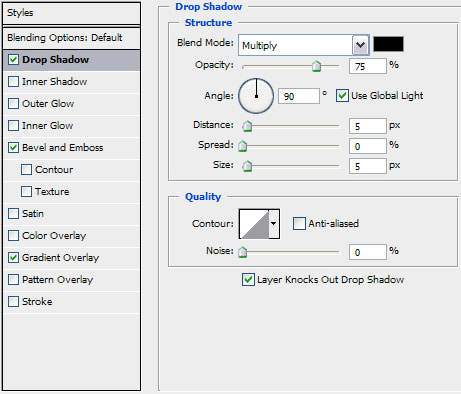
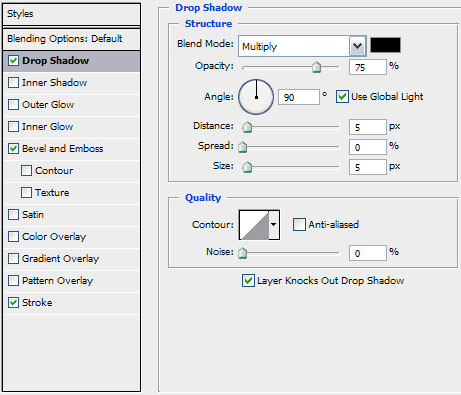
Put together both halves into a single rasterized layer. Hold Ctrl button to select the necessary layers in Layers panel and finally press Ctrl+E to Merge Down. Click on Add a layer style icon from bottom part of the Layers panel and select Drop Shadow.
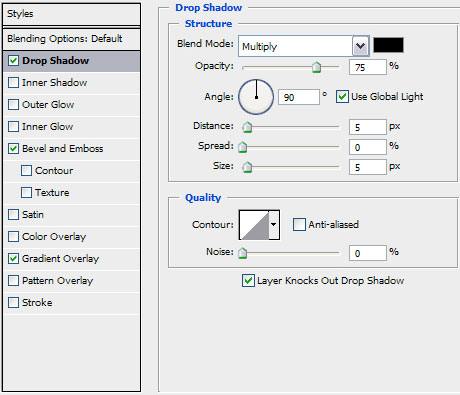
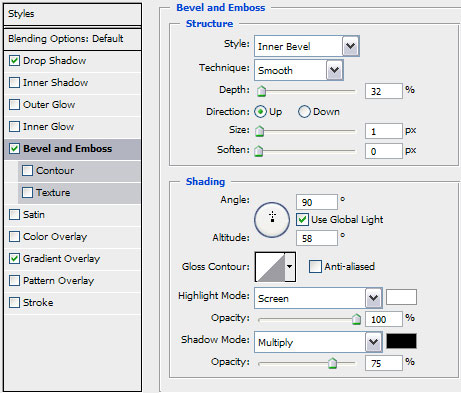
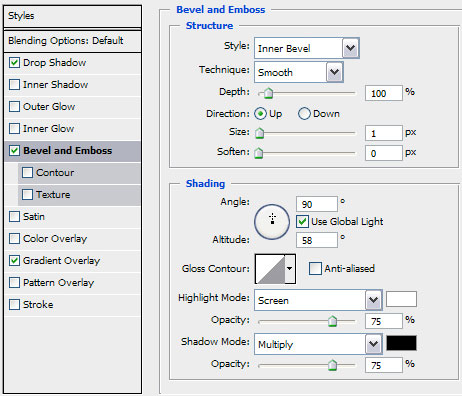
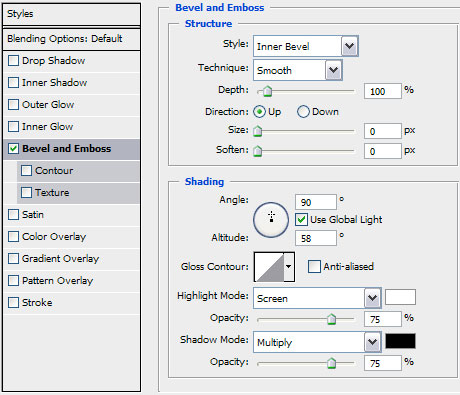
Add Bevel and Emboss:
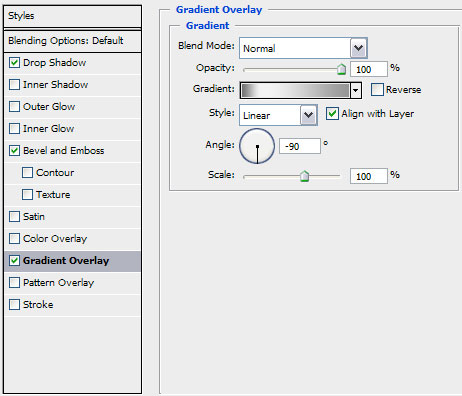
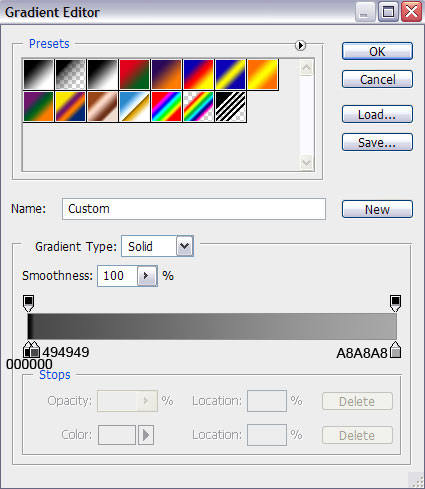
Apply Gradient Overlay:
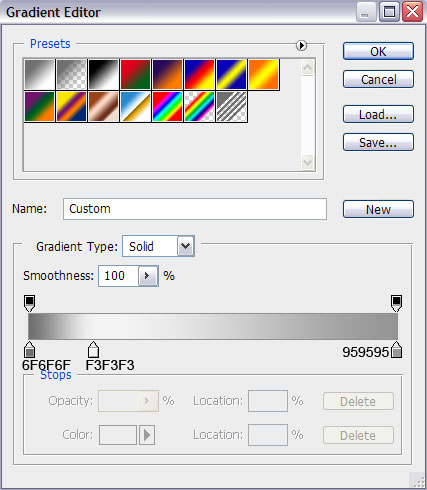
Click in the color bar to open the Gradient Editor and set the color stops as shown. Click OK to close the Gradient Editor dialog box.
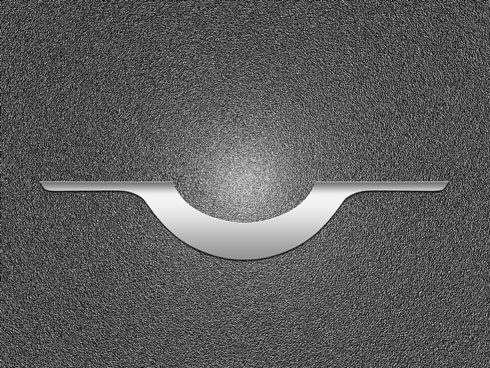
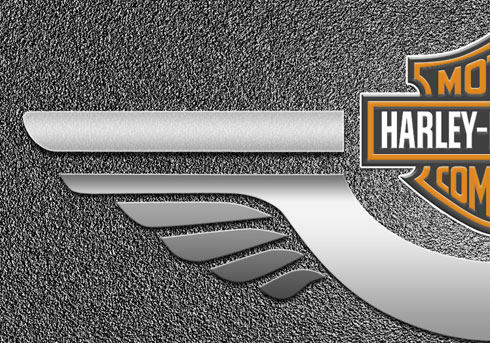
We’ve got the next result:
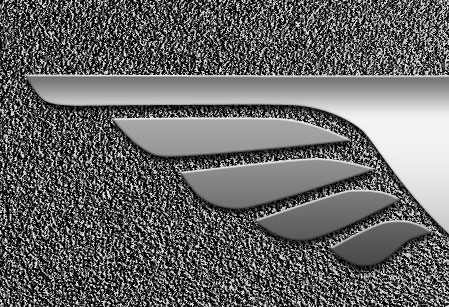
Select the earlier applied tools (the Pen Tool (P)) to represent several more elements of the same logotype.
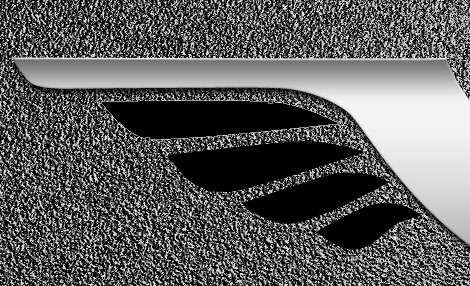
Put together the new made elements into a single layer the same way described above with the previous elements, click on Add a layer style icon from bottom part of the Layers panel and select Drop Shadow.
Add Bevel and Emboss
Apply Gradient Overlay

Click in the color bar to open the Gradient Editor and set the color stops as shown. Click OK to close the Gradient Editor dialog box.
We’ve got the next result:
Make a copy of the rasterized layer, containing the elements from the bottom part and choose the Free Transform (Ctrl+T) command to turn over the copy, placing it the way shown below:
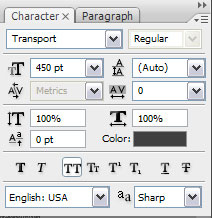
Next we’ll download from dafont.com the font Transport. Install this font on your system and insert the logotype of Harley Davidon company.
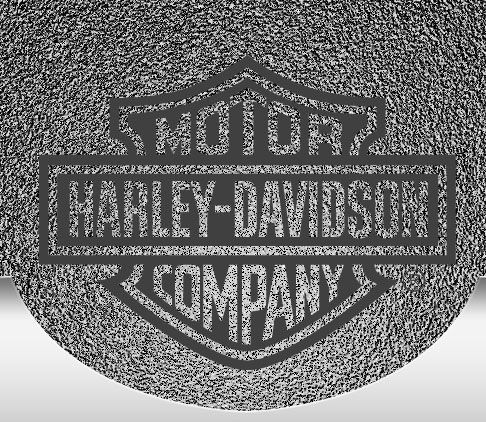
Rasterize this layer too. In this case we have to create a new layer, hold Ctrl button and select both layers and then press Ctrl+E. Create a new layer under the new layer that we’ve got and choose the Hard Round brush from Brush Tool (B).
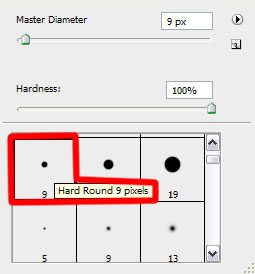
Use this brush to paint with two colors the logo’s edge as shown.
Click on Add a layer style icon from bottom part of the Layers panel and select Bevel and Emboss.
We’ve got the next result:

Put together now both layers, the brush’s layer and the layer containing the Harley Davidson logo. Hold Ctrl button, select both layers and then press Ctrl+E.
Click on Add a layer style icon from bottom part of the Layers panel and select Drop Shadow.
Add Bevel and Emboss
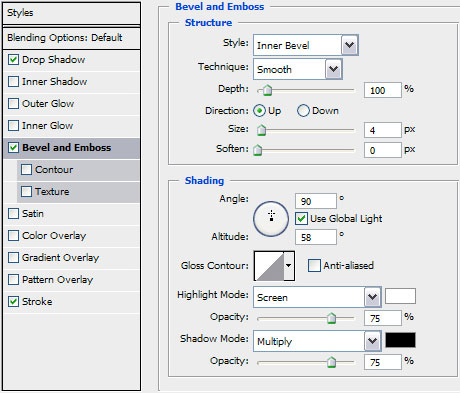
Apply Stroke
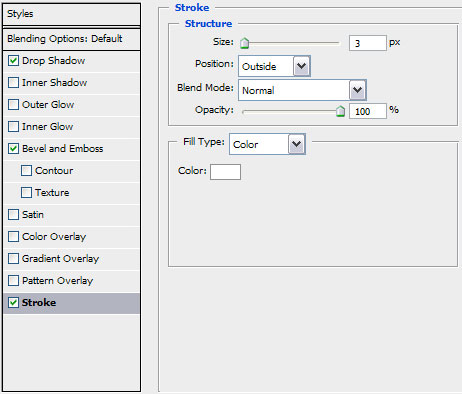
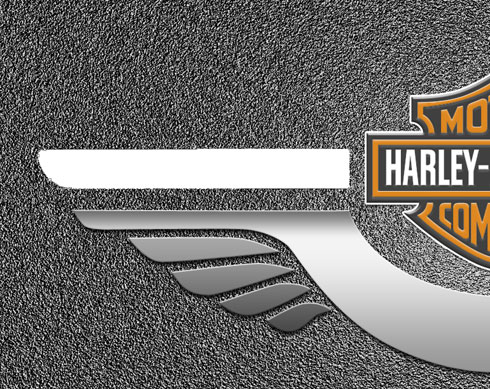
We’ve got the next result:

Using the Pen Tool (P) continue representing the logotype. Next we’ll draw another element of the logo from its left side.
Set Opacity to 92% and Fill to 0% for this layer. Click on Add a layer style icon from bottom part of the Layers panel and select Drop Shadow.

Add Inner Glow:

Apply Gradient Overlay:
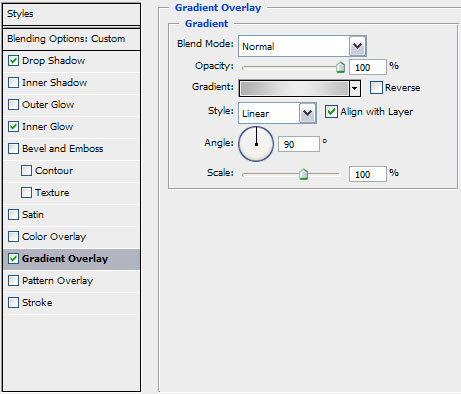
Click in the color bar to open the Gradient Editor and set the color stops as shown. Click OK to close the Gradient Editor dialog box.
We’ve got the next result:
Make a copy of the last made layer and choose again the Free Transform (Ctrl+T) command to turn around the copy, placing it the same way you may see below:
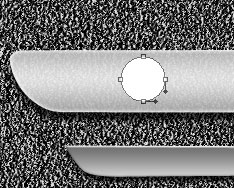
Now we shall draw an hole reserved for the rivet, choosing in this case the Ellipse Tool (U):
Page: 1 2
Comments