
Photoshopping Aqua Wallpaper
In this tutorial you’ll learn how to recreate the famous Aqua wallpaper in just a few minutes using Photoshop. It’s actually very easy!
Final Image Preview

Create a new file (File>New) of 1920x1200px/72 dpi.
In this case we’ll select the Paint Bucket Tool (G) and fill our primary layer with blue color. The color’s code is #17CBFF

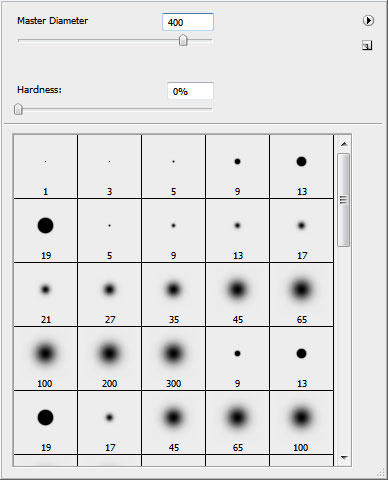
Select now the Brush Tool (B) with the next demonstrated parameters. Opacity 30% and the color’s code is #0499E6
Paint the blue background on its lateral sides.


… and on the bottom part.

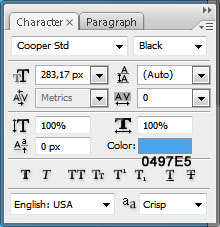
Take the Horizontal Type Tool (T) and type the word ‘aqua’ by separate letters. All the letters have the same next demonstrated parameters, except Q.

The parameters for the Q letter.
Place the word the same way demonstrated below:

Mark out the letters on the layers’ panel and press Shift button while left clicking on the appropriate layer. Then press Ctrl+J and the marked layers will be copied. Move them lower, using the Move Tool (V) and change their colors – #084DA2

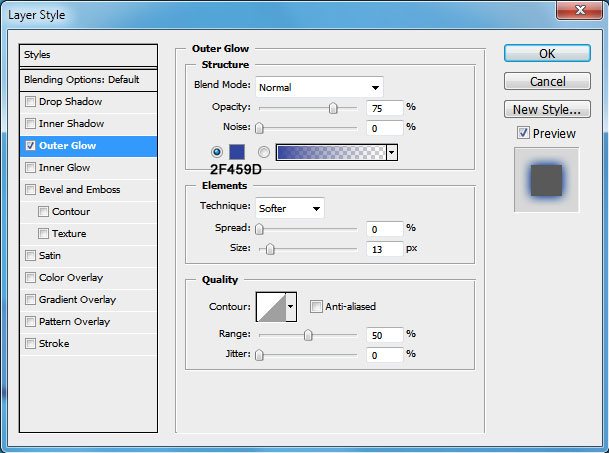
Select now Blending Options – Outer Glow for each letter. Make a double click on the necessary layer on the layers’ panel.
It’s the result you should get:

Now choose the next Blending Options – Inner Shadow for all the letters, except the last one.

Blending Options – Outer Glow

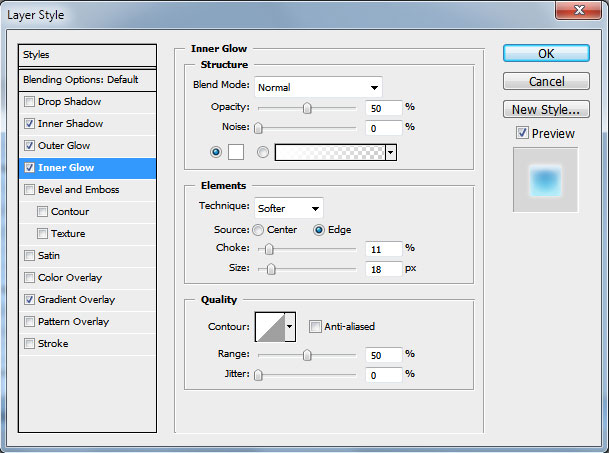
Blending Options – Inner Glow
Blending Options – Gradient Overlay

Gradient Editor

The letters start to get a kind of marine nuance:


Page: 1 2
Comments