How to Create a Mystery Photo Manipulation in Photoshop
October 12th, 2009 by ART-D Posted in Adobe Photoshop, Photo Editing
In this tutorial I will show you how to create a mystery photo manipulation using Photoshop brushes, different blend modes, and more. Let’s get started!
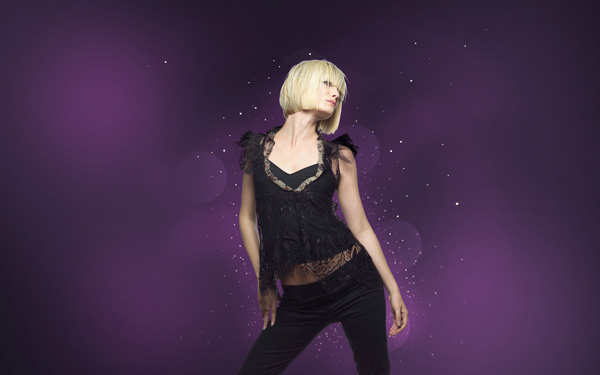
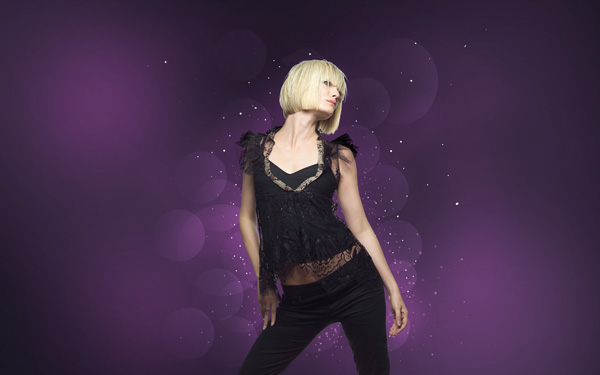
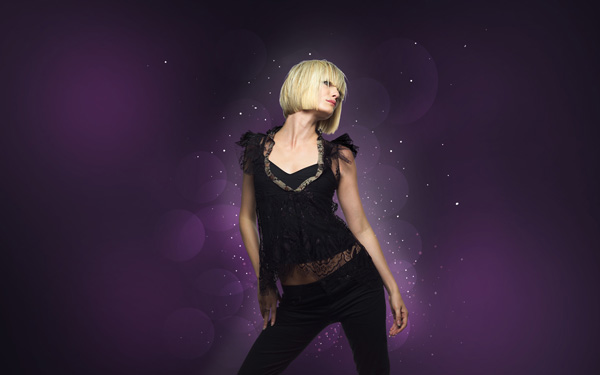
Final Image Preview

For the beginning create a new file (File>New) having 1920x1200px/72ppi. Then take the Paint Bucket Tool (G) and fill the new background layer with the next demonstrated color.

Select the Brush Tool (B) set the Opacity to 20% in Options Bar

Let’s put some brushstrokes on a new layer, the same way demonstrated below:

… and more on a new layer again…

Set for this layer Blend Mode to Color Dodge:

That’s the result you should get:

Find a stock photo with a model represented on it, I used this photo from deviantart. I would like to thank the author of this photo:

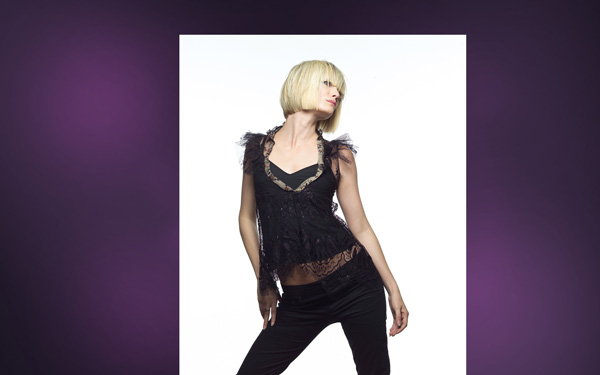
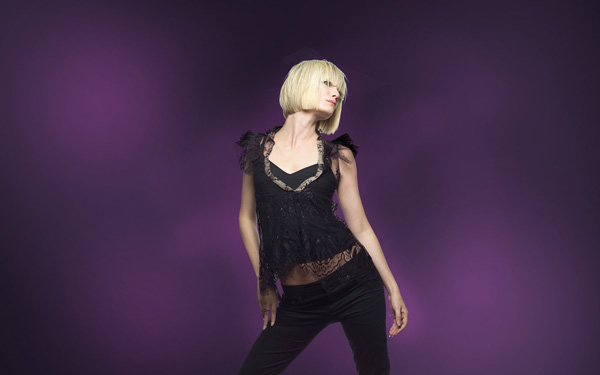
Remove the background using your favorite tools like Pen Tool (P), Magic Wand Tool (W), Magnetic Lasso (L) or even a simple Filter>Extract.

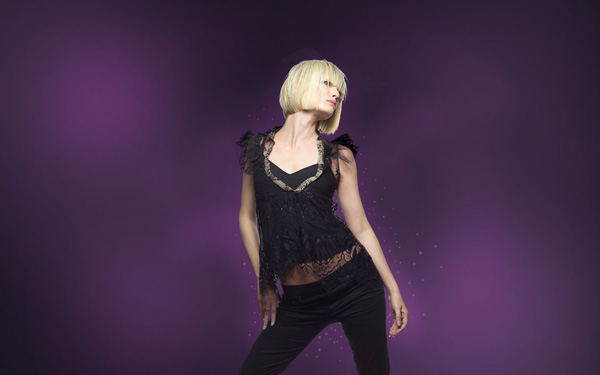
Create a new layer and insert here several dots with the brush, changing their sizes with the button [ or ]. The color’s code in this case is #BA93B3

… and more of white color:

Take now the Ellipse Tool (U) and make a circle:

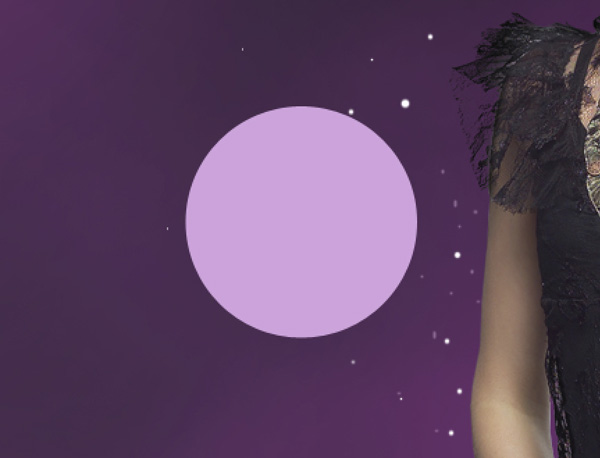
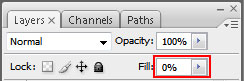
Set Fill to 0% for this layer:

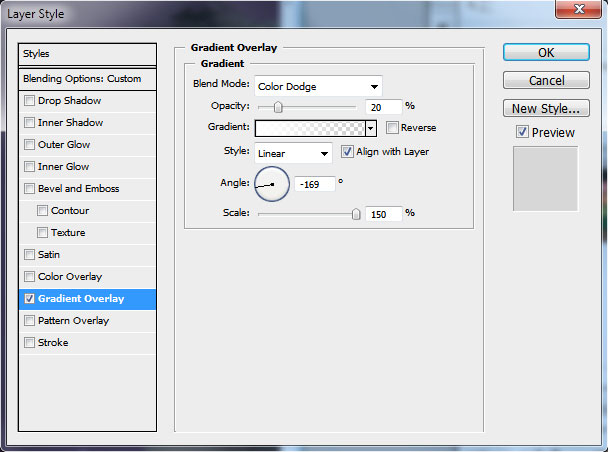
Next select the Layer Style. Make a double click on the left mouse’s button on this layer on the layers’ panel and set the Gradient Overlay as shown:

We’ve got a kind of half – transparent circle:

Copy them out (Ctrl+J) and put them arbitrary on the layer, using the Move Tool (V)


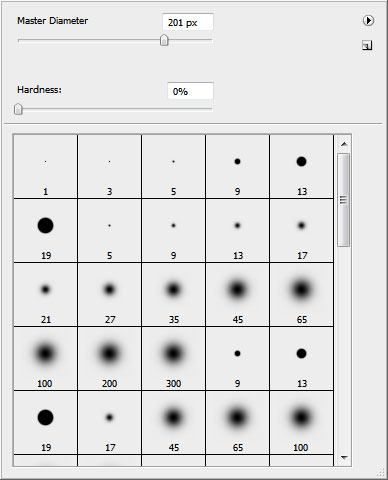
Create a new layer and represent on it a kind of luminescence around the girl. The brush’s settings are demonstrated below. Opacity 10%.


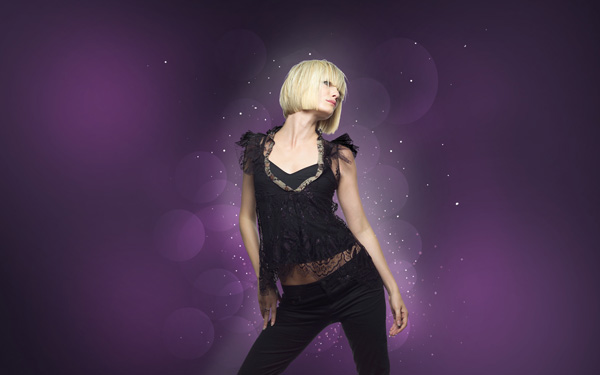
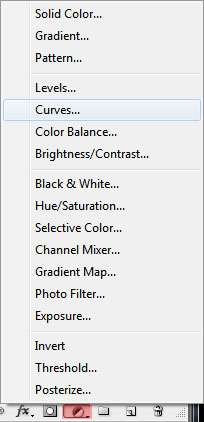
Next insert the adjustment layer Create new fill or adjustment layer > Curves:

Set it:

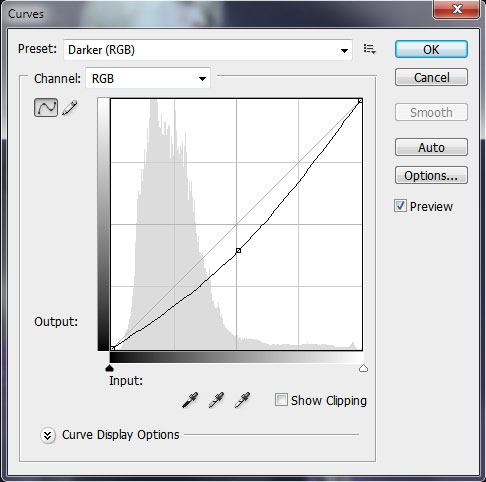
This way, our work became more contrasting and saturated.

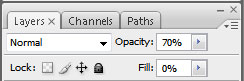
Make one more circle using Ellipse Tool (U):

Set the Fill to 0% and Opacity to 70% for its layer:

Post Pages: 1 2
Tags: cs3, fantasy, magic, mystery, photo-effect, Photoshop, wallpaper


Amrit virk
14/10/2009
thanks for such a nice tutorial..
DINATA
15/10/2009
look good
TheWebTuts
16/10/2009
Tutorial added to thewebtuts.com
sandy
19/10/2009
woooowwwww..
lor
01/11/2009
amazing
plskillme
01/11/2009
nice tut, thanks alot.
lo
01/11/2009
It’s a fantastic tutorial
sabba
21/11/2009
bubbles wont work
Social
28/11/2009
That’s a nice one I must confess. I would want to know how to use the fotoshop generally,I’m a lame man to the environment. Please contact me with this address: ovinicecentre.@yahoo.com
nadia
15/12/2009
very nice tutorial.thanks so much
Wiol
17/12/2009
very nice, thanks
charles olivier
02/01/2010
Thanks for the tutorial. I tried to do the same, but I stopped at the step of the circles.. lol..
Very nice effect!
b3jj
08/01/2010
heee i don’t see the option extract? :S
can you help me
pleaseee!!
Ayumi
09/03/2010
Hey, nice tut, some of these soap bubbles look kinda flat in my opinion.
Everything else is great, thanks!
Hilary
13/05/2010
I am very new to photo shop so a friend was helping me with some tutorials and on this one we stumbled at the bubble. We went over it a few times but have not missed a step so we are not sure why they dont have the coloured look of your bubble?
floryela
06/07/2010
thanks for share your knowledge with us !
Deevo
30/09/2010
awesome tutorial, very easy to follow!!
nourbil
01/10/2010
what photoshop 6 or cs5 plz help
Yusra
08/11/2010
woo00ooo
thnx
Grant Pedrosa
21/10/2011
I don’t even know how I ended up here, but I thought this post was good. I do not know who you are but certainly you are going to a famous blogger if you aren’t already
Cheers!
Trisha
21/01/2012
I’m new to Photoshop and I am at the step of adding the picture. I have no idea how to add it. Anyone help please?