
How to create abstract colorful rainbow background
In this tutorial, you’ll go through easy steps for creating a nice abstract rainbow background in Photoshop. We’ll use Photoshop’s simple shapes, layer styles and gradients to create a colorful background. Let’s get started!
Final Image Preview

Create a new document (Ctrl+N) in Adobe Photoshop with the size 1920px by 1200px (RGB color mode) at a resolution of 72 pixels/inch. Select then the Paint Bucket Tool (G) to fill the new background layer with black color.

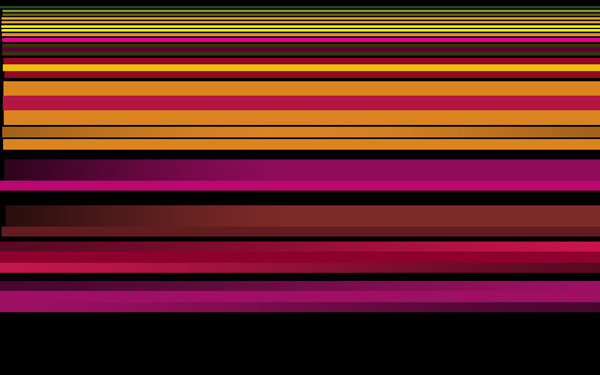
Next we’ll select the Rectangle Tool (U), to represent many colored lines of different size. The colors are indicated bellow:
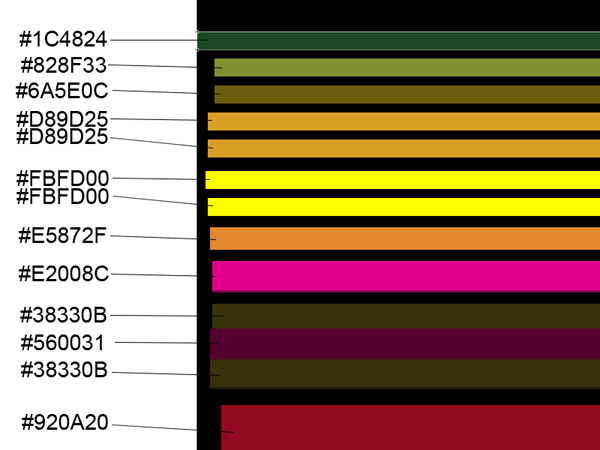
We’ve got the next lines:
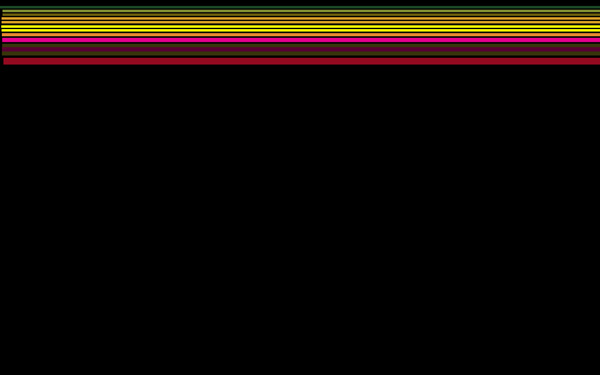
Using the same tool, continue representing the colored lines, keeping the same image as below (leave the same intervals between the lines as it is demonstrated below).

We’ve got the next composition:

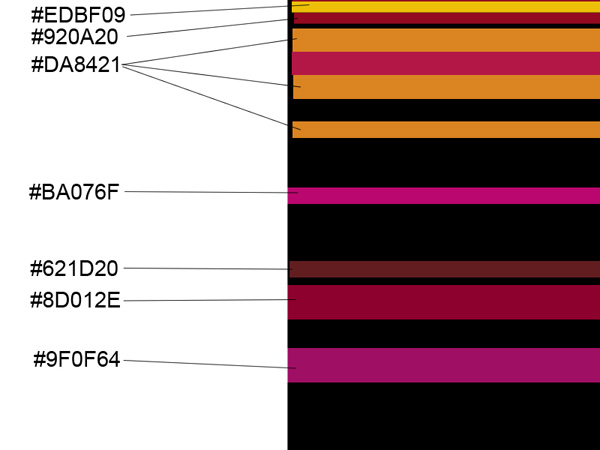
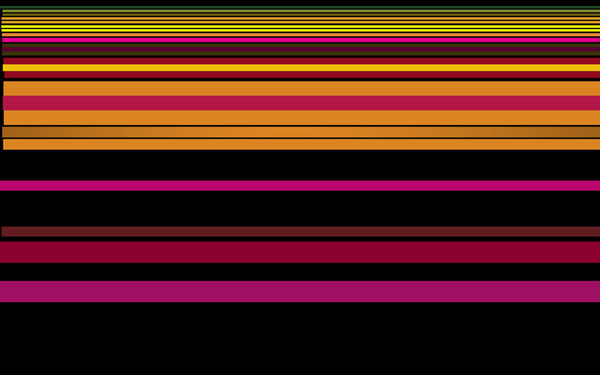
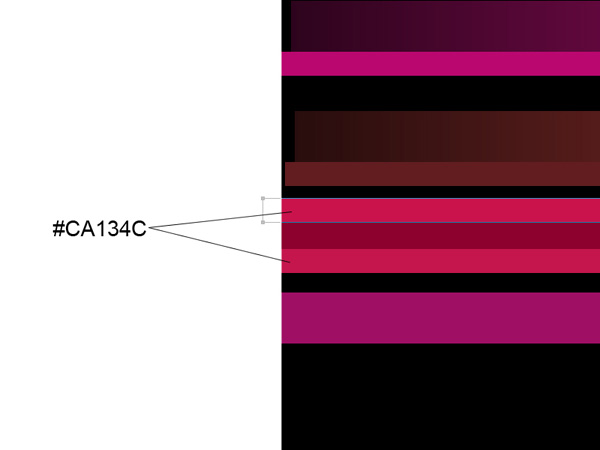
Take the same Rectangle Tool (U) to draw several more lines.
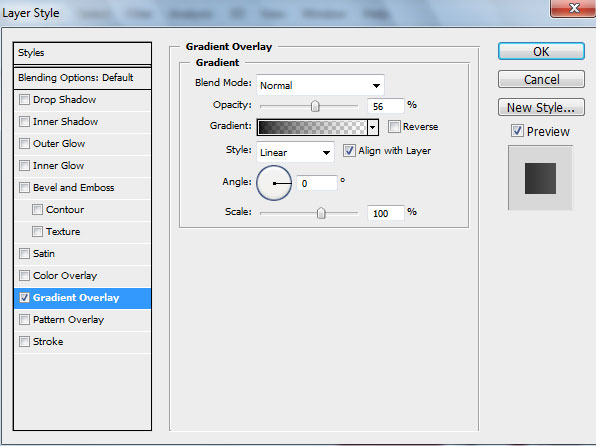
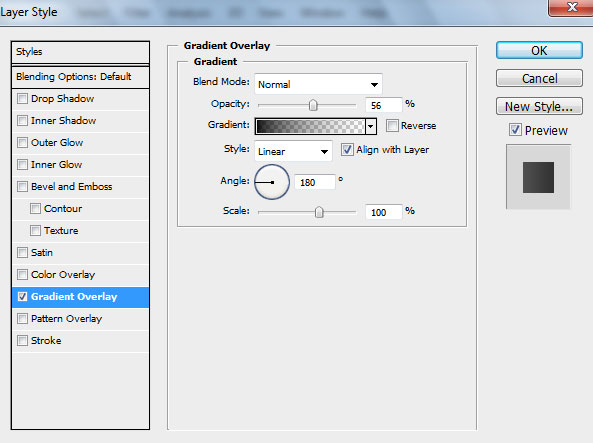
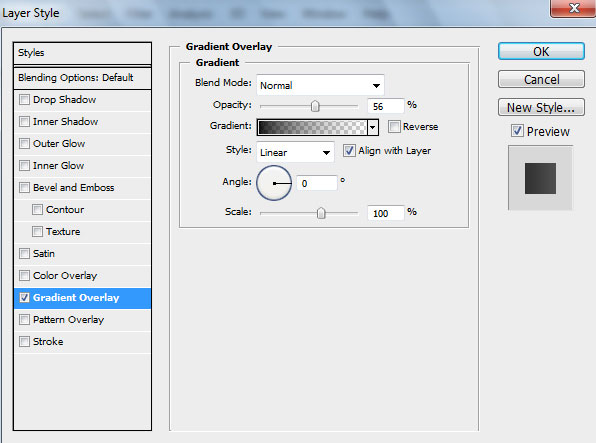
For this line click on Add a layer style icon from bottom part of the Layers panel and select Gradient Overlay:
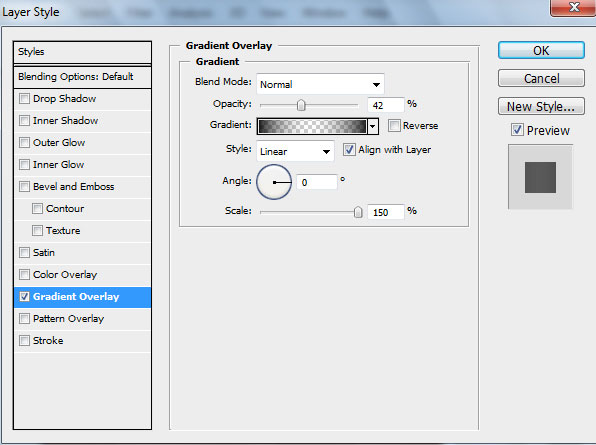
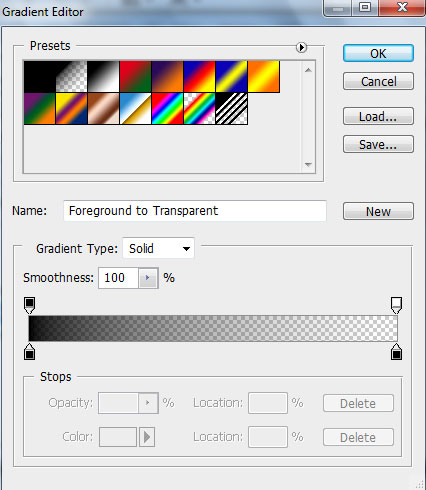
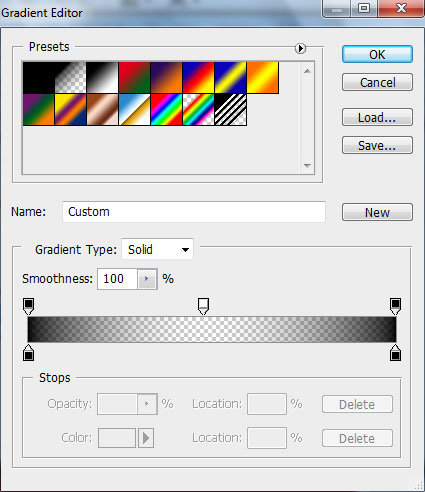
Click in the color bar to open the Gradient Editor and set the color stops as shown. Click OK to close the Gradient Editor dialog box.

We’ve got the next gradient on the line:
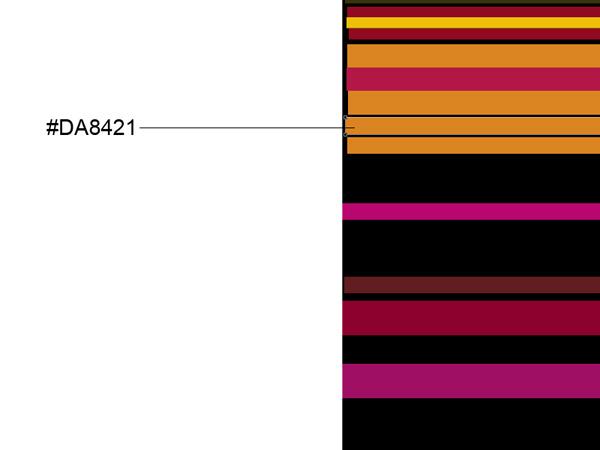
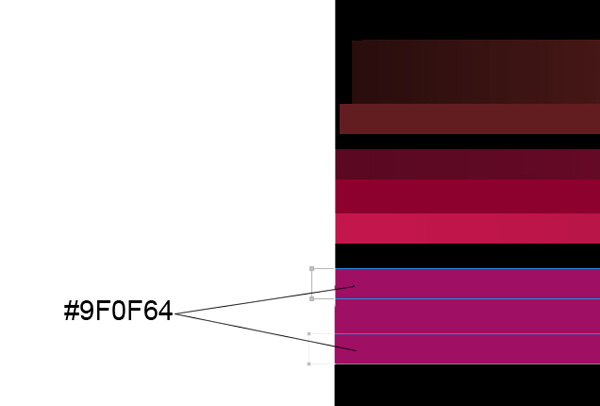
Represent another 2 lines:

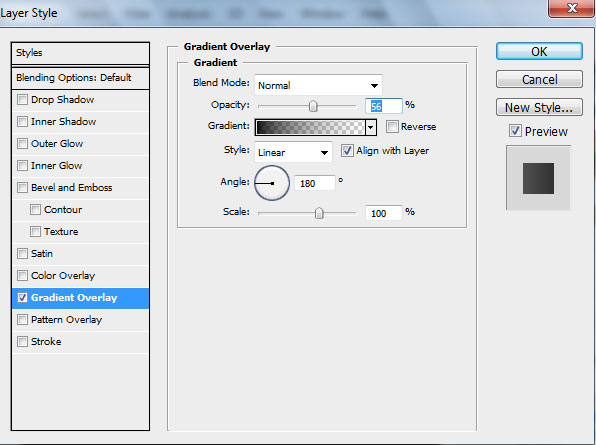
Apply for these lines the same settings for Layer Style>Gradient Overlay:
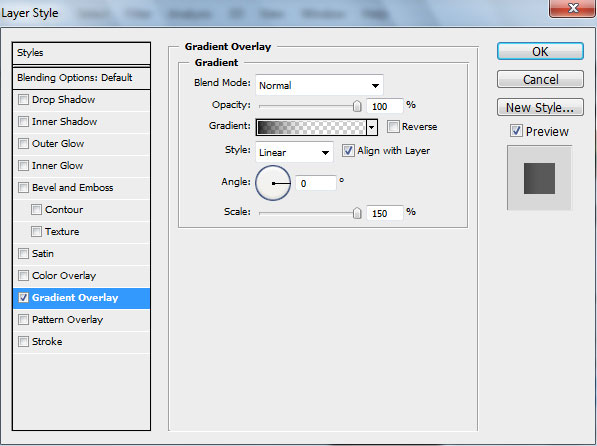
Click in the color bar to open the Gradient Editor and set the color stops as shown. Click OK to close the Gradient Editor dialog box.

We’ve got the next gradient on these lines:
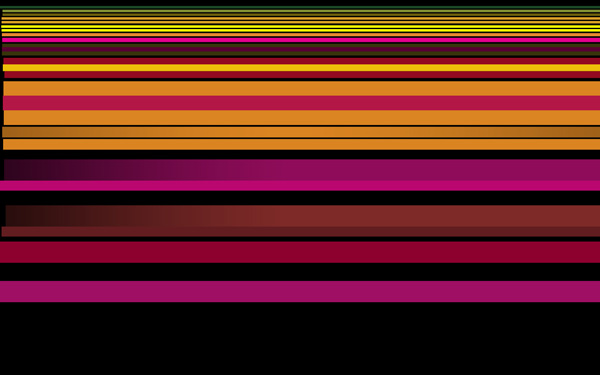
Using the Rectangle Tool (U), try to make two more lines.
For the upper line click on Add a layer style icon from bottom part of the Layers panel and select Gradient Overlay:
Click in the color bar to open the Gradient Editor and set the color stops as shown. Click OK to close the Gradient Editor dialog box.

Add Layer Style > Gradient Overlay for the lower line:
Click in the color bar to open the Gradient Editor and set the color stops as shown. Click OK to close the Gradient Editor dialog box.

We’ve got the next gradient on the lines:
Using the same mentioned tool above, try to represent two more lines.
Apply the next Layer Style > Gradient Overlay settings for the upper line:
Click in the color bar to open the Gradient Editor and set the color stops as shown. Click OK to close the Gradient Editor dialog box.
Add Layer Style > Gradient Overlay settings for the lower line:
Click in the color bar to open the Gradient Editor and set the color stops as shown. Click OK to close the Gradient Editor dialog box.

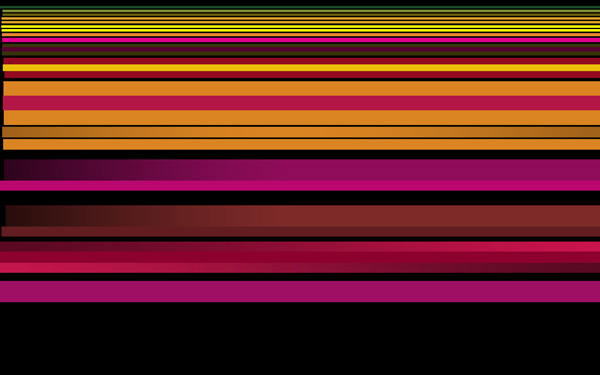
We’ve got the next effects on the lines:
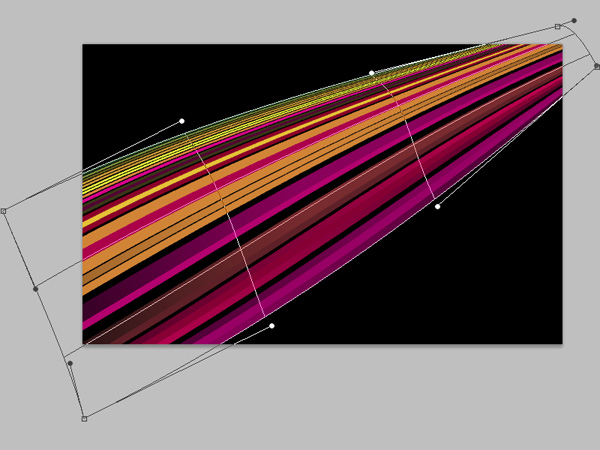
Next we’ll combine in a group all the layers containing the colored lines (press CTRL button to select the appropriate layers and then hold on the left mouse’s button when dragging the selected layers on Create a new group option). Merge Down the group layers by pressing CTRL+E. Next we need to warp this layer, select Free Transform command by pressing Ctrl+T, click the Switch Between Free Transform And Warp Modes button in the Options bar and use the control points to distort the lines the same way as it is shown below:
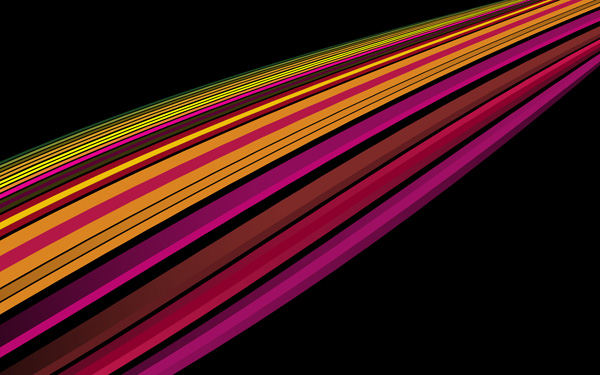
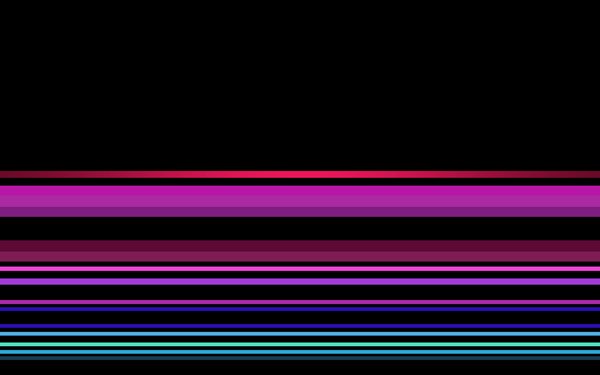
We’ve got the next result:
Click the eye icon next to a layer containing the lines to hide its content for a while and choose the Rectangle Tool (U) to represent several more lines. The colors are indicated bellow:
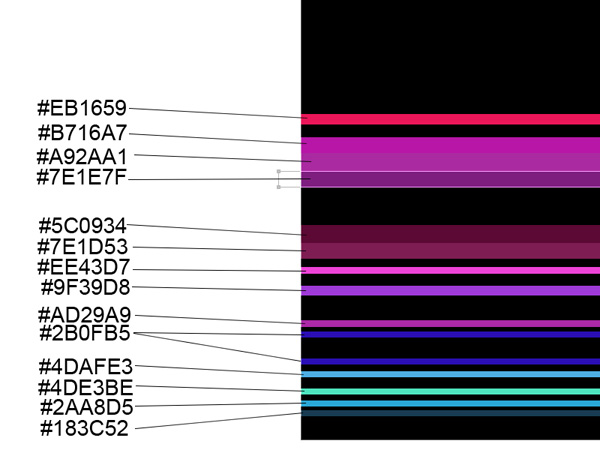
We’ve got the next lines:

Click on Add a layer style icon from bottom part of the Layers panel and select Gradient Overlay settings for the lines’ layers (from top to downwards by turn). Start with the red line:

Click in the color bar to open the Gradient Editor and set the color stops as shown. Click OK to close the Gradient Editor dialog box.
We’ve got the next gradient on the line:
Page: 1 2
Comments