
How to create abstract colorful background with bokeh effect in Photoshop
In today’s tutorial, you’ll learn how to create an abstract colorful background with bokeh effect using Photoshop’s drawing tools, blending modes, and lighting techniques. Layered PSD file included. Let’s get started!
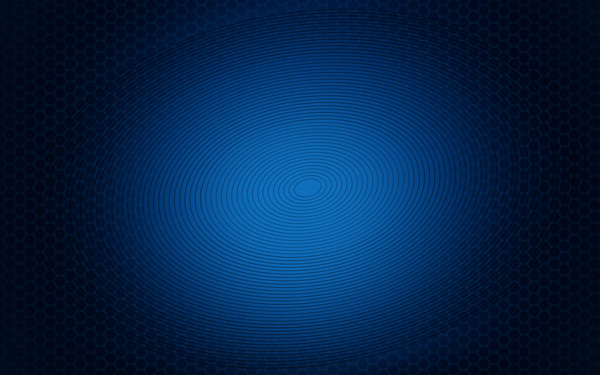
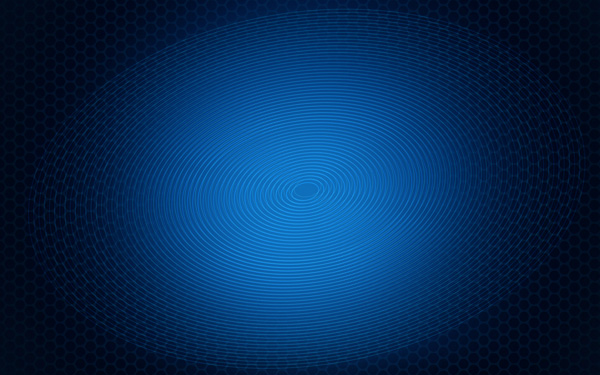
Final Image Preview

Inspired from Hexillus by Miniman.
Create a new document (Ctrl+N) in Adobe Photoshop with the size 1920px by 1200px (RGB color mode) at a resolution of 72 pixels/inch. Use the Paint Bucket Tool (G) to fill with #010E1F color the new background layer.

To create a fiber background we’ll download Spiderman Pattern from brusheezy.com. Copy the pattern file and paste it into, C:/Adobe/Photoshop/Presets/Patterns.
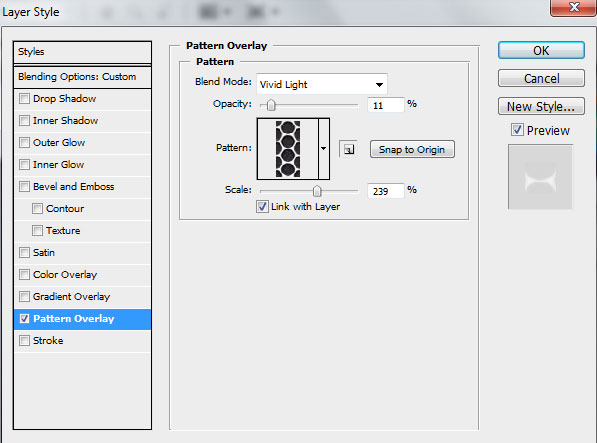
Create a new layer and fill it with black color, click to Add a layer style icon from bottom part of the Layers panel and select Pattern Overlay. Go to Pattern Picker, and additional Spiderman Pattern can be added by loading them from the Picker’s submenu.
We’ve got the next effect:


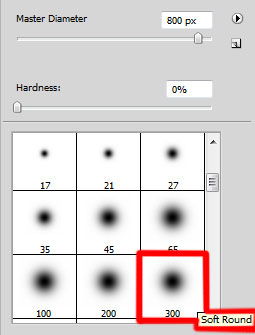
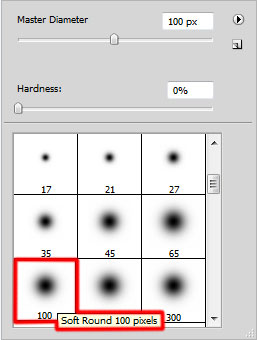
Click on the same layer on the bottom part of the Layers panel on Add layer mask icon and choose a Soft Round brush of black color from Brush Tool (B)( set the Opacity to 10% in Options bar)

Use Soft Round brush to paint in the mask to hide a little the document’s edges:

Create a new layer and select again the Soft Round brush
Use the Soft Round brush to paint the central part of the document with the #003173 color

On the next new layer we’ll apply again Soft Round brush to paint more the same part of the picture with the next color – #0F6FBC

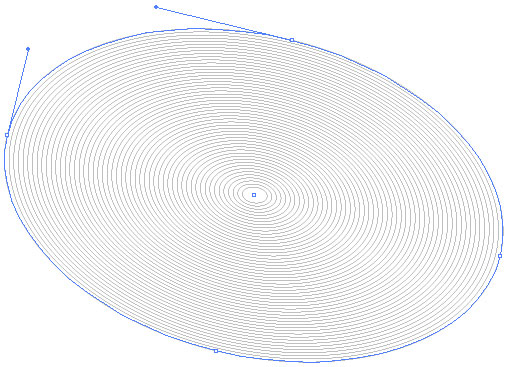
Next pass on Adobe Illustrator program and choose here the Ellipse Tool (L) to draw two ellipses of black color.
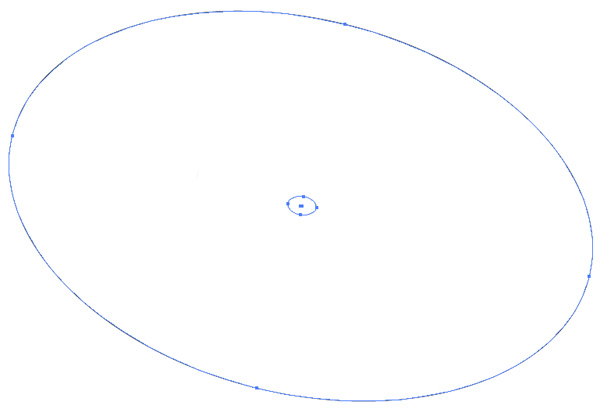
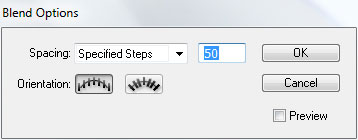
Using the Direct Selection Tool (A), select both ellipses and apply here the next option: Object>Blend>Blend Options
We’ve got the next result:
Select the ellipses and press CTRL+C(Copy). Pass on Adobe Photoshop program after that and press CTRL+V (Paste As – Pixels).
Select for this layer CTRL+I (Inverse)
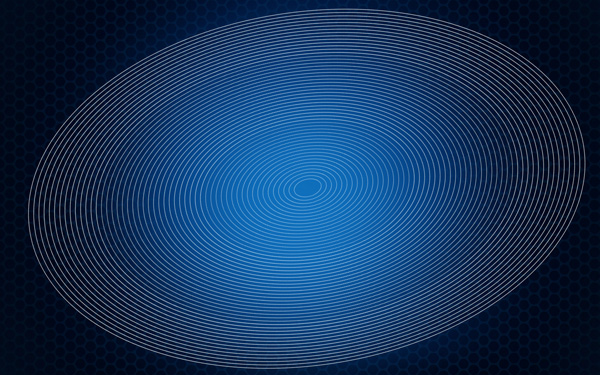
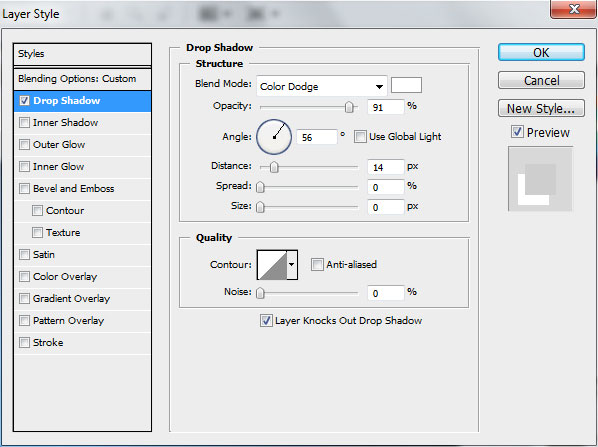
Set the Blending mode to Soft Light for this layer and click Add a layer style icon from bottom part of the Layers panel to select Drop Shadow:
We’ve got the next result:
Click on the same layer on the bottom part of the Layers panel on Add layer mask icon and choose the Soft Round brush (Opacity 20%) of black color

Use Soft Round brush to paint in the mask to hide the ellipses edges.

Create a new layer and select the Airbrush Soft Round brush of white color
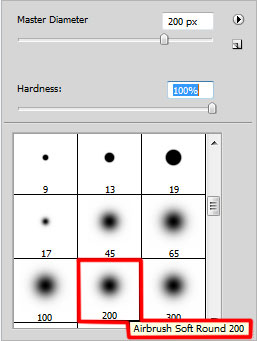
Use Airbrush Soft Round brush to draw several small circles by changing the Opacity, Hardness value and the brush’s size

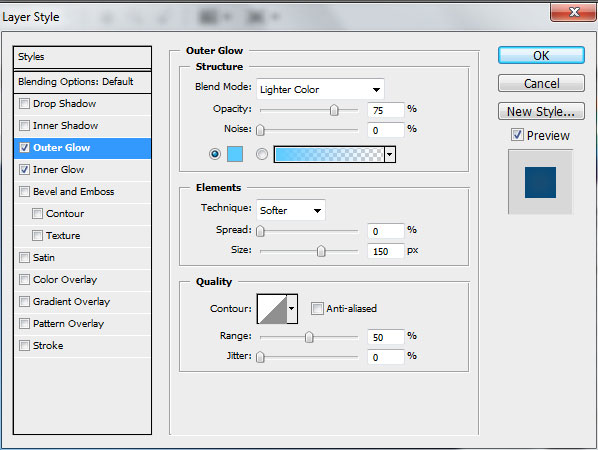
Click on Add a layer style icon from bottom part of the Layers panel to select Outer Glow
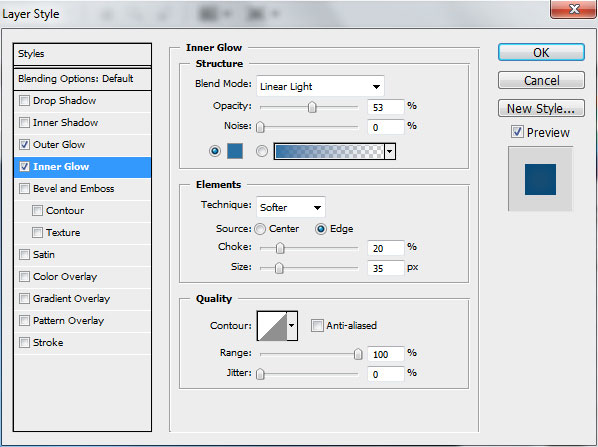
Add Inner Glow
We’ve got the next result:

Create the next new layer and select the Soft Round brush
Draw a spot of the color #FF00FF (set the Opacity to 10% in Options bar)

Use the same Soft Round brush for a new layer to paint the shown part below with the color #4AC1E4

Create a new layer and select the Airbrush Soft Round brush and white color (Opacity 30%)

Use the Airbrush Soft Round brush to represent a spot on the central part of the canvas.

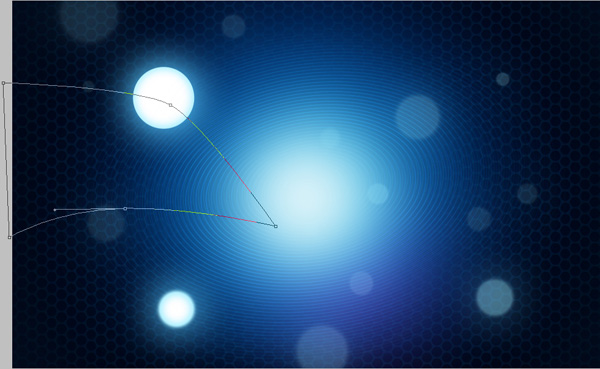
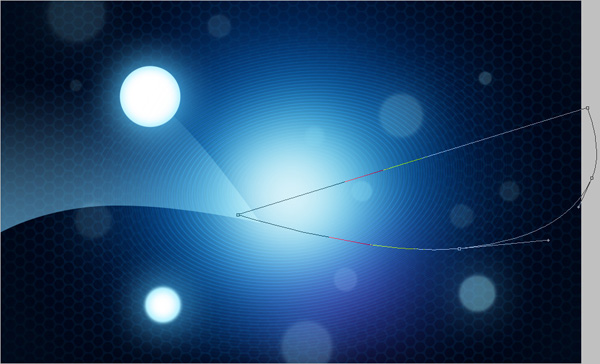
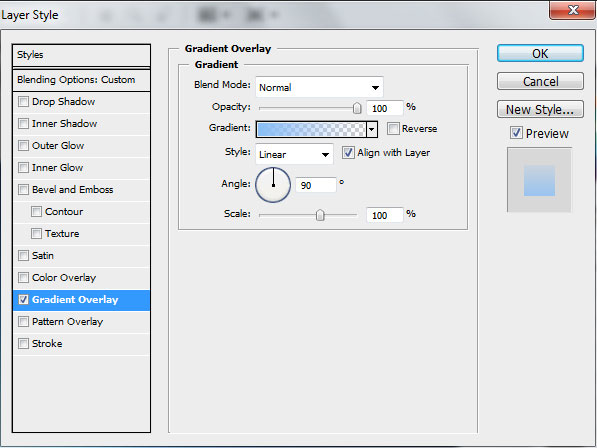
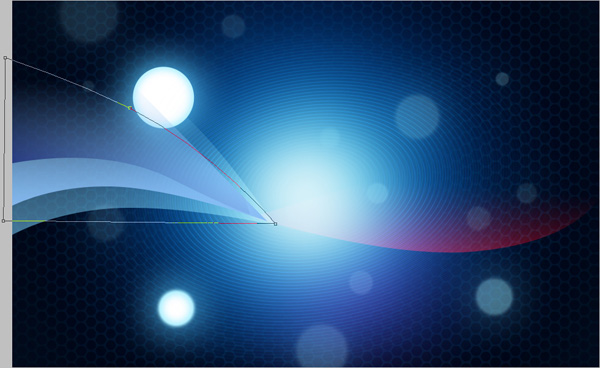
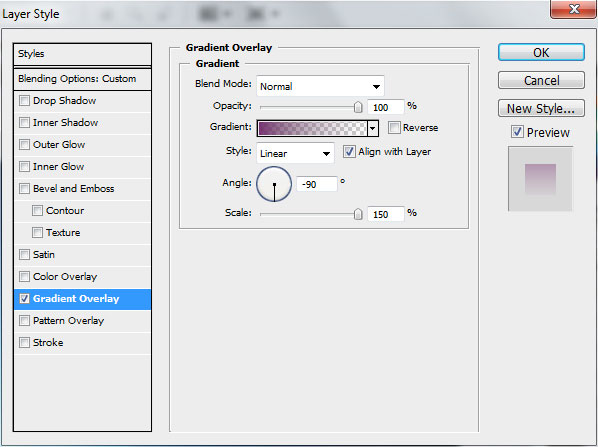
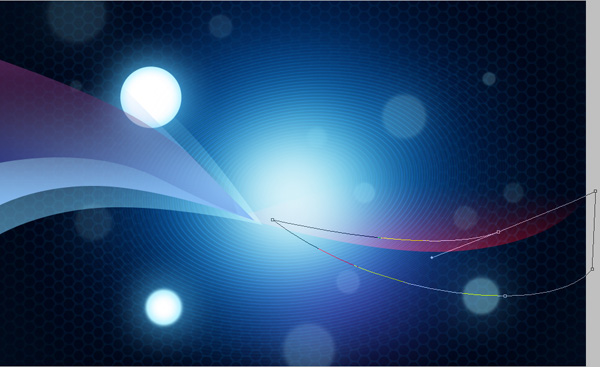
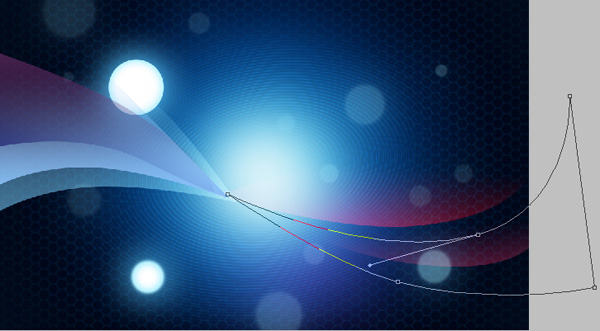
Next choose the Pen Tool (P), set the drawing mode on Shape Layers in Options bar and draw many shapes as shown.
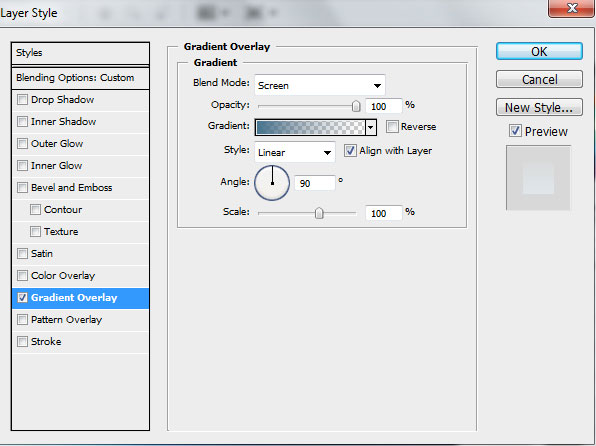
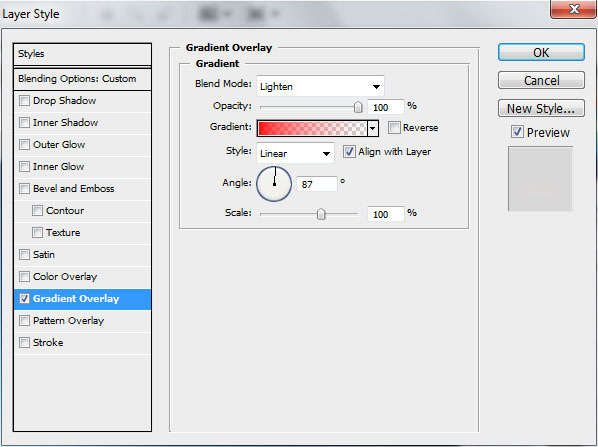
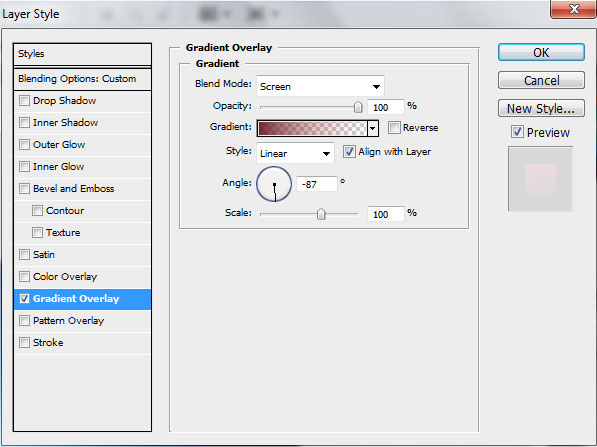
Set Fill to 0% for this layer and click Add a layer style icon from bottom part of the Layers panel to select Gradient Overlay:
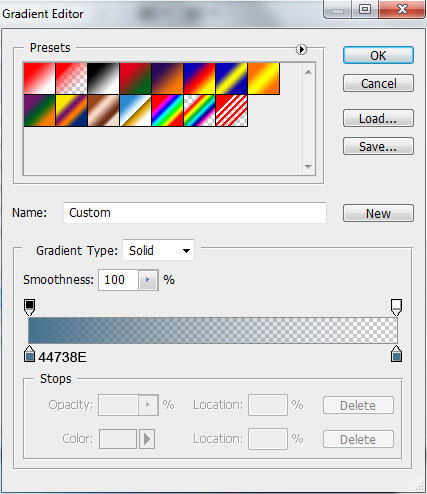
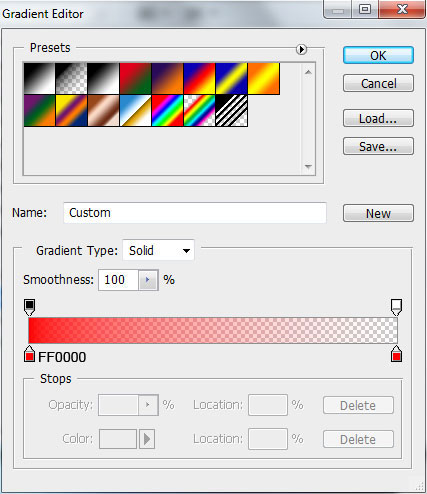
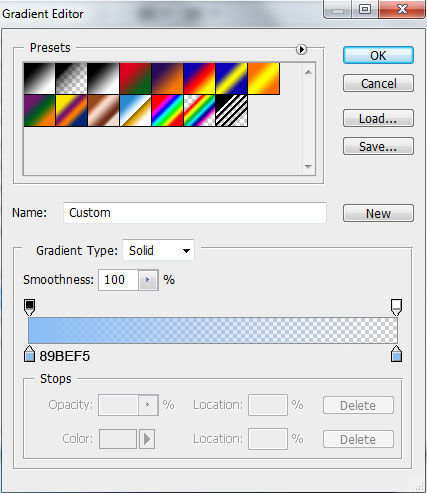
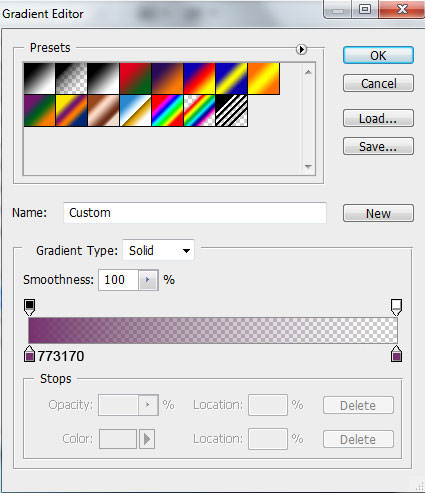
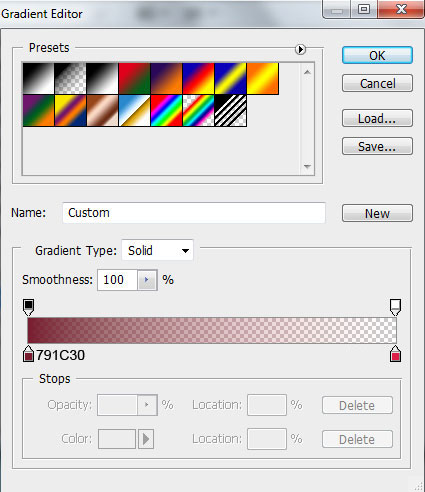
Click in the color bar to open the Gradient Editor and set the color stops as shown. Click OK to close the Gradient Editor dialog box.
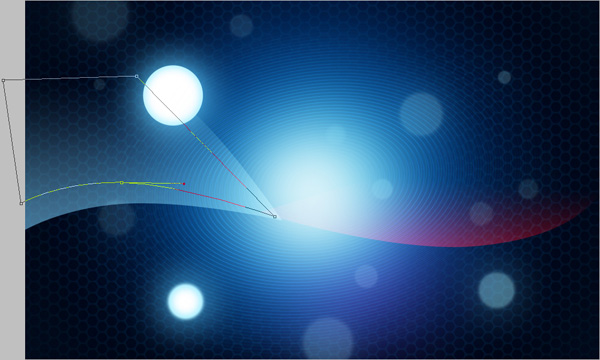
We’ve got the next gradient on the shape:

Draw another shape
Set Fill to 0% and go to Layer Style >Gradient Overlay
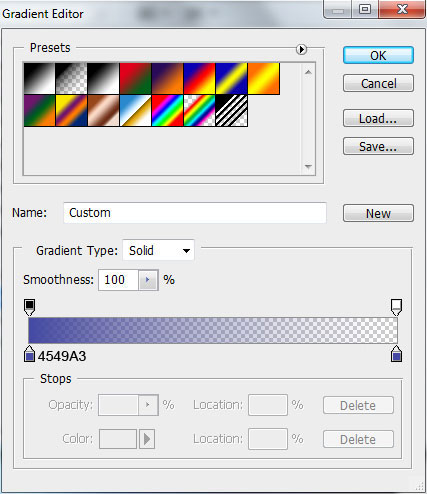
Open the Gradient Editor and set the color stops as shown. Click OK to close the Gradient Editor dialog box.
We’ve got the next effect:

Draw another shape:
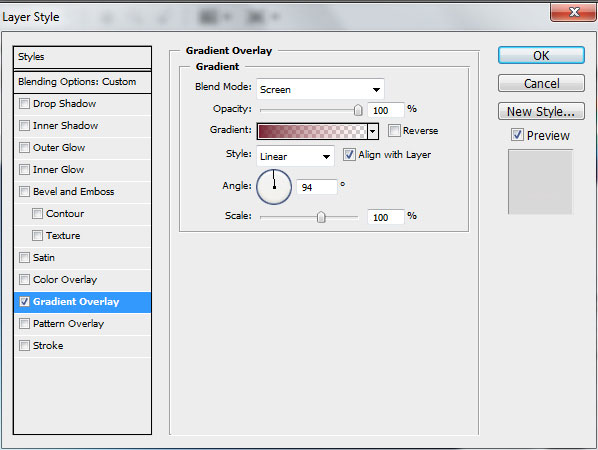
Set Fill to 0% and click Add a layer style icon from bottom part of the Layers panel to select Gradient Overlay:
Open the Gradient Editor and set the color stops as shown. Click OK to close the Gradient Editor dialog box.
We’ve got the next result:

Represent another shape using Pen Tool (P)

Set Fill to 0% and go to Layer Style>Gradient Overlay

Open the Gradient Editor and set the color stops as shown.
We’ve got the next result:

Draw another shape:
Set Fill to 0% and click Add a layer style icon from bottom part of the Layers panel to select Gradient Overlay:
Click in the color bar to open the Gradient Editor and set the color stops as shown. Click OK to close the Gradient Editor dialog box.
We’ve got the next gradient on the shape:

Represent another shape:
Set Fill to 0% in Layers panel, add Layer Style>Gradient Overlay
Open the Gradient Editor and set the color stops as shown. Click OK to close the Gradient Editor dialog box.

We’ve got the next result:

Represent another shape on the right part
Set Fill to 0% for this layer and click Add a layer style icon from bottom part of the Layers panel to select Gradient Overlay:
Click in the color bar to open the Gradient Editor and set the color stops as shown. Click OK to close the Gradient Editor dialog box.
We’ve got the next effect:

Comments