
How to Create Christmas Greeting Card with colorful stars and baubles in Photoshop CS5
If you want to learn how to create a greeting card for the holiday, then we have an awesome tutorial for you. We will learn how to create an abstract Christmas background using brushes then we’ll create baubles using Ellipse Tool and Layer Styles in Adobe Photoshop CS5. Layered PSD file included. Let’s get started!
Final Image Preview

Start working by creating a new document (Ctrl+N) in Adobe Photoshop with the size 1920px by 1200px (RGB color mode) at a resolution of 72 pixels/inch. Use the Paint Bucket Tool (G) to fill with #01431F color the new background layer.

Create a new layer and select the Soft Round brush from Brush Tool (B), set Foreground color to #00C962, go to Options bar and set Opacity to 15%.
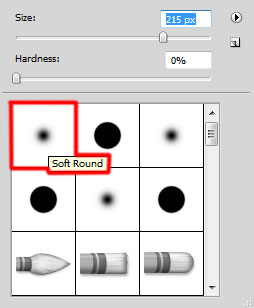

Use this brush to paint the background as shown:

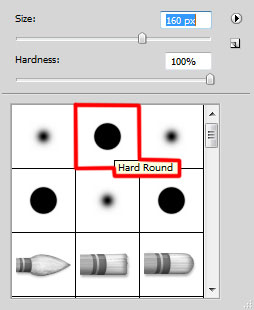
Create a new layer and choose the Hard Round brush.

Use this brush to represent many small circles of different Brush Size and different Opacity value for brush. The circles’ color is #00D086 (brush Opacity – 15%).

On the next new layer we’ll use the earlier mentioned brush to continue drawing the circles. Their color is #00FFD9 (brush Opacity – 15%). Draw the circles using different Brush Size and different Opacity value for brush.

Set Fill to 47% for this layer and change the Blending mode to Lighter Color.

Create a new layer again and select the Hard Round brush to continue representing the circles of different diameters on the background.
Their color is #687F62 (brush Opacity – 80%). Their Opacity value is also different.

Set Fill to 27% for this layer and change the Blending mode to Screen.

Next step we’ll download set of brushes for Adobe Photoshop, named: light_brushes_2. Copy the brushes file to C:\Program Files\Adobe\Adobe Photoshop X\Presets\Brushes folder (Adobe Photoshop X been your version of Photoshop).
Create a new layer and load the downloaded brushes, select the next brushes from light_brushes_2 set:
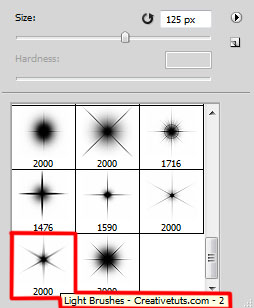
Use this brushes to draw many small stars of white color.

Set the Blending mode for this layer to Hard Mix.

Create a new layer and use on it the downloaded brush to continue representing the small stars of white color too.

On the next new layer we’ll select the Soft Round brush of white color, set Opacity to 15% in Options bar.

Use this brush to paint the background as shown.

Set the Blending mode for this layer to Linear Light.

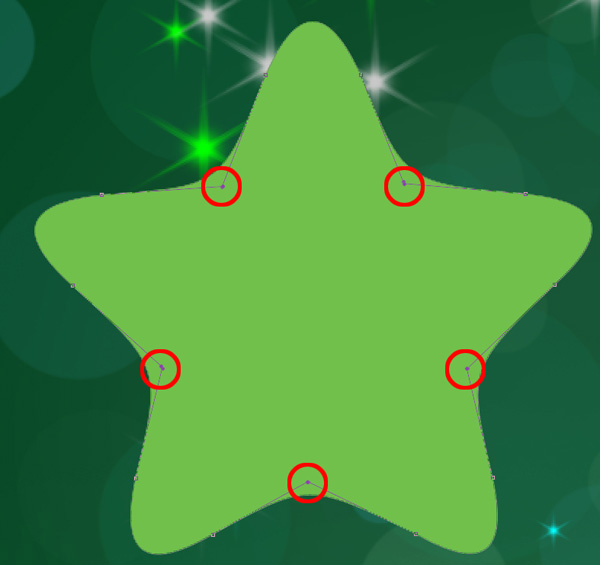
Next we’ll represent a star, select the Polygon Tool (U), go to Options bar and click on Polygon Options. Set Radius – 110px, Indent Sides by – 42% and check the Smooth Corners, Star, Smooth Indents. Also set in Options bar the Sides – 5
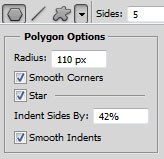
Click and drag to draw the star shape.

Using the Convert Point Tool, we may convert a smooth point to a corner point without direction lines as shown:
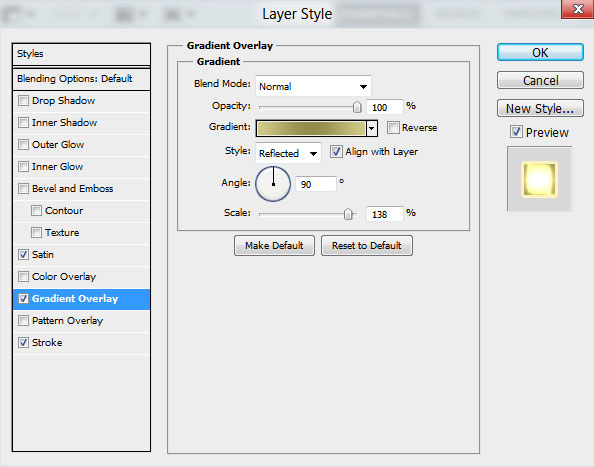
Click on Add a layer style icon from bottom part of the Layers panel and select Gradient Overlay.
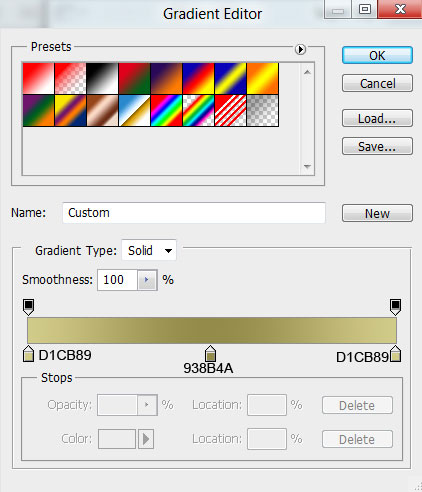
Click in the color bar to open the Gradient Editor and set the color stops as shown. Click OK to close the Gradient Editor dialog box.
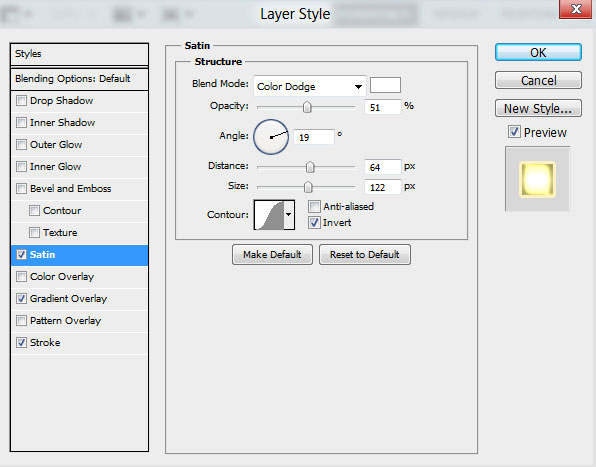
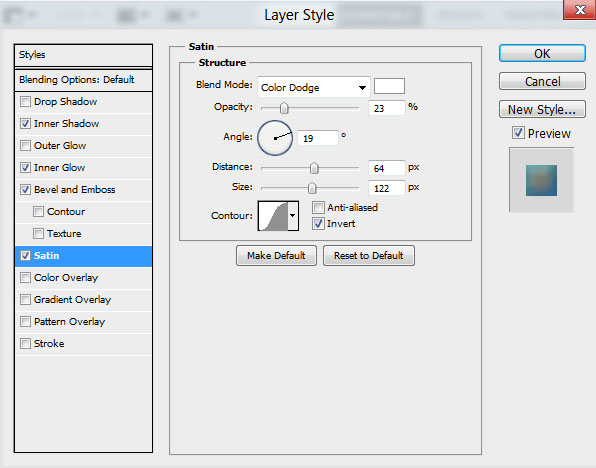
Add Satin:
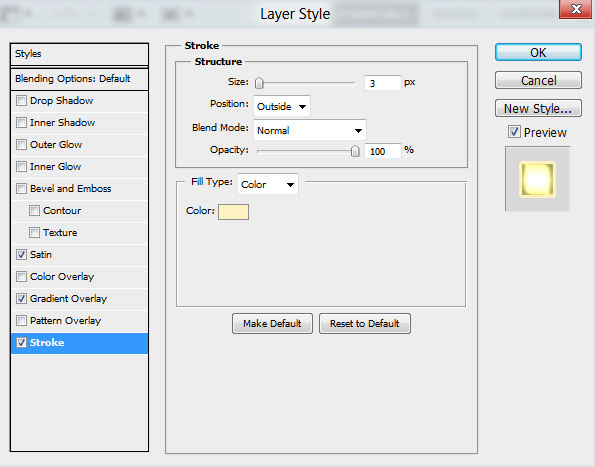
Apply Stroke:
We’ve got the next result:

Make a copy of the recently made layer (removing the Layer’s styles out of the copy). Select after that the Free Transform (Ctrl+T) command, set Maintain Aspect Ratio in Options bar and make smaller the copy’s layer. Its color is #3BCDFE:

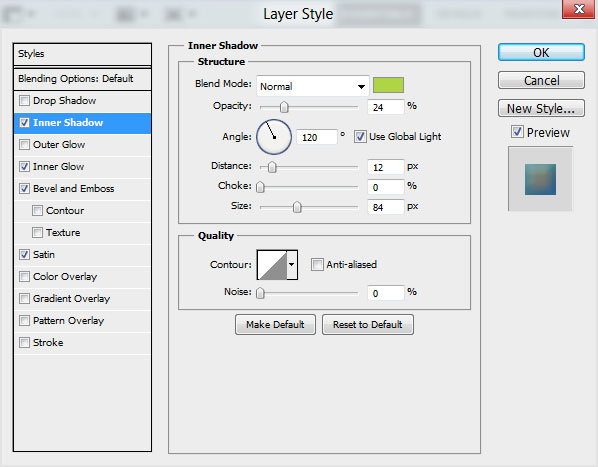
Click on Add a layer style icon from bottom part of the Layers panel and select Inner Shadow.
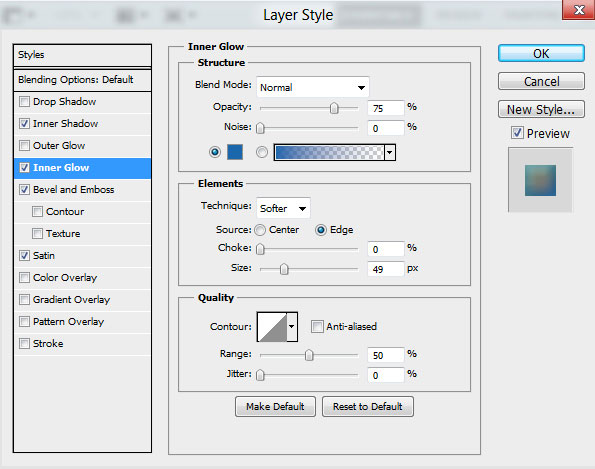
Add Inner Glow:
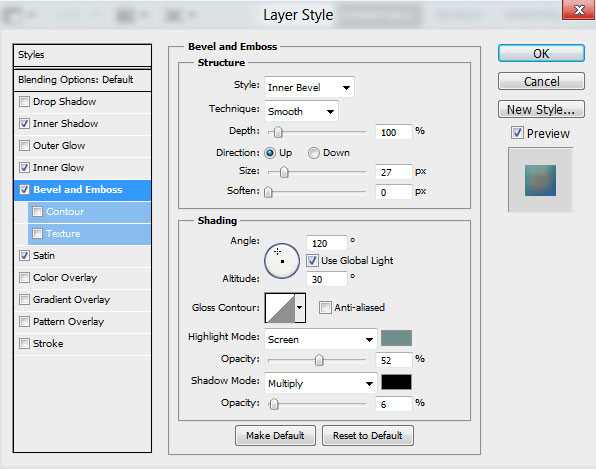
Apply Bevel and Emboss:
Set Satin:
Result:

We’ve got the next colorful star:

Comments