
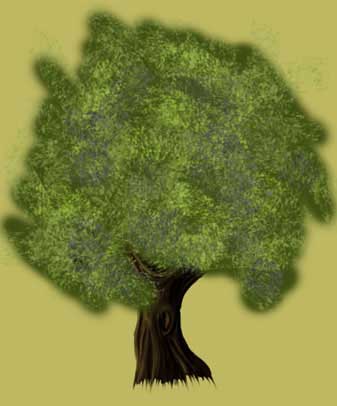
A tree with rich leafage
This tutorial we will learn how to represent a tree with rich leafage.
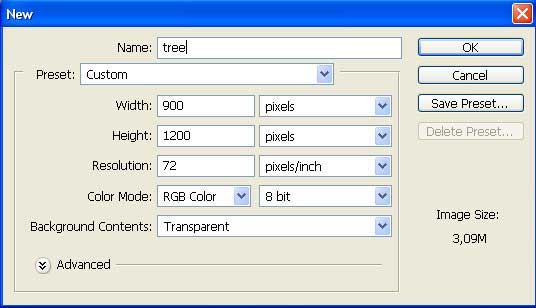
Open a new file: File – New (ctrl+n)
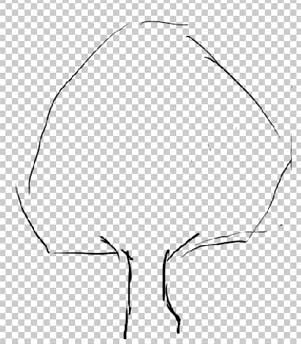
Choose then the Brush Tool of a small size and determine the future tree’s contours.
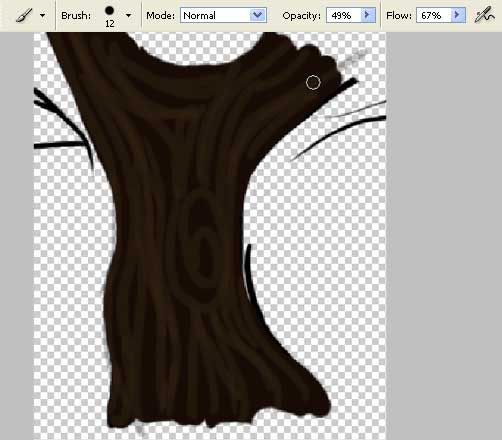
Create next a new layer: Layer – New – Layer and little by little, outline the tree’s rind, applying the Brush Tool. Paint it firstly with the basic color.


Change now the brush’s adjustments and picture out its texture.
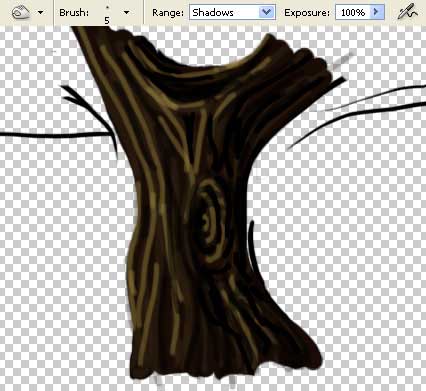
Mark now clearly the rind’s light and its shadow.
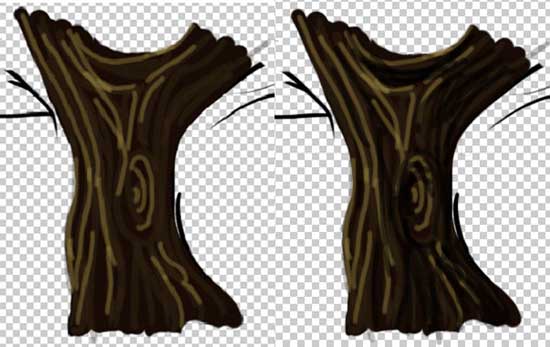
Using the Burn Tool, mark out the most intensive shadows.
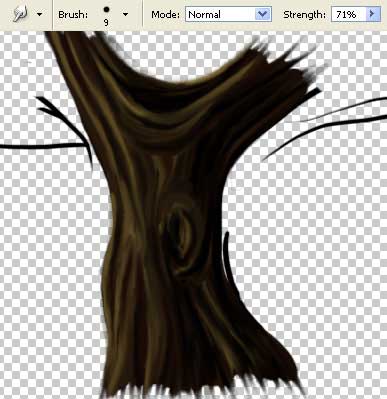
Apply next the Smudge Tool and blur out all the traits, keeping the same texture of the “stripy” rind.
Create then a new layer above this one and get back to the Brush Tool, painting with it the leafage.
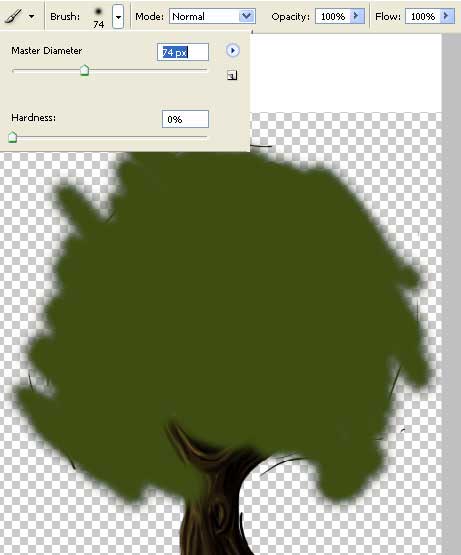
Choose now another brush’s type and paint the leafage in different directions, using several different colors.
 Erase now the layer containing the draft with the Delete Layer button on the Layers window. Insert a new layer on the previous one’s place and paint it with a certain color, using Paint Bucket Tool.
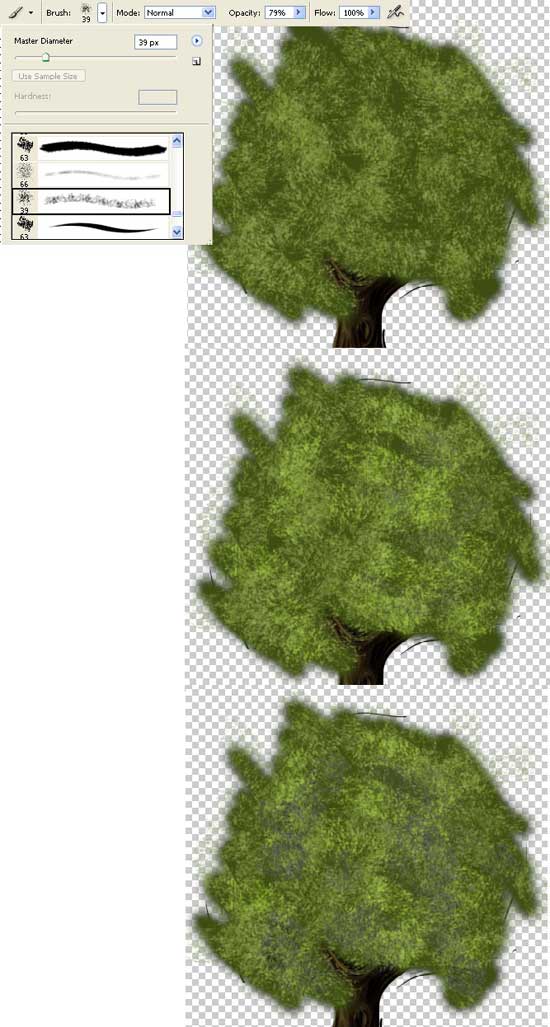
Choose now the Eraser Tool to correct the leafage edges with dots motion.
Applying the Smudge Tool of a big size, correct the lowest part of the tree’s trunk.

Increase a little the trunk’s brightness and contrast with next combination: Image – Adjustments – Brightness/Contrast.

Choose now a brush resembling a leaf and change a little its adjustments in the Brushes window.
Choose two colors also that will be used in representing the leaves.
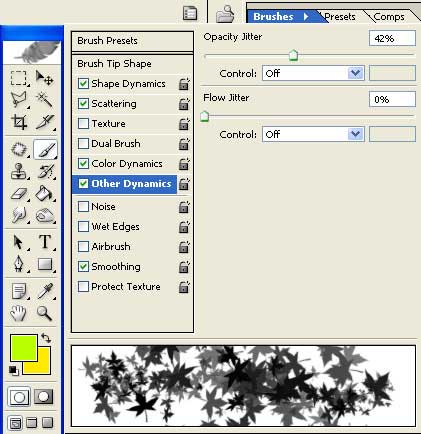
Apply exactly this brush on the leafage.

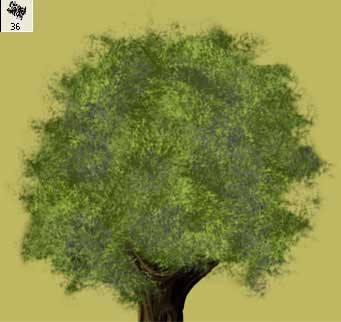
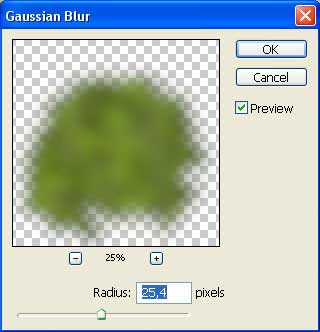
Make a copy with the leafage: Layer – Duplicate Layer and move the copy lower than the basic layer with the leafage. Apply to it a special filter (Filter – Blur – Gaussian Blur).
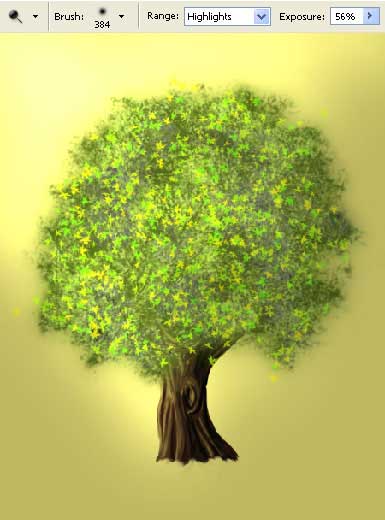
Merge down now all the layers: Layer – Merge Visible (shift+ctrl+e) and create the effect of a shining sun among the leafage. It’s possible to do it with the Dodge Tool.
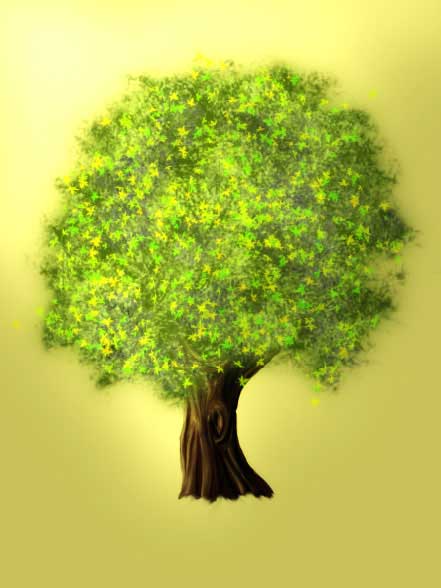
Copy the layer now and blur it out (Gaussian Blur). Change its type on the Soft Light and minimize the Opacity till 73%.
Made by Sigma
Comments