
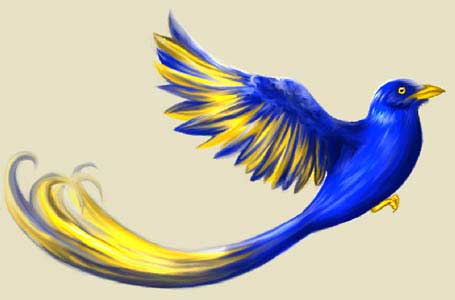
Phoenix Bird Drawing
This task we’ll learn how to picture out a fairy-tale bird.
It’s necessary for this to open a new file: File – New (Ctrl+N).

Choose now the Brush Tool of a small size and firstly outline the bird’s contours.

Open a new layer now (Layer – New – Layer) and select a big size brush to paint out the bird.

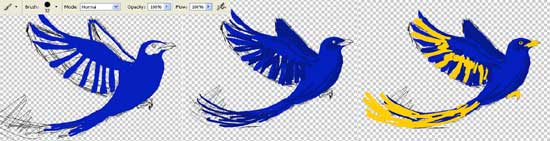
You can erase now the layer with the outlined contours, moving it on the Delete Layer button in the Layers window and create another layer again. Move it lower than the bird’s layer and paint it with the next instrument: Paint Bucket Tool.
Get back to the bird’s layer and choose the dark colors to outline the shadows.
Then apply the white color to represent the light (Brush Tool).
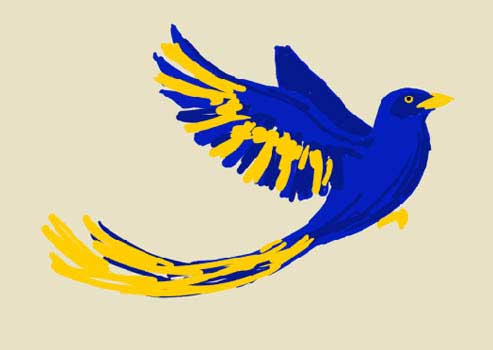
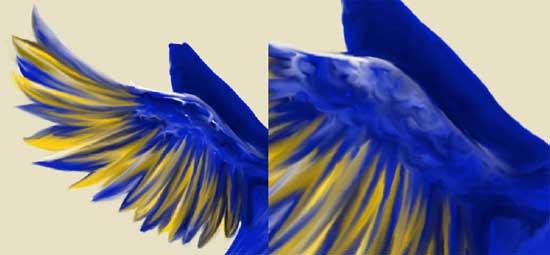
Start to intensive bird’s picturing.
Choose first the Smudge Tool and smooth out the small feathers on the bird’s body.

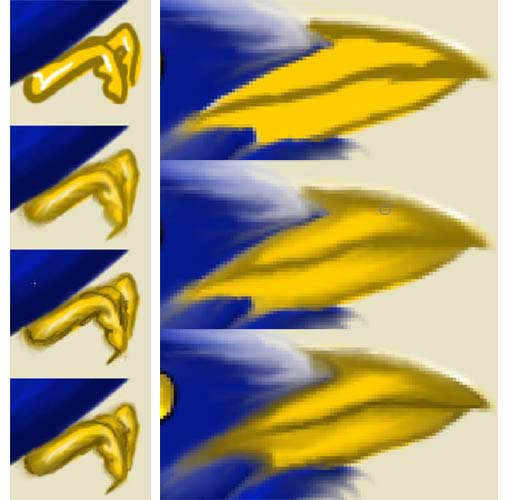
Then choose a brush of a big size and smooth out the bird’s tail and the wings.
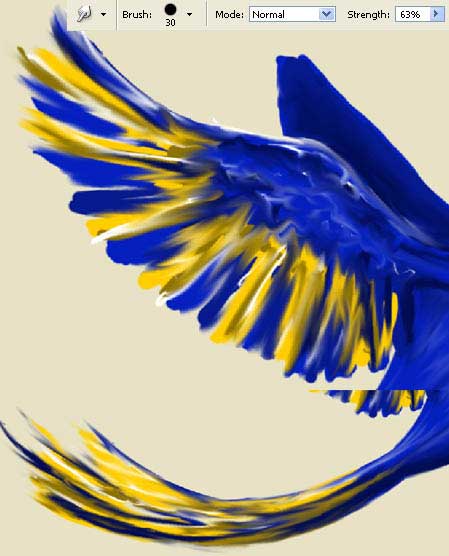
Minimize again the brush’s size and process the wing in a way for the sharp feathers’ edges to be seen very clear. Their paining must be done with zigzag lines. The upper part of the wing must be processed with easy, circular motions.
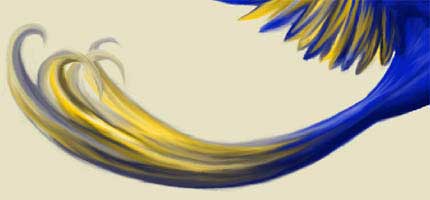
Smooth out the tail too, twisting out its endings.
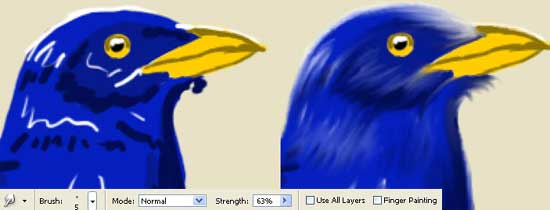
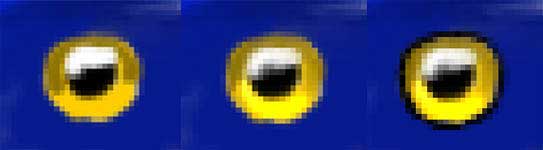
Start working with the eye now. Choose the Smudge Tool to blur out the clear line between the colors. Make the lowest part of the eye look lighter and outline it with the Brush Tool.
The beak and the paws must be processed he same way.
Using the Eraser Tool, delete the second wing because it’s not necessary.
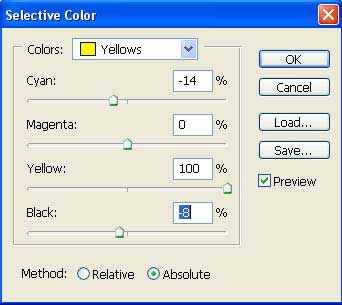
Make the yellow color more intensive now, using next selection: Image – Adjustments – Selective Color.
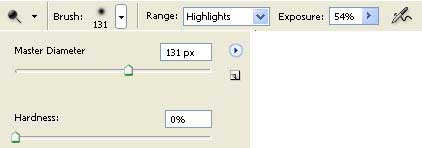
Select the Dodge Tool with the following adjustments:
Insert several decolorizing lines along the wing, tail and the bird’s body.
Paint the background with a darker color (Paint Bucket Tool).
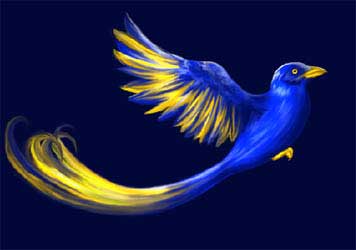
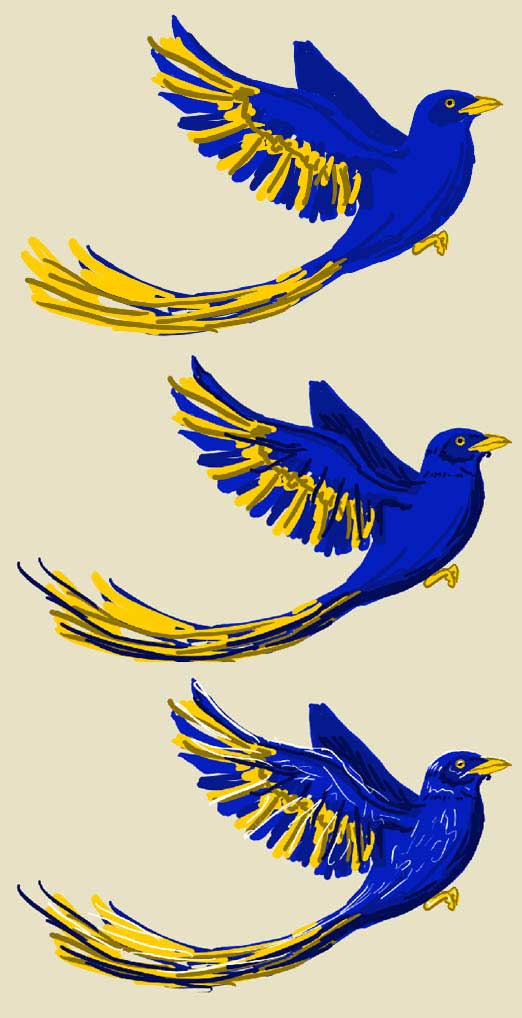
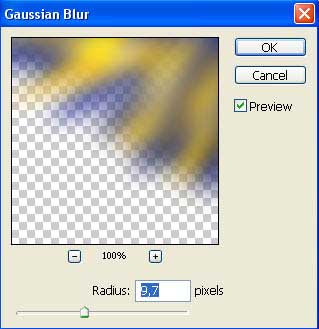
Copy the layer with the bird: Layer – Duplicate Layer and move the copy lower than the basic layer representing the bird. Blur it out applying Filter – Blur – Gaussian Blur.
The last feature includes correcting the contours on the bird’s layer.
Use the Eraser Tool, setting the brush’s Hardness on 0%.
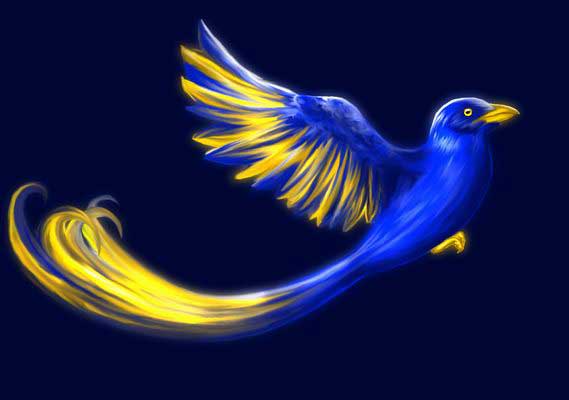
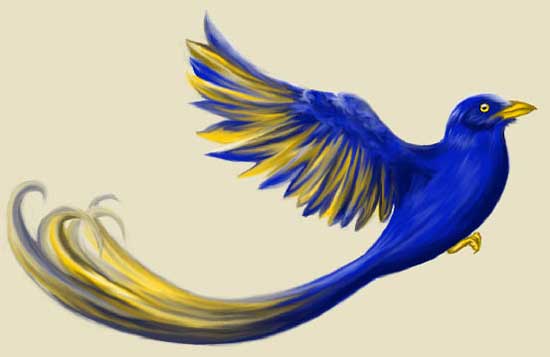
Finished!
Made by Sigma
+ View full size image
Comments