
Summer Rest – Design
The next topic we’ll learn to create an illustration picturing the summer rest by imitating the vector.
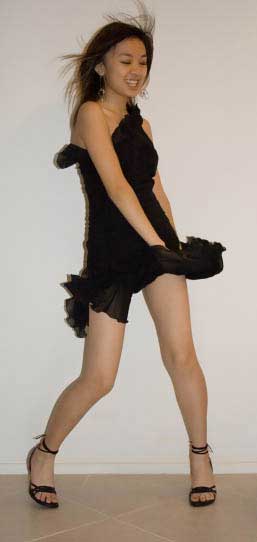
All that you have to do firstly is to open in a new window a picture of a dancing girl: File – Open (ctrl+o).
Open firstly a new file: File – New (ctrl+n).
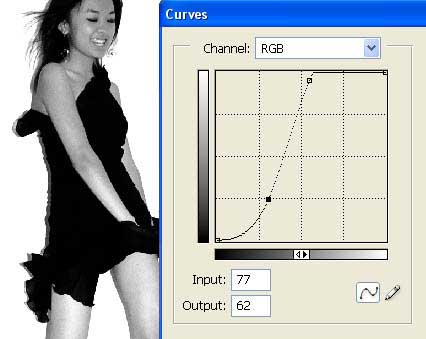
It’s necessary to copy this layer to be possible to work with it: Layer – Duplicate Layer (ctrl+j). The previous layer must be deleted by moving it on the Delete Layer button. Separate after that the girl from the background. You have to decolorize the layer at the beginning with the next command: Image – Adjustments – Desaturate (shift+ctrl+u). Then increase the brightness and the contrast of the layer: Image – Adjustments – Curves (ctrl+m).

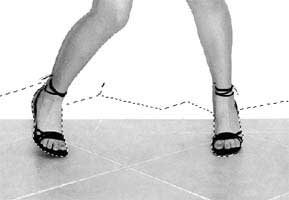
Apply the Polygonal Lasso Tool to mark out the floor the girl is situated on and erase it.
Select the markings (Select – Deselect (ctrl+d)) and make use of the next options: Image – Adjustments – Levels (ctrl+l) to make a maximum contrast between the girl and the background.
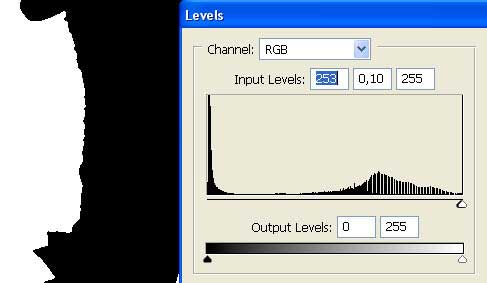
Mark out and delete the background after that with the Magic Wand Tool (10px). In the end all that must remain is the girl’s figure.

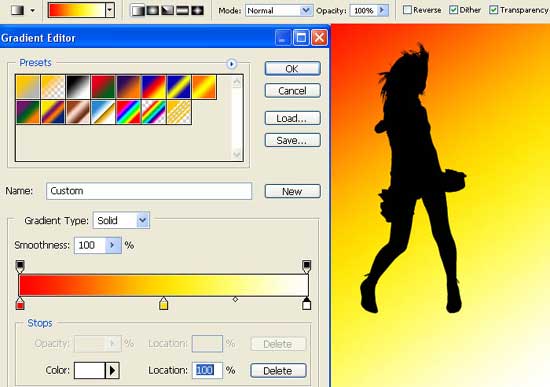
Increase now the size of the ground with the Crop Tool. Create a new layer now (Layer – New – Layer) and place it under the girl’s layer. Paint it with the background’s color, choosing the Gradient Tool.
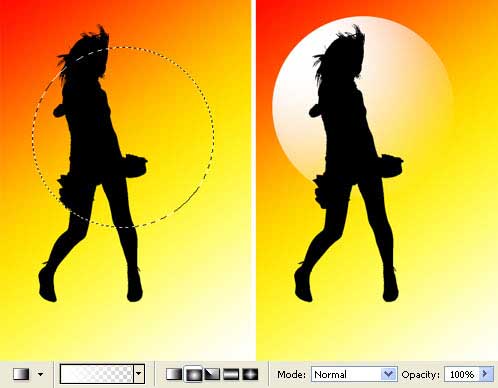
Choose the next tool (Elliptical Marquee Tool and Gradient Tool) to create a white sphere, behind the girl.
Take the next instruments (Pen Tool and Gradient Tool) to imitate the waves on a new layer:

Applying the same Pen Tool it’s possible to draw several exotic flowers too.

Picture now on a new layer with the same instrument a small flower. After that you must copy this layer many times (ctrl+j) and use the flowers for making any kind of composition. Combine all the layers then containing the flowers’ layers by applying next selection: Layer – Merge Down (ctrl+e).

Represent the rays now on a new layer, above the background. Use for this the Pen Tool. You have to minimize the Opacity till 20% also.
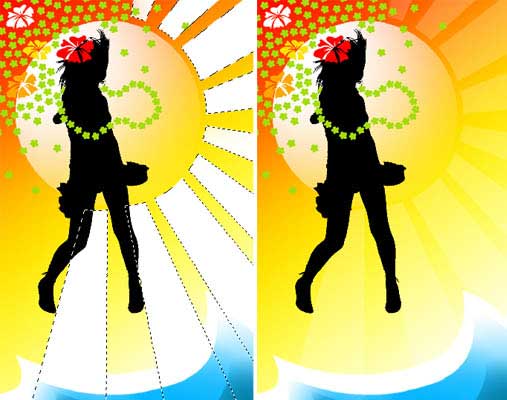
Copy the girl’s layer and invert the copy’s colors, using the next option: Image – Adjustments – Invert (ctrl+i). Place the copy lower than the basic layer and move it a little with the Move Tool.

Merge down all the layers now: Layer – Merge Visible (shift+ctrl+e) and insert the illustration in a frame, making use of the next instruments: Crop Tool and Rectangular Tool.

Add several more flowers.

Choose now the Brush Tool with the following adjustments:
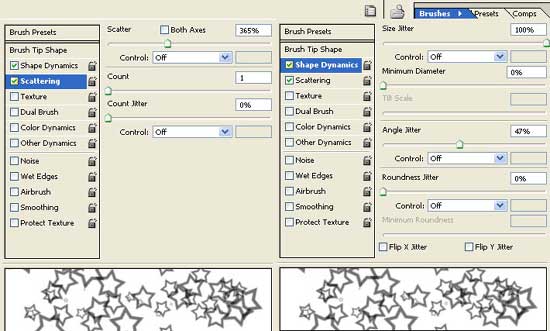
Insert on the picture several stars also:

The illustration is finished!
Made by Sigma
Comments