
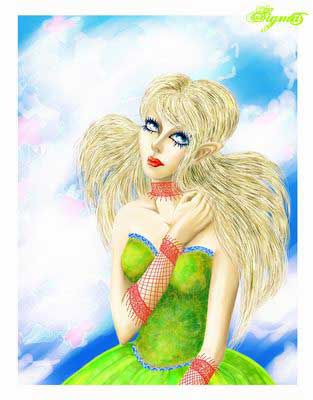
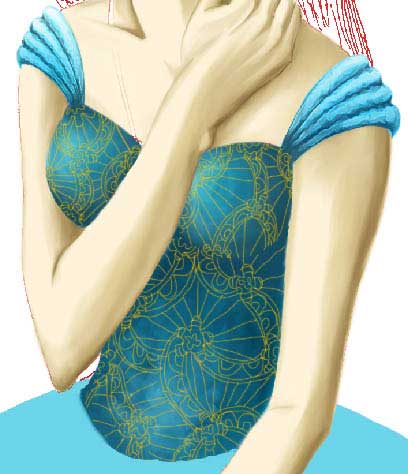
Elf-Girl Picture
In this tutorial we’ll see how is it possible to represent an elf – girl, giving texture to the textile and picture the ornaments.
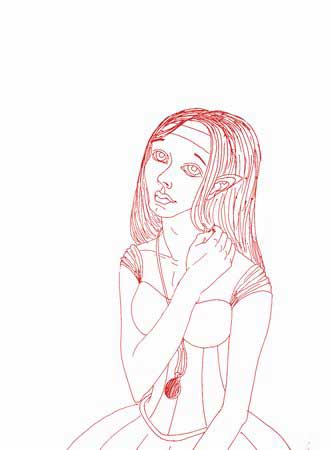
First we need to open in a new window the already scanned contours: File – Open (ctrl+o)
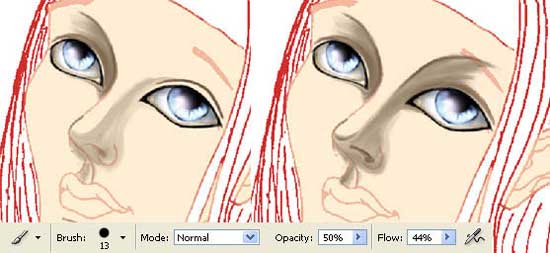
Then create a new layer with the fast button in the layers window or simply apply the next command: Layer – New – Layer. Colorize the girl’s skin with the basic color, using the Brush Tool. Minimize after that the Opacity of the layer till 70%.

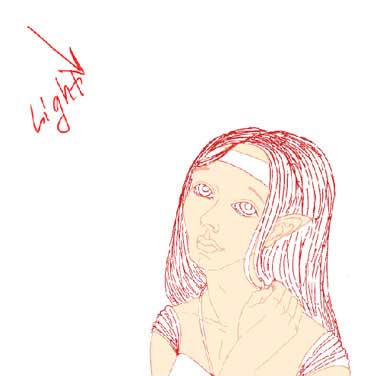
Determine now the light’s direction.
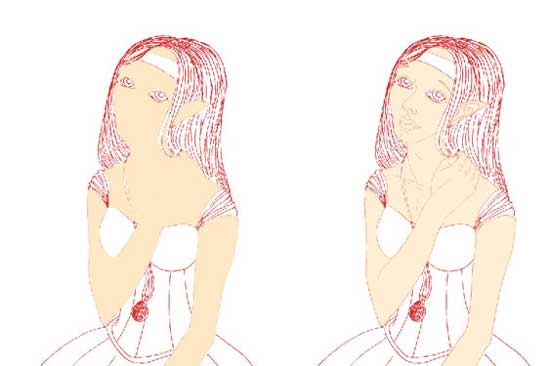
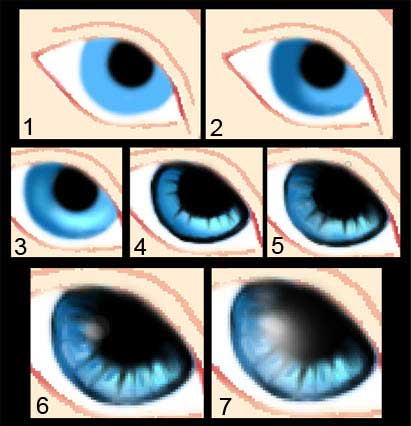
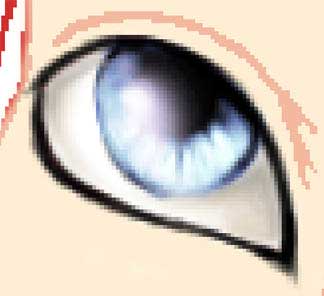
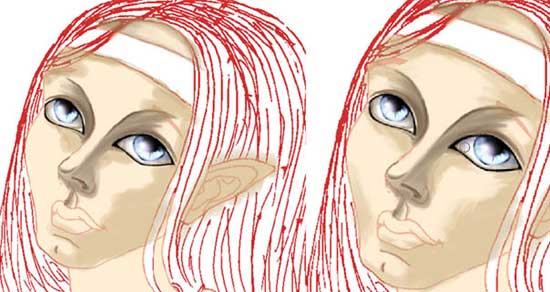
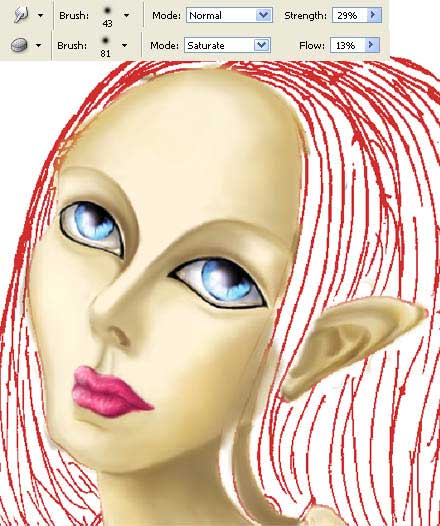
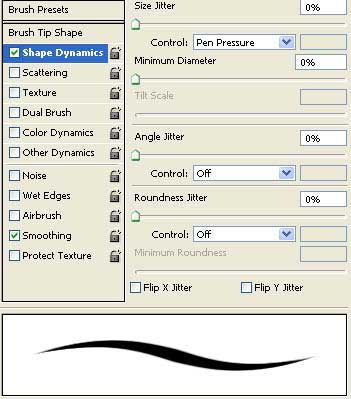
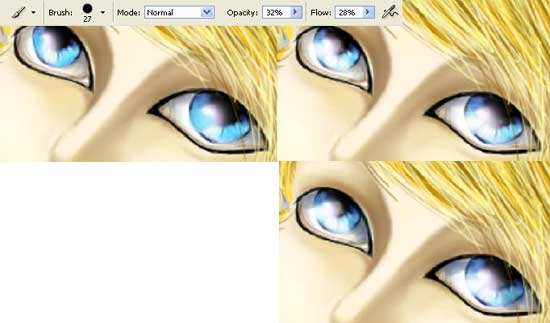
Start representing the eyes (they must be drawn on a new layer, under the skin’s layer). Set for this the brush’s Hardness on 0% and draw the eyes in 4 steps which are indicated below. Blur out a little the lines, making use of the Smudge Tool. Add after that the flare in the girl’s eyes, by using a big size brush of white color. Don’t forget to apply the adjustments for the brush that are demonstrated in the next table.

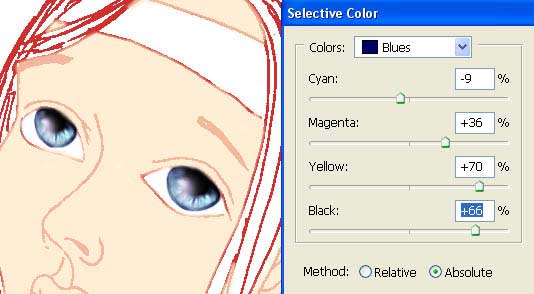
Change a little the eyes’ color by applying this selection: Image – Adjustments – Selective Color.
Copy the eyes’ layer (Layer – Duplicate Layer). Then we should change the layer’s type on Screen.
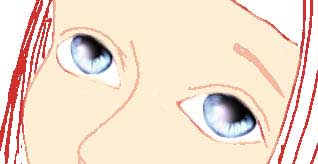
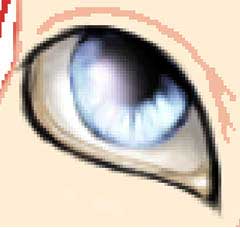
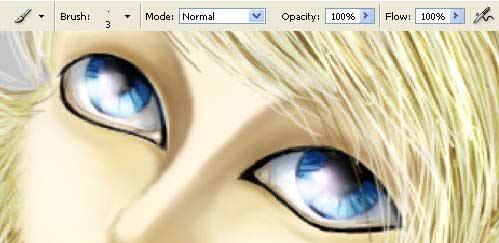
Get back to the initial brush’s adjustments on 100% and select a brush of small size to outline the eyes on the skin’s layer.
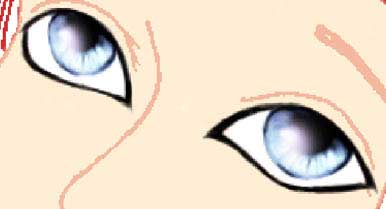
Move on the eyes’ layer to set the brush’s Hardness on 0%. Represent the shadow now on the white of the eye.
Make the eye look more natural by representing also the thickness of the skin and the eye’s corner.
Return to the skin’s layer and select a darker color for representing the shadows. First picture the shadows around the eyes with the usual Brush Tool and blur them out with the Smudge Tool.
Insert after that two more shadows’ nuances (lighter one and darker one than the previous shadows). Use the same two instruments applied earlier.
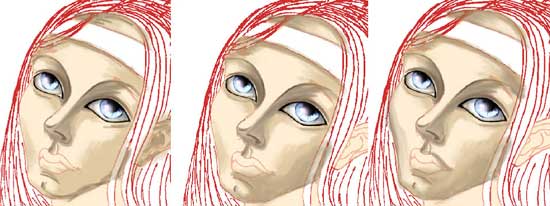
Using the same method, it’s possible to give volume to the girl’s body.
The layer’s Opacity must be 100% again. Choose the Brush Tool (with the same adjustments applied in the eyes’ processing) and represent the skin smoother than it is with accurate, blurring motions which must repeat the shape of the pictured volume.
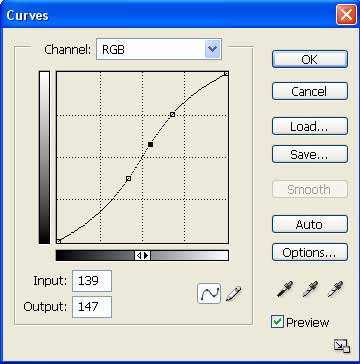
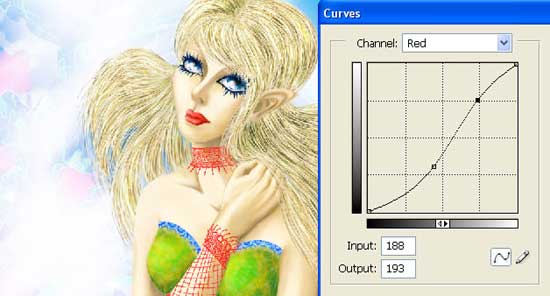
The image that we’ve got looks dimly, that is why we must correct the brightness and the contrast, making use of the next command: Image – Adjustments – Curves (ctrl+m).
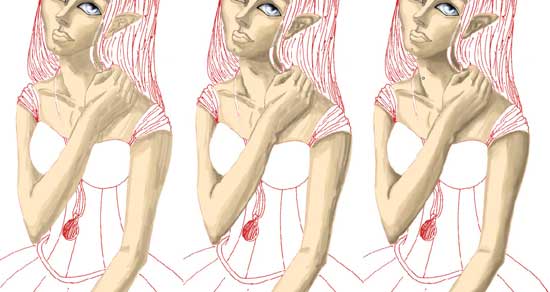
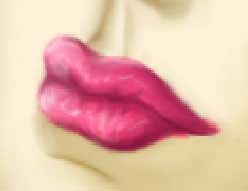
Make use of the Brush Tool (100% adjustments) and the Smudge Tool to represent the girl’s lips on the skin’s layer.
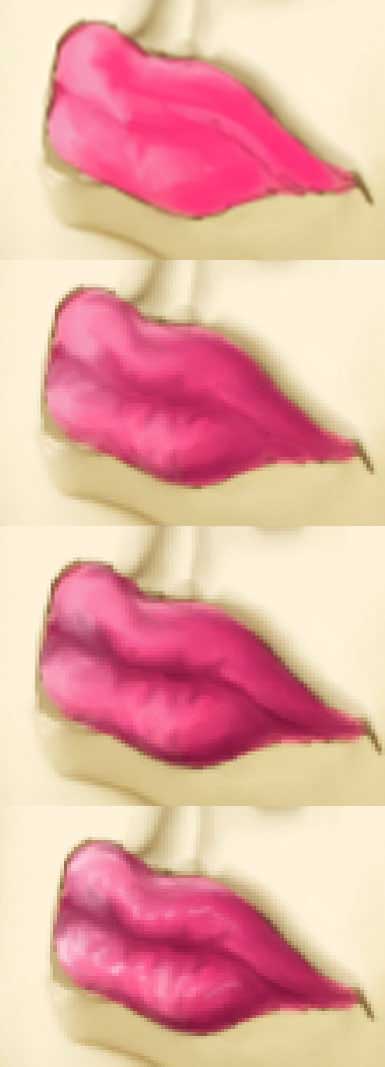
Select the Brush Tool to correct the skin around the lips.
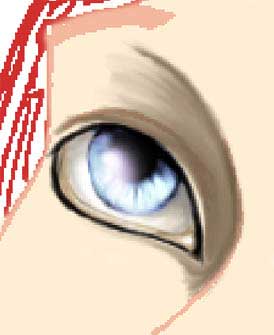
As you can see the girl’s eyes need to look brighter too. Create a new layer above the eyes and add more color on it (Brush Tool). Smudge the edges and change the layer’s type on Linear Burn. Merge down the basic layer with eyes’ one: Layer – Merge Down (ctrl+e).
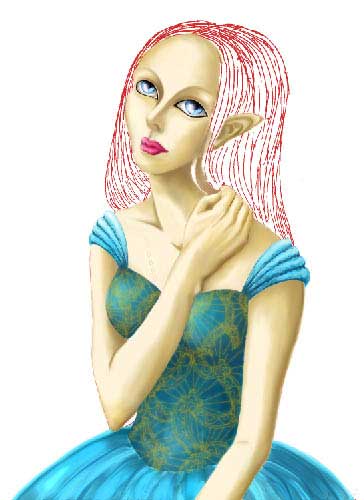
On a new layer, above the skin’s layer we should represent the clothes (preliminary minimizing the layer’s Opacity till 70%).
Give back the Opacity of 100% to the layer and start representing the shadows on the sleeves using the Brush Tool and smudging the colors with the usual instrument (Smudge Tool).
Applying the Burn Tool and the Dodge Tool, it’s possible to insert more shadow’s and light’s facets. Don’t forget to blur them out too.

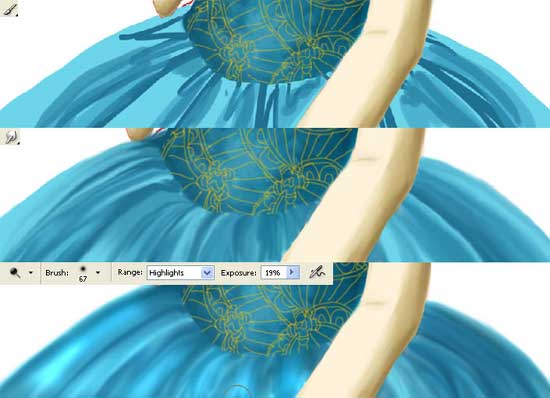
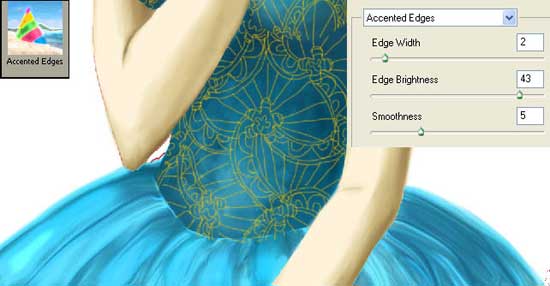
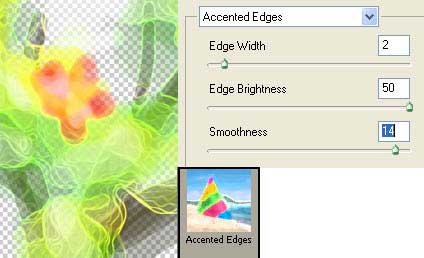
Represent the same way the second sleeve, but make it darker because it is situated farther from the light. Both sleeves need to be processed with Filter – Brush Strokes – Accented Edges. But fist mark them out with the Polygonal Lasso Tool.

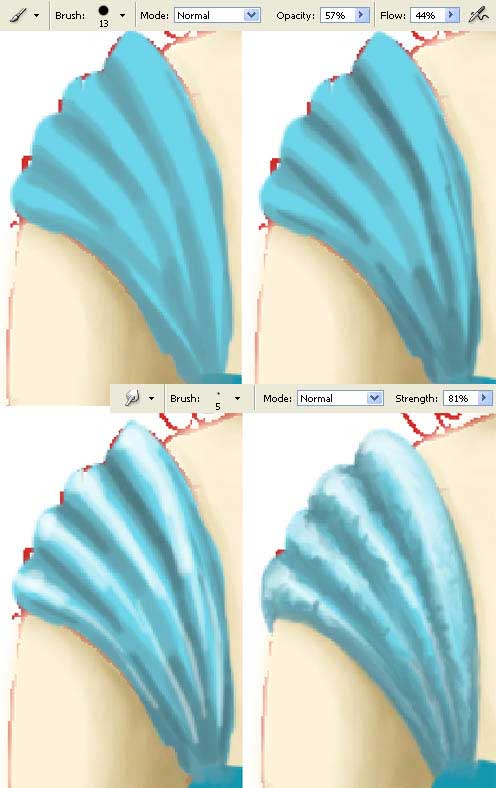
We need to work now with the bodice. Introduce the shadows and the light (Brush Tool).
Smudge out the pictured places (Smudge Tool) and accentuate the deepest shadows with the Brush Tool.
Represent the same way the lowest part of the bodice.
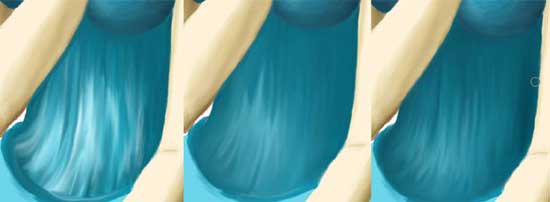
Insert on the bodice now the textile texture. Using the Smudge Tool spread the color on different bodice’s parts.
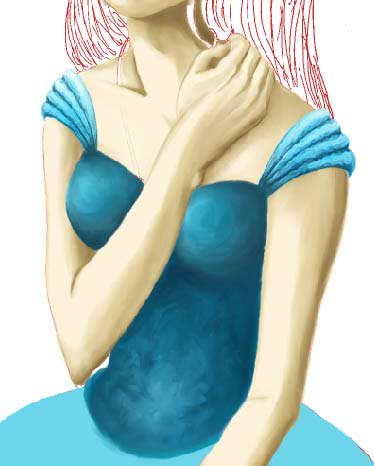
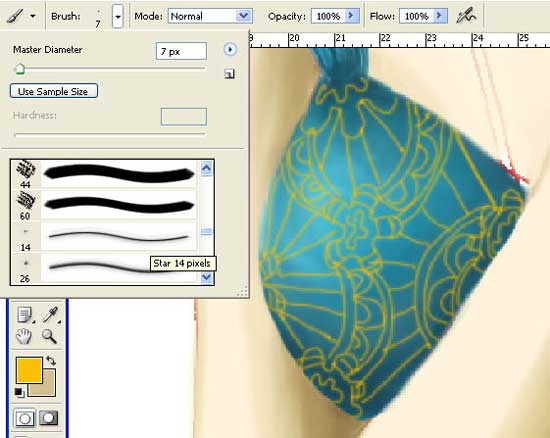
Create a new layer above the bodice now (Layer – New Layer). Picture some ornaments on it by choosing the Brush Tool with a star shape.
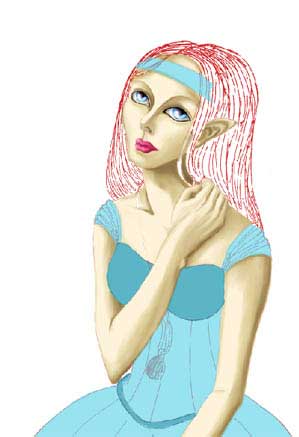
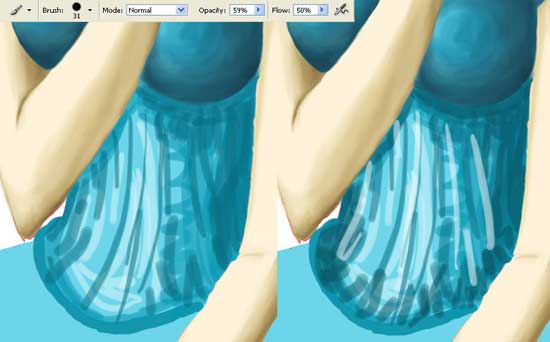
Applying the usual Brush Tool and the Smudge Tool, the skirt will look more voluminous. Select the Dodge Tool after that to decolorize the lightest places on the dress.
Apply the filter too: Filter – Brush Strokes – Accented Edges.
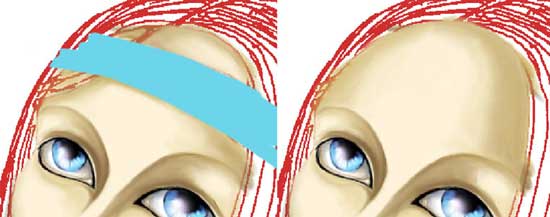
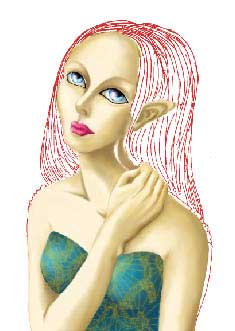
Make a copy of the ornaments’ layer and blur it out (Filter – Blur – Gaussian Blur) 7, 5 px, just to give the ornament a luminescent effect. As we can see, the band on the girl’s head is not necessary, that’s why it must be deleted with the Eraser Tool. After that, select again the Brush Tool and the Smudge Tool to represent the skin on the band’s place.
Make the skin look lighter on those places that are a little darker. Use for this the Sponge Tool with the Mode Saturate. Now we should smooth out the transitions between the colors with the Smudge Tool.
I decided that the sleeves should be erased too, applying the same method we used in the band’s case.
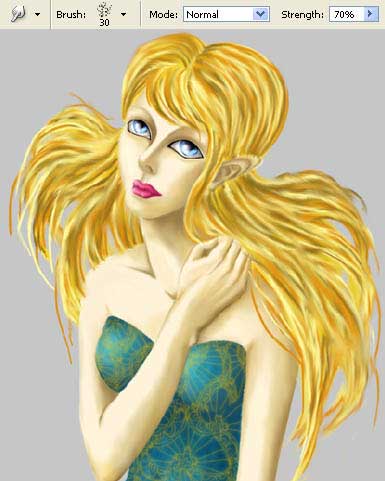
Erase now the layer containing the contours. On a new layer above the skin’s one, we should represent the girl’s hair. Use for this the Brush Tool. Create the background’s layer also, lower than all the layers. Paint it in a grey color with the Paint Bucket Tool.
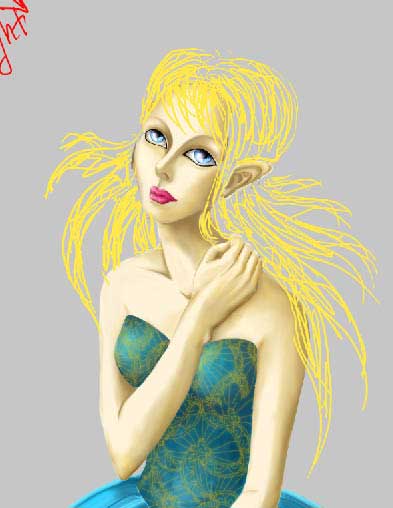
Further we need to apply the Brush Tool and the Eraser Tool to represent the hair.
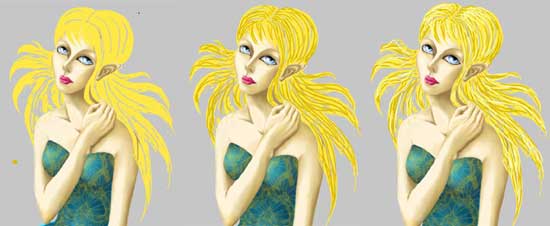
Choose the Burn Tool and the Dodge Tool to deepen the shadow and accentuate the light.
Choose after that the Smudge Tool and smooth out the hair’s locks.
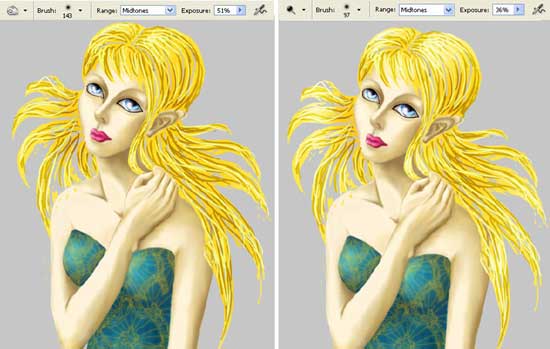
Set now the next adjustments that you can see in the table for the Brush Tool.
Introduce several other nuances on the girl’s hair with smooth lines of medium thickness.

Blur out the lines again and it’s not necessary to do it extremely accurate.
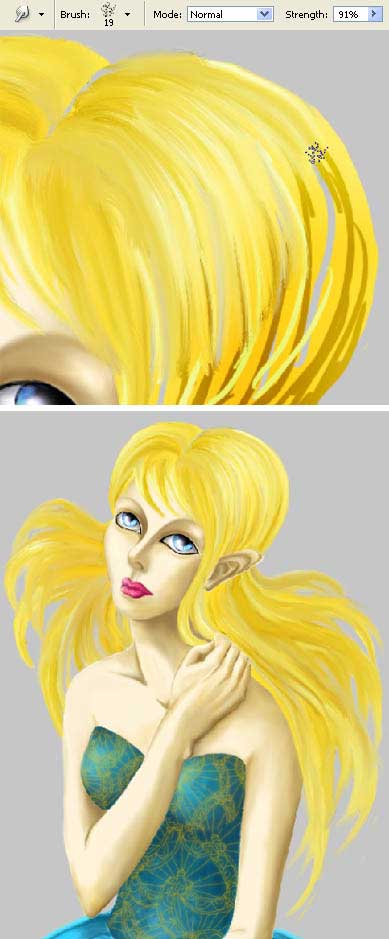
Select now a Brush Tool of 1-3 px and insert on the hair several colors for them to look more lively.
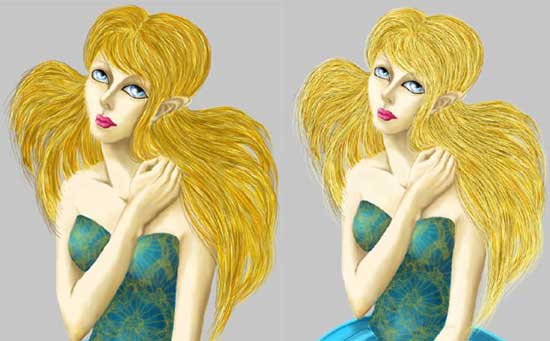
Choose the Dodge Tool to make the hair look lighter.

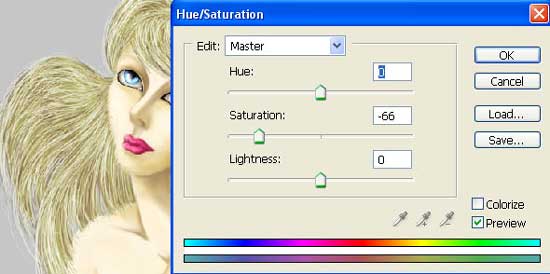
Change finally their color and intensity with Image – Adjustments – Hue/Saturation (ctrl+u) and Image – Adjustments – Curves (ctrl+m).

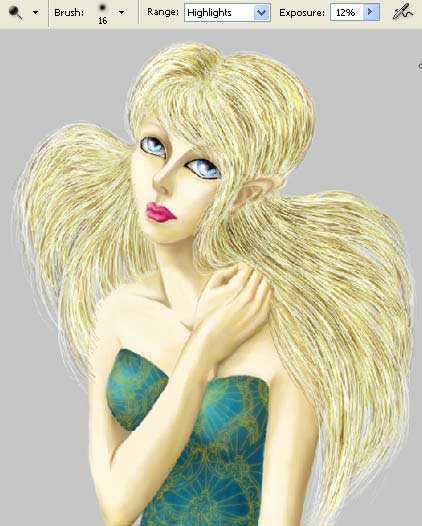
Make use of the Eraser Tool now to trim the hair and insert a little brilliance on them applying the Dodge Tool.
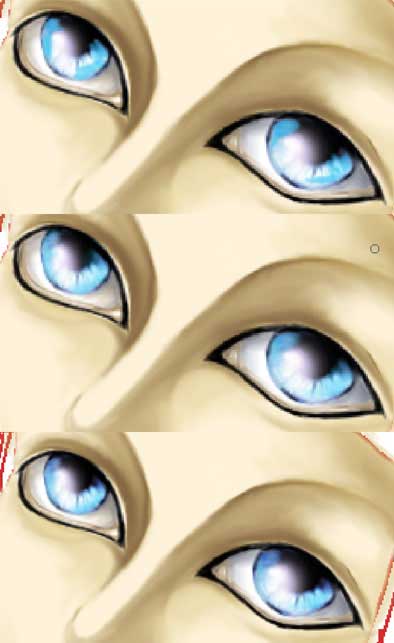
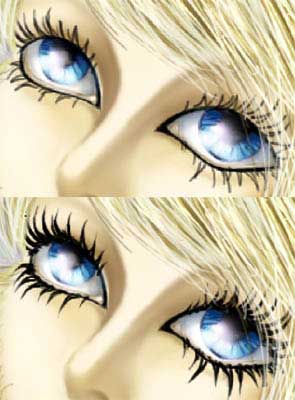
Using the Brush Tool, it’s possible to make the eyes look bluer with a kind of flare in them. Insert the shadows also deeper on the whites of the eyes.
Next we need to picture on the eye’s iris several stripes of darker color.
Choose the Brush Tool and the Smudge Tool to represent the eyelids. We need them to look darker, that is why we have to copy the layer containing the eyelids several times (ctrl+j).
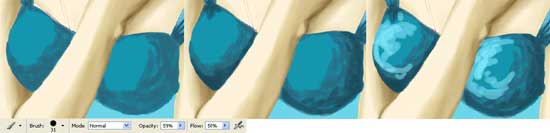
Use the same Brush Tool to introduce the mount on the dress’s bodice, by choosing several colors and changing the brush’s size.
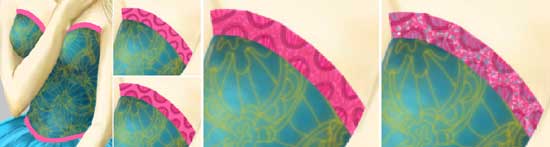
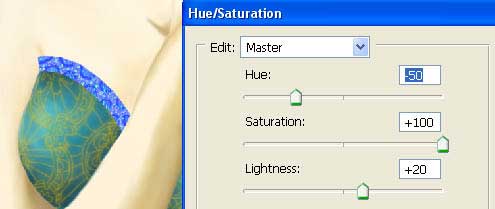
Change its color (ctrl+u).
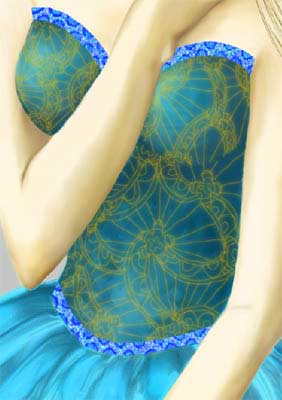
Copy after that with the Eyedropper Tool the color of the ornament on the bodice. Change the brush’s adjustments and apply the pointing motions to hide the tape’s edges situated on the bodice.
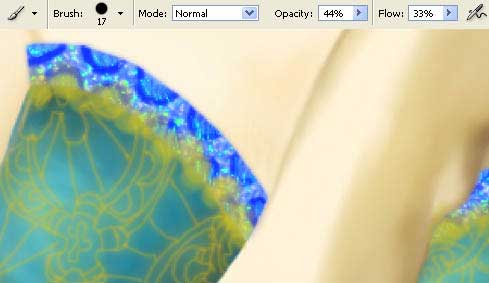
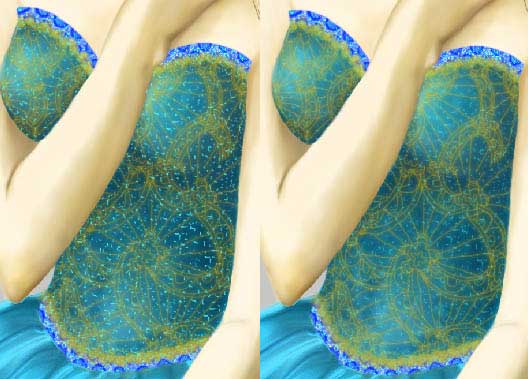
Give back 100% for the Brush Tool‘s adjustments, choose after that a small brush and introduce sparkles on the bodice. Make a copy of this layer and blur it out with Gaussian Blur. The Opacity of the copy’s layer must be of 50%. The Opacity of the basic layer should be 90%.
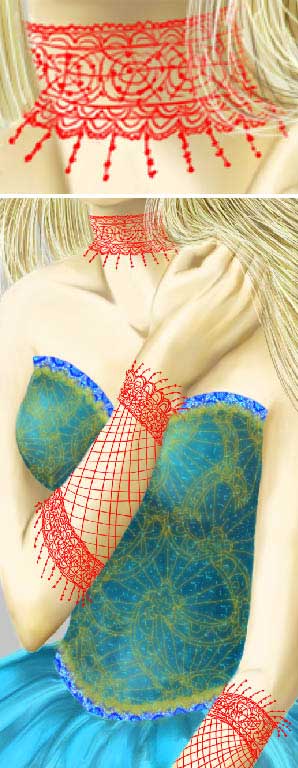
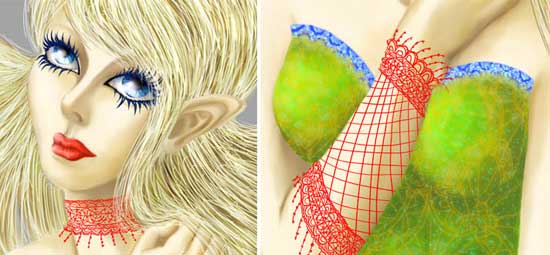
Now we have to draw the lace on the girl’s neck and on her arms (the brush’s size is 1-2 px). Apply the filter for the drawn (Filter – Sharpen – Sharpen).
Change now the dress’s color, using Image – Adjustments – Selective Color.

Applying the same command, we should change the lips’ color, the color of the eyelids and the color of the tape.
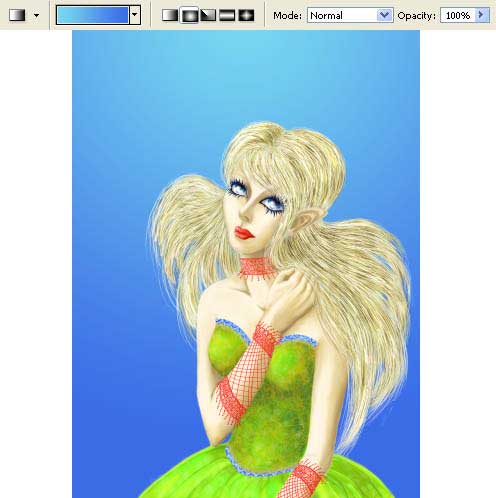
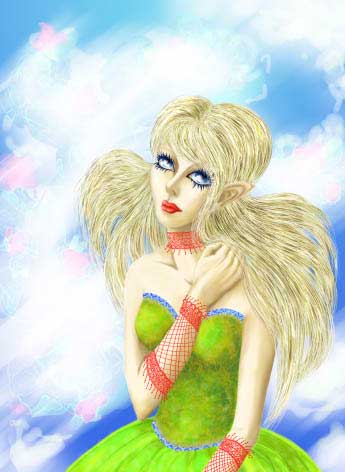
We need to change the background by using the Gradient Tool.
Selecting the appropriate brush’s type, add on a new layer, above the background the clouds. (We won’t outline the background very intensively just not to distract the attention from the girl).
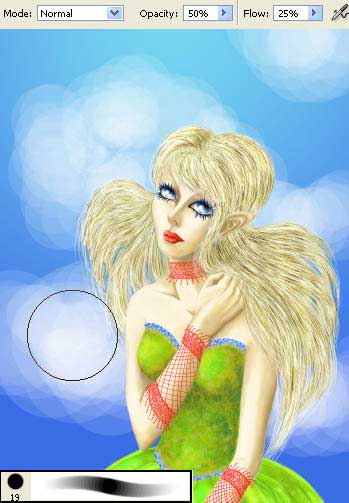
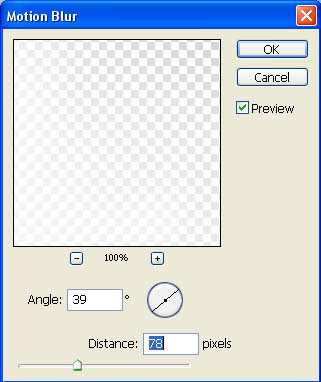
Blur them out on the given direction with next selection: Filter – Blur – Motion Blur.
On a new layer, above the clouds, we should insert now a flowering tree.
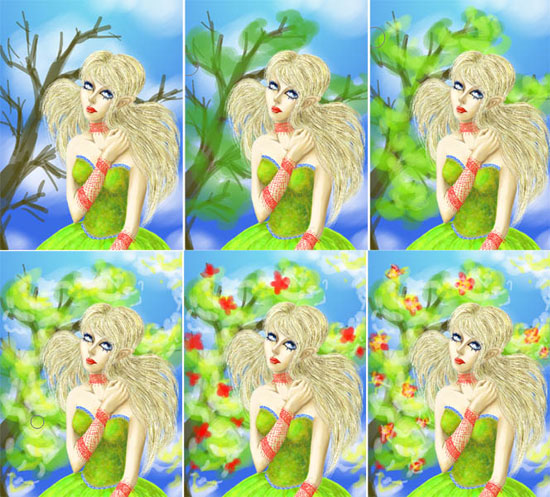
Apply to this layer the filter we used when processing the girl’s skirt (Filter – Brush Strokes – Accented Edges).
Change the layer’s type on Screen and merge down all the layers after that: Layer – Merge Visible (shift+ctrl+e).
Correct a little the colors, making use of the next option: Image – Adjustments – Curves (ctrl+m) and if that is necessary, apply also Levels (ctrl+l).
The last feature includes inserting the illustration in a frame and that is possible to do with the next instruments: Crop Tool and Rectangular Tool. After this operation use again Filter – Sharpen – Sharpen.
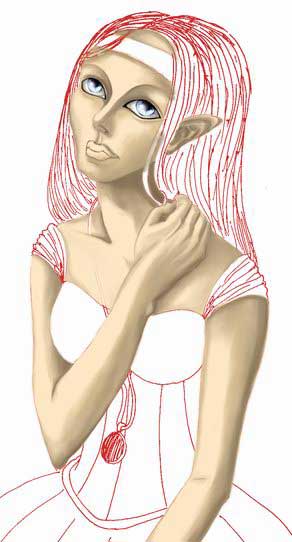
The illustration is finished!
Made by Sigma
Comments