
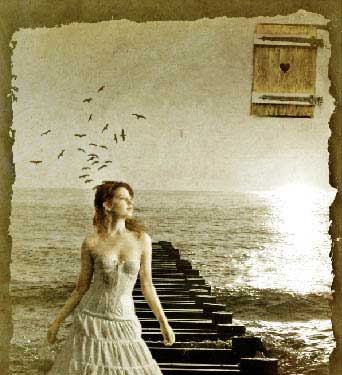
Sand Story Photo Effect
I’ll show you how to make a model’s coiffure look more lively, to tone the picture and I’ll show you also one method of styling the picture and make it look older.
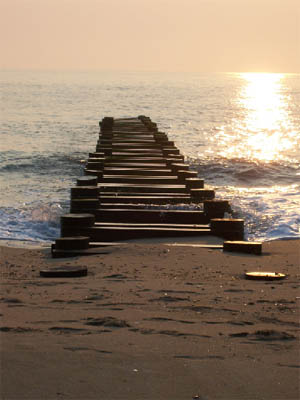
Open the picture of an uninhabited beach: File – Open (ctrl+o)
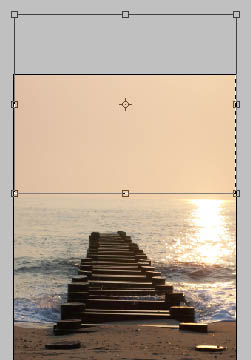
Copy the layer just to be easier to work with it: Layer – Duplicate Layer (ctrl+j). Erase the previous layer. Increase the picture’s highness, applying the Crop Tool. Mark out after that a sky’s part with Rectangular Marquee Tool and stretch it out, making use of next command: Edit – Free Transform (ctrl+t).
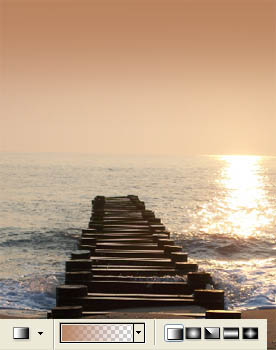
Using the Gradient Tool, dark out the upper part of the sky with the necessary color.

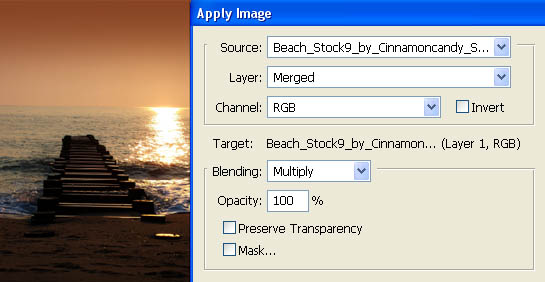
Apply the next selection too: Image – Apply Image.
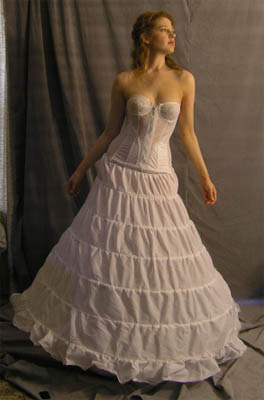
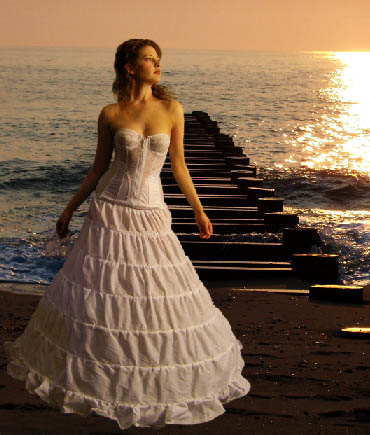
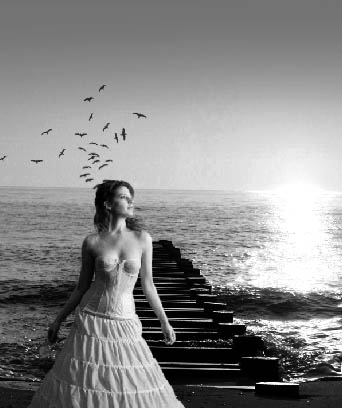
Open in a new window the picture of girl on her entire stature: (ctrl+o).
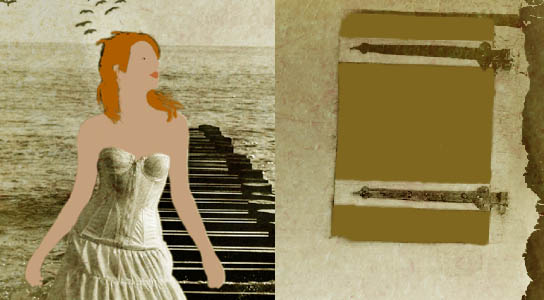
Mark it out with Rectangular Marquee Tool and make a copy of it: Edit – Copy (ctrl+c). Get back to the processed picture and insert it on a new layer: Edit – Paste (ctrl+v). After that you should mark the background along her contours with Polygonal Lasso Tool and erase it with the Delete button on the keyboard. Correct the girl’s stature, selecting Edit – Free Transform (ctrl+t).
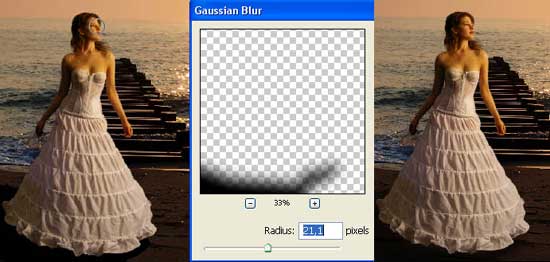
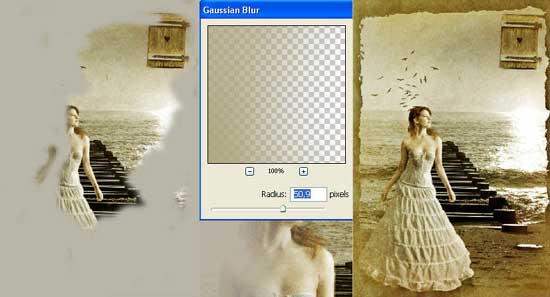
Make the girl’s image’s edges look less sharpen. It’s possible to do that by copying the girl’s layer (ctrl+j). Blur out the lowest layer making use of the next filter: Filter – Blur – Gaussian Blur. Combine both layers: Layer – Merge Down (ctrl+e).
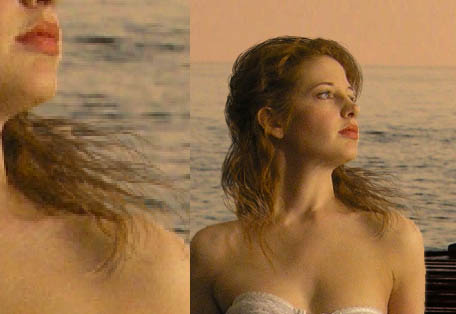
Choose after that the Clone Stamp Tool of 1 px and make several copies of the girl’s hair The mentioned instrument must be used as a brush to draw a little the curled hair.
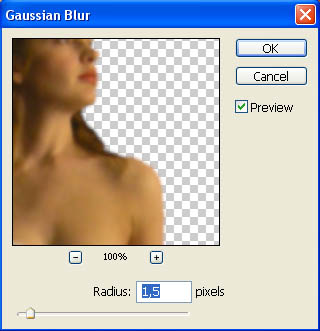
Blur a little the hair, using the Blur Tool with the following adjustments.

Copy one more time the girl’s layer (ctrl+j). Blur it out (Gaussian Blur with the same parameters) and change the layer’s type on Soft Light. Combine both these layers (ctrl+e).
Use next the Brush Tool to picture on the layer under the girl, her shadow. Blur out the layer with Gaussian Blur and minimize the layer’s Opacity till 70%.
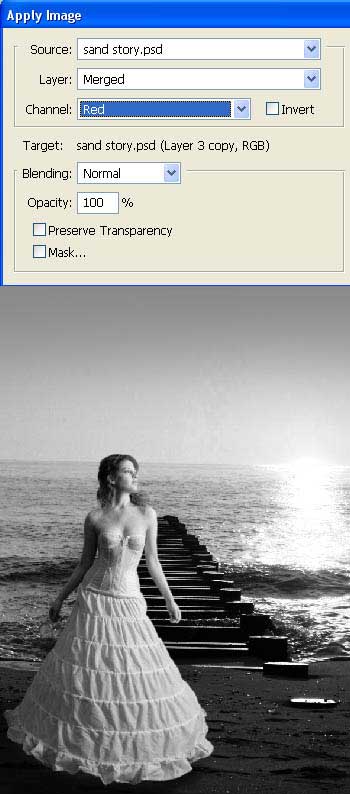
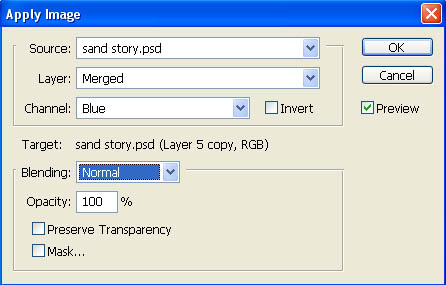
Merge down the layers containing the girl and the shadow (ctrl+e) and decolorize the picture with Image – Apply Image.
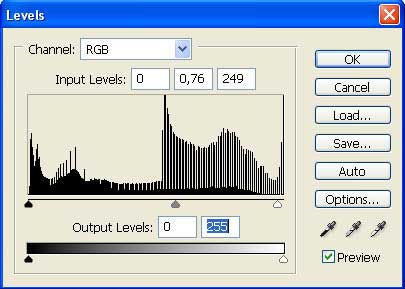
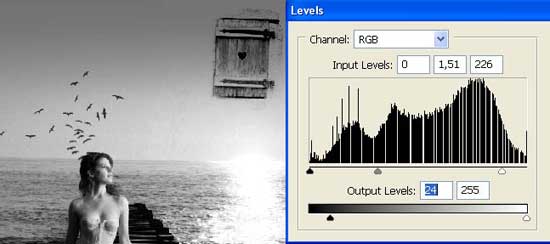
Correct a little the girl’s brightness and the contrast, applying Image – Adjustments – Levels (ctrl+l).
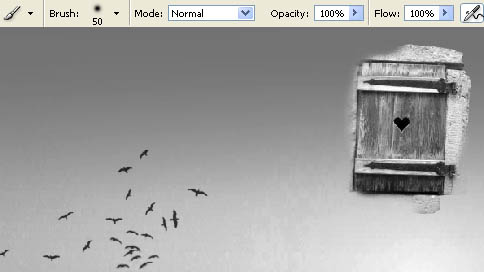
Insert on the picture several birds, using the Brush Tool. The necessary brushes may be downloaded here: http://www.deviantart.com/deviation/15235233/
?qo=91&q=by%3Aspiritsighs-stock+birds&qh=sort%3Atime+-in%3Ascraps.
Open in a new window the picture representing a small window.
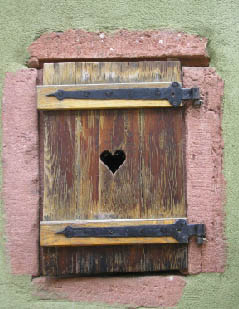
Cut it out and insert it on a new layer, above our picture, minimizing firstly the size if that is necessary: (ctrl+t).
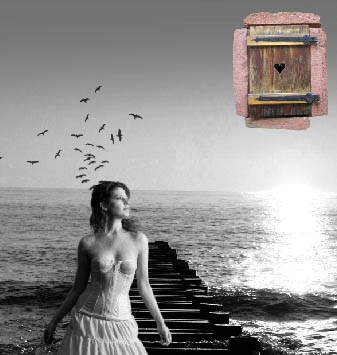
Decolorize now the window (Apply Image) with the same adjustments we used earlier when decolorizing the picture. Create a mask out of this layer: Layer – Add Layer Mask – Reveal All. Then make use of the Brush Tool of black color with its Hardness of 0% and hide partially the window’s edges.
Apply after that the command Layer – Remove Layer Mask – Apply, change the layer’s type on Color Burn and correct the Levels (ctrl+l).
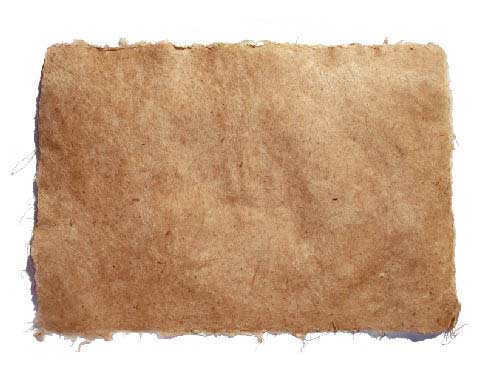
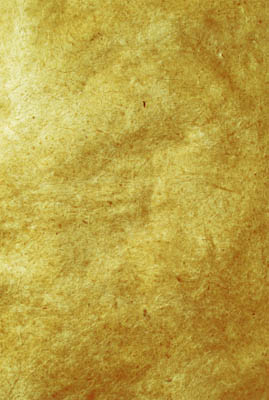
On a new window must be inserted a texture like the next one:
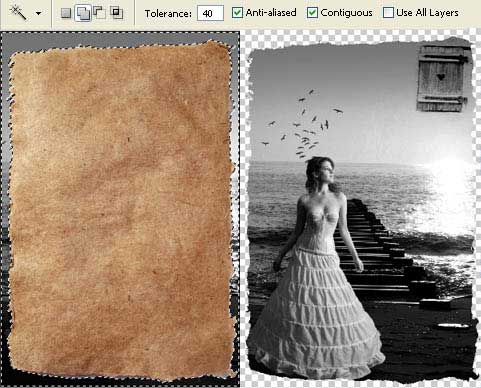
Rotate the picture: Edit – Transform – Rotate 90o CCW, correct the size (ctrl+t) and mark out the background with Magic Wand Tool just to erase it after all. Move the texture on the lowest layer (merging down all the layers beforehand). Group out those two layers we’ve got, making use of the option: Layer – Create Clipping Mask (ctrl+g).
Create another new layer, place it on the bottom and paint it in black, applying the Paint Bucket Tool. Insert on a new layer, above the rest of the layers, the same texture and stretch it out on the entire picture.
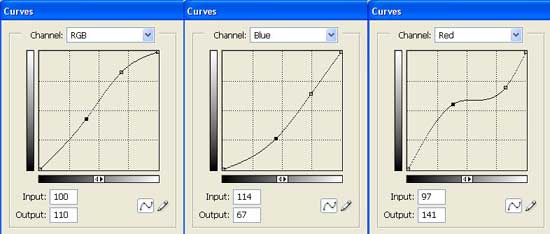
Make the necessary corrections on the brightness and the contrast, the texture’s color also with Image – Adjustments -Curves (ctrl+m).
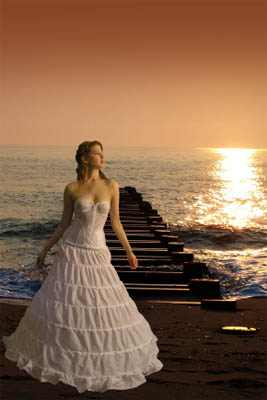
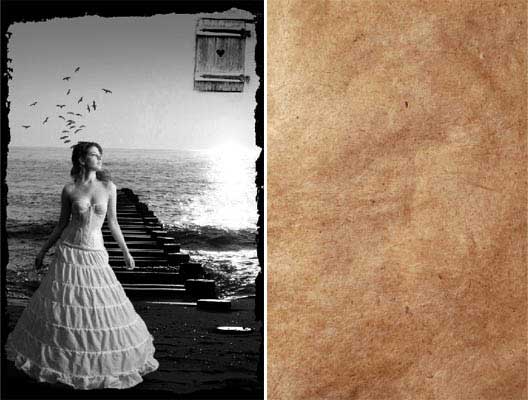
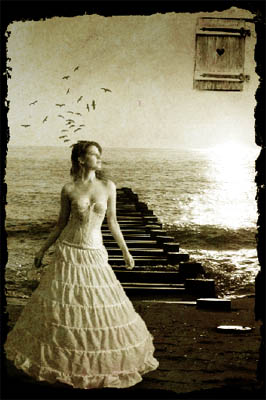
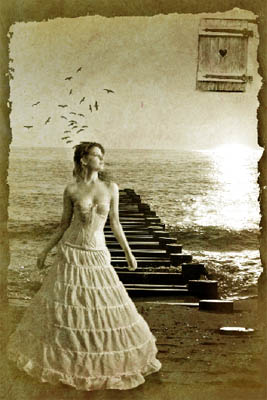
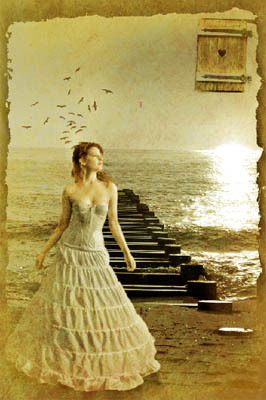
That is what we should get:
Change the texture’s layer’s type on Soft Light.
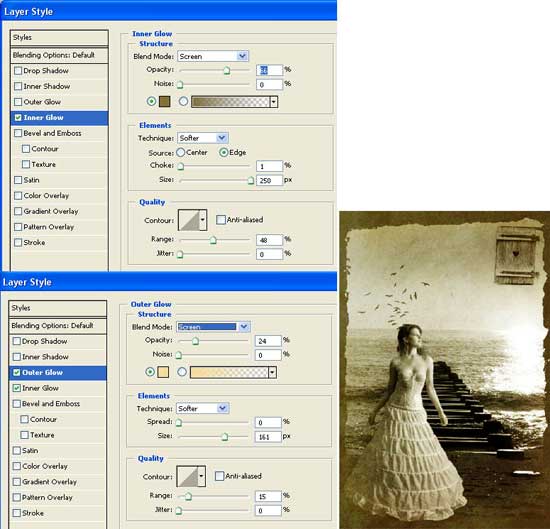
Merge down the grouped layers (ctrl+e) and the new layer must be processed also. Use next selection for it: Layer – Layer Style – Blending Options.
Merge down all the layers (shift+ctrl+u). Make a copy of the new got layer. Decolorize it: Image – Adjustments – Desaturate (shift+ctrl+e) and invert the colors: Image – Adjustments – Invert (ctrl+i).
Select the necessary filter that would blur out the picture on the given direction: Filter – Blur – Motion Blur (the filter’s direction should be parallel with the bridge).
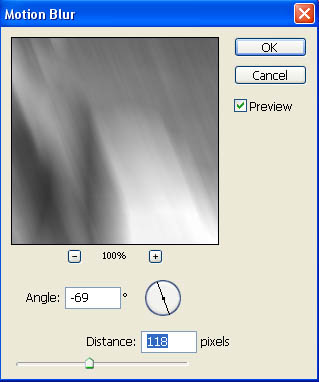
Increase the blurred picture’s dimensions (ctrl+t), change the layer’s type on Soft Light and minimize the Opacity till 70%.
Now we have to tone the picture. It’s necessary first to create a new layer, choose the Brush Tool with its Hardness on 0% and paint out those parts which must get a special nuance, choosing several less intensive colors.
Change the layer’s type on Overlay and minimize the Opacity till 60%.
On a new layer the picture must be partially colored with a different color, but apply to the color the filter too: Filter – Blur – Gaussian Blur. Change the layer’s type on Overlay and minimize the Opacity till 60%.
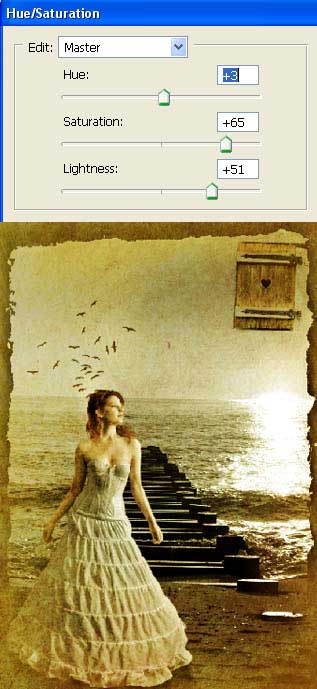
Merge down all the layers after that (shift+ctrl+e), make a copy of the new layer and change its type on Multiply. Change it s colors too, applying Image – Adjustments – Hue/Saturation (ctrl+u).
Merge down the layers (??trl+e) and copy again the new layer (ctrl+j). Apply to this layer the next command: Image – Adjustments – Invert (ctrl+i) and then Image – Apply Image with the following adjustments.
Change the layer’s type on Soft Light and minimize the Opacity till 55%.
Combine all the layers again and make a copy of the got layer (the final one). The copy must be processed with Filter – Artistic – Poster Edge.
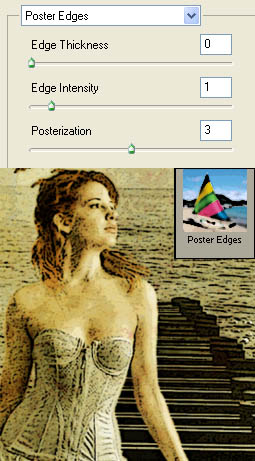
Change the layer’s type on Soft Light and minimize the Opacity till 50%. Merge down the layers.
If that is necessary we should correct a little the brightness and the contrast, making use of Levels (ctrl+l). In my opinion the picture would look more interesting when rotating it around. That is what I’m intending to do with Edit – Transform – Flip Horizontal. Then apply again the filter (Filter – Sharpen – Sharpen).
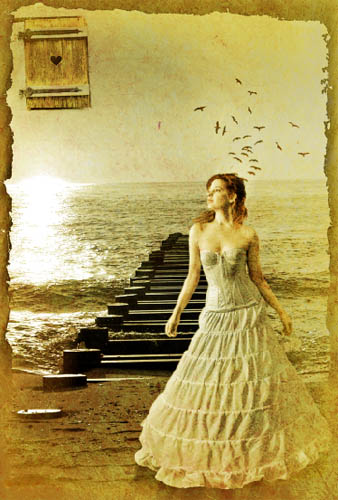
It is finished!
Made by Sigma
Comments