
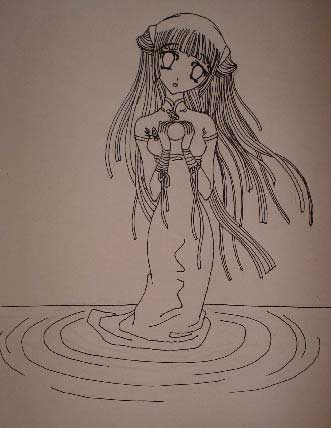
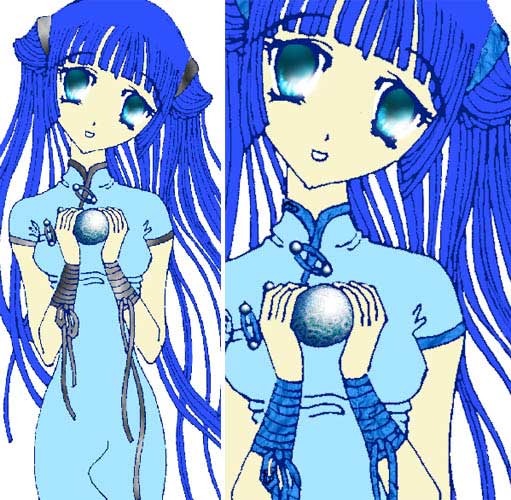
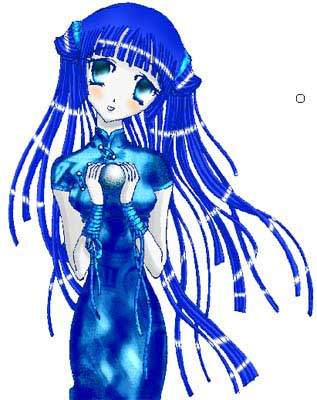
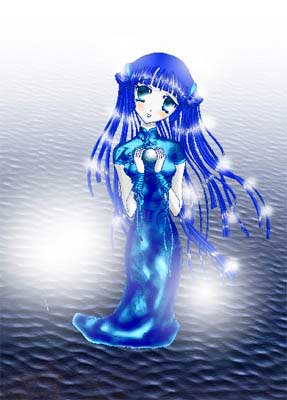
Water Angel Nymph Anime Picture
The next task we’ll see how is it possible to make the corrections on the scanned already contours and change their colors, see how to create different textures (textile’s for example) applying different filters of the program, different pictures, create also a magic sphere and giving a shining effect to the surfaces.
Open in a new window the scanned contours of the picture we want to process next: File ? Open (ctrl+o).
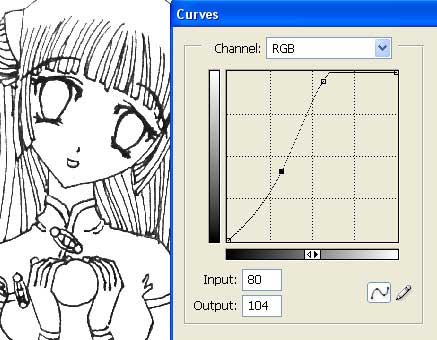
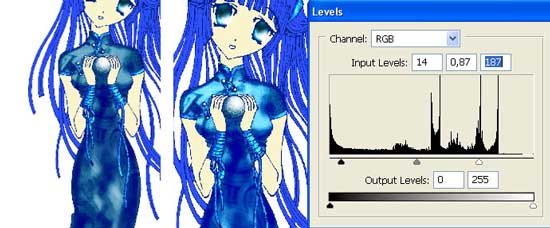
Copy the layer just to make the work possible by moving it on the new layer’s icon in the Layers window. The first layer should be erased applying the other button in the same window. Decolorize the layer: Image ? Adjustments ? Desaturate (shift+ctrl+u) and correct the brightness and the contrast of the picture, making use of the next selection: Image ? Adjustments ? Curves (ctrl+m).
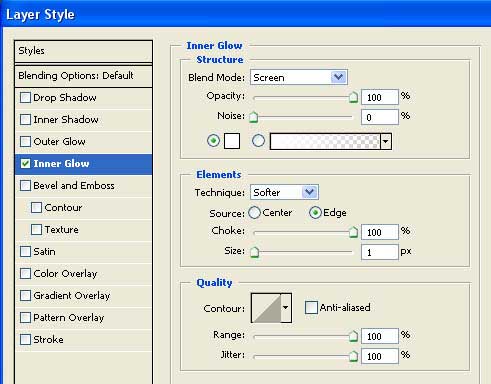
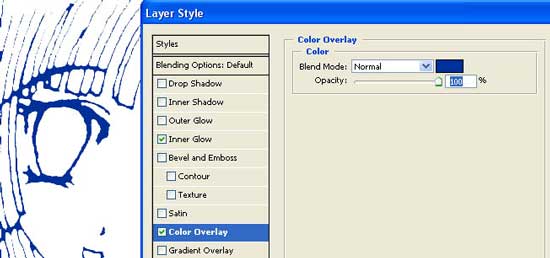
Make the contours look a little thinner and get to the next window: Layer ? Layer Style ? Blending Options to select the following adjustments:
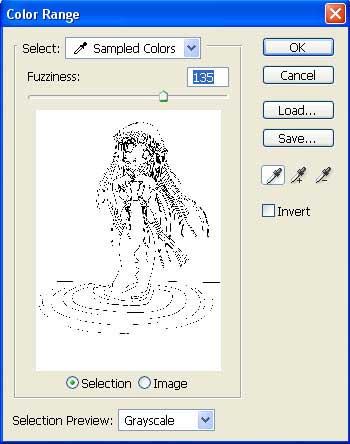
Create now a new layer (use the icon on the Layers window) and place it under this layer, then combine both of them. Accentuate after that the white background in the Select ? Color Range window and click on it:

Erase now the marked zone, using the Delete button on the keyboard. Move off the markings: Select ? Deselect (ctrl+d). We have to create a new layer now under the layer with the contours, just not to lose the last layer. Paint it in a neutral color (I choose white color) applying the Paint Bucket Tool. Get back to the layer containing the contours and change their color in the Blending Options window also.
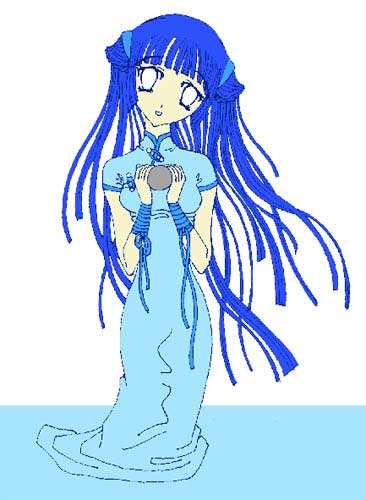
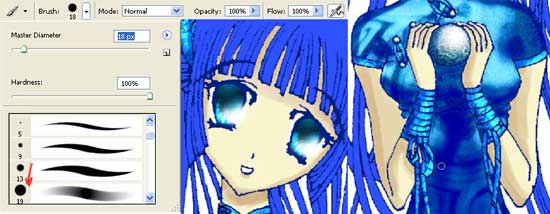
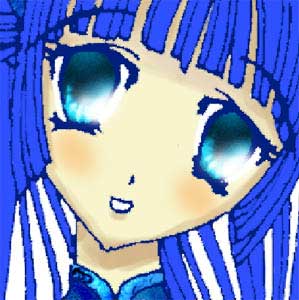
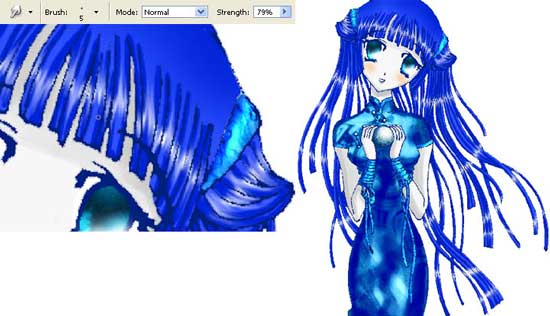
Paint the given picture with the basic colors now. I recommend you to place each color on a new layer to make easier after that placing the shadows and if that is possible to change the color easily then. Use the Brush Tool of Hard Round type to make this operation.
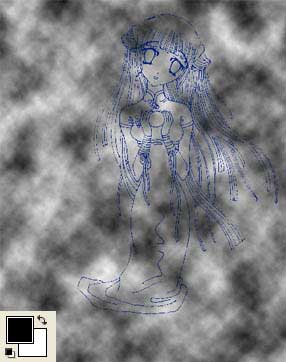
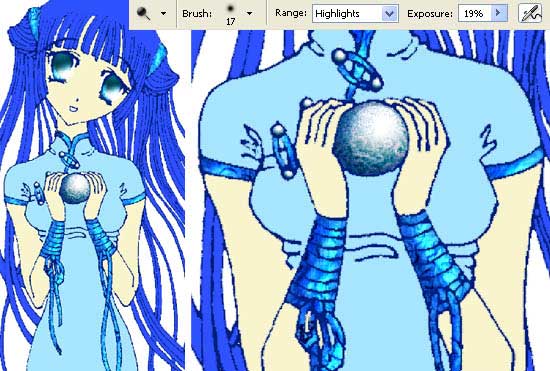
I like starting picturing with details, that is why represent at the beginning the magic sphere in the girl’s hands. Use on a new layer above the circle’s coloring Filter ? Render ? Clouds, making sure that you have chosen preliminary the black and white colors.
Minimize the layer’s size until it covers the sphere only, making use of the next command: Edit ? Free Transform (ctrl+t). Group this layer with that one containing the sphere’s coloring: Layer ? Create Clipping Mask (ctrl+g), but the layer shouldn’t get outside its contours.

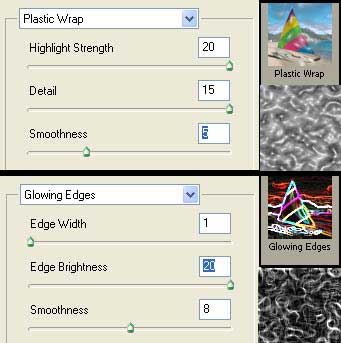
Apply by turn now two filters. First – Filter ? Artistic ? Plastic Wrap, then Filter ? Stylize ? Glowing Edges.
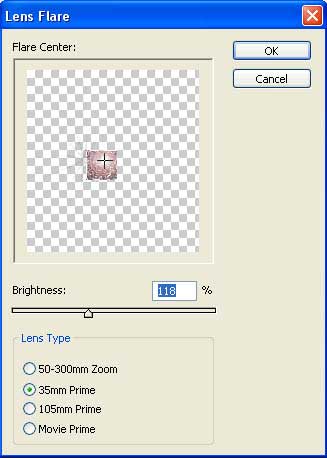
Represent a flare now on the sphere, selecting Filter ? Render ?Lens Flare.
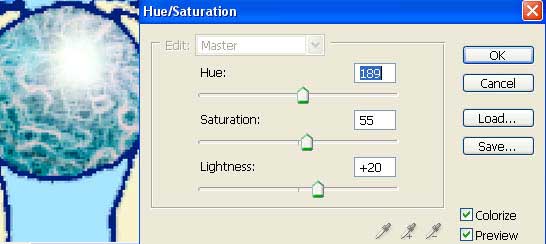
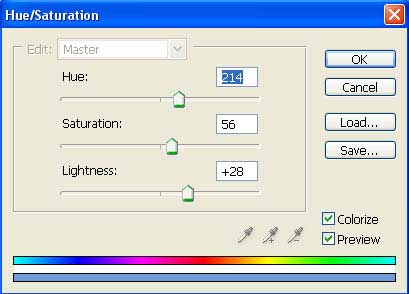
Change the layer’s type on Color Burn and change the color selecting Image ? Adjustments ? Hue/Saturation(ctrl+u).
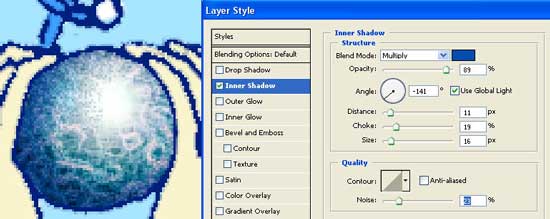
Insert the shadow after that, choosing Blending Options:
Combine this layer with the previous one: Layer ? Merge Down (ctrl+e). Copy the new layer after that several times and place the copies on the buttons’ place, using Edit ? Free Transform (ctrl+t). Combine now all the layers containing the buttons on the clothes (ctrl+e) and make them look in contrast, using next selection: Image ? Adjustments ? Curves (ctrl+m).

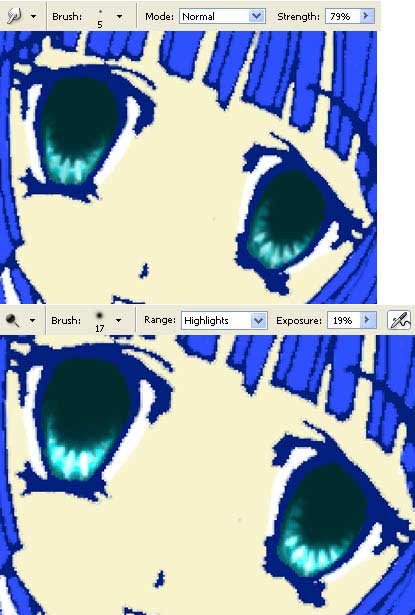
Start working with the eyes now. Mark first the light and the shadow with the usual Brush Tool.
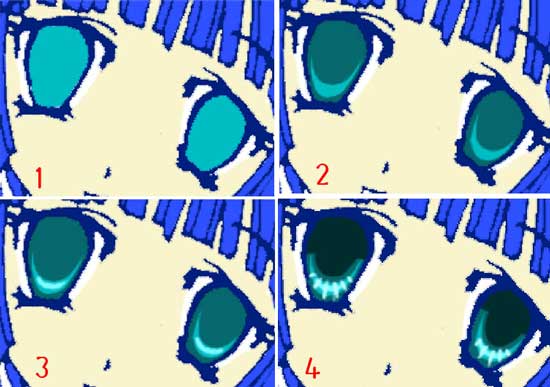
Then smudge all the lines (Smudge Tool) and decolorize a little the lowest part of the iris using the Dodge Tool.
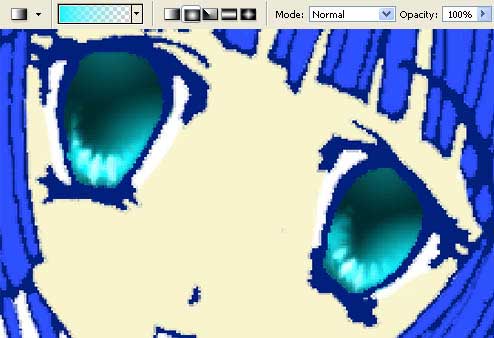
Create now a new layer and group it with the layer containing the eye’s coloring. Insert more volume on it, selecting the Gradient Tool.
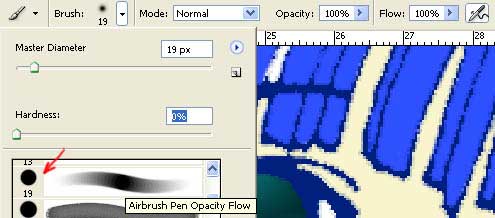
Select now the next type of the brush designed for flares:
Insert on the new layer, above the contours’ layer several flares of different sizes. Combine now the layers with the eyes’ coloring and change a little their colors (ctrl+u).

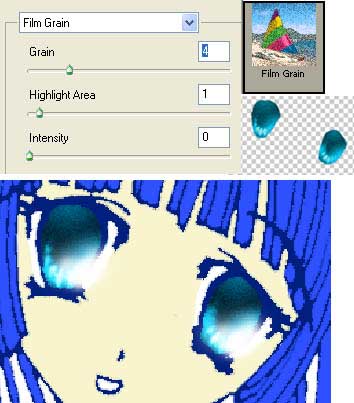
Copy this layer (ctrl+j), then apply to the copied layer next options: Filter ? Artistic ? Film Grain. Change now the Blending Mode of the copy-layer on Soft Light and merge down the layers containing the eyes (ctrl+e).
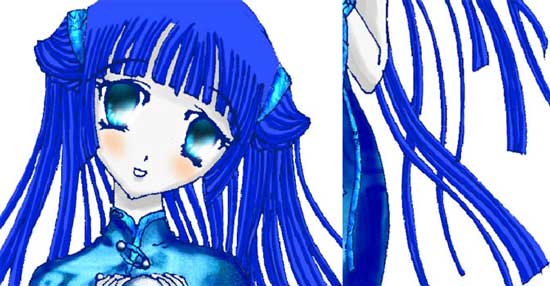
Apply on the layer with the hair’s fillets the filter too (Filter – Render ? Clouds), correct the sizes (ctrl+t), group the layers (ctrl+g) and select the filters with the same adjustments we used for the sphere: Filter ? Artistic ? Plastic Wrap, then Filter ? Stylize ? Glowing Edges.
Select the Dodge Tool now and give more luminescence to the brighter parts of the hair’s fillets.
Above the layer with the dress should be inserted a texture with some ornaments. Open it in a new window (ctrl+o), mark it out with Rectangular Marquee Tool and make a copy of it: Edit ? Copy (ctrl+c). Get back now to our picture’s window and insert it on the necessary layer: Edit ? Paste (ctrl+v).
Make the corrections on the size (ctrl+t), group the layers (ctrl+g) and decolorize the texture’s layer (shift+ctrl+u). Change the layer’s Blending Mode on Color Burn.
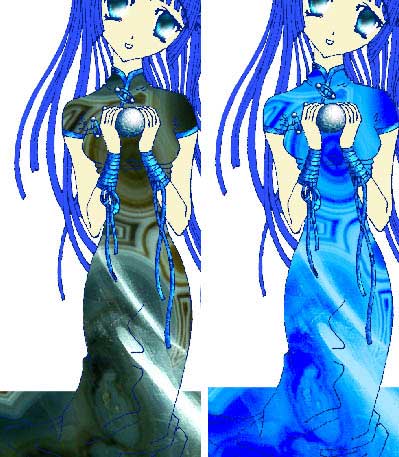
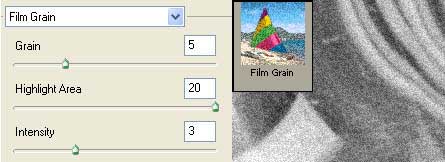
Apply the necessary filter to this layer: Filter ? Artistic ? Film Grain:
Then create a mask out of this layer: Layer ? Add Layer Mask ? Reveal All. Select now the black color and the Gradient Tool to erase the texture’s visibility on the dress’s bottom part.
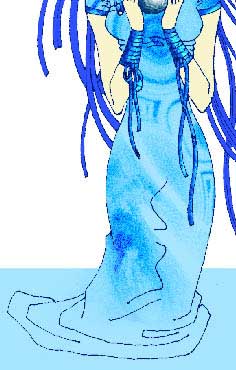
Combine now the layers with the dress (ctrl+e) and select the Burn Tool to add the shadows.
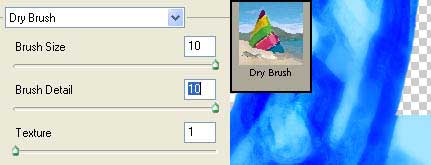
Make a copy of this layer and apply the filter that is given: Filter ? Artistic ? Dry Brush.
Change the layer’s type on Multiply, merge down all the layers and correct a little the brightness and the contrast, using this operation: Image ? Adjustments ? Levels (ctrl+l).
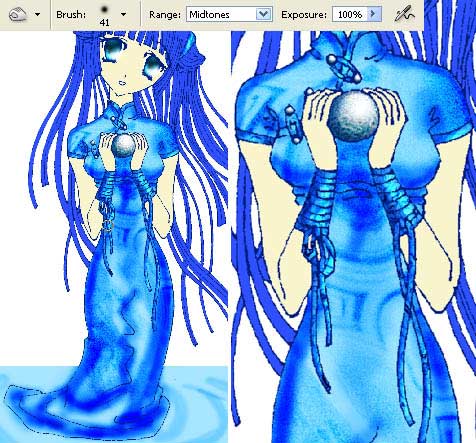
Insert now the shadows on her skin, selecting the following brush:
Set the Hardness on 0% and choose also a brush of big size to picture the blushes on a new layer too.
(I’ve decided to decolorize the skin with Hue/Saturation)
Choose a Brush Tool of Hard Round type to dark out the hair near the contours.
Select now a brush with smooth edges and mark out the place of the flares to be.
Using the Smudge Tool, represent the flares on the hair’s locks, with zigzag motions.
Choose the Gradient Tool now and brushes with smooth edges to add more light on the hair and on the girl’s figure. Do it on the layer with the flares situated above the contours.
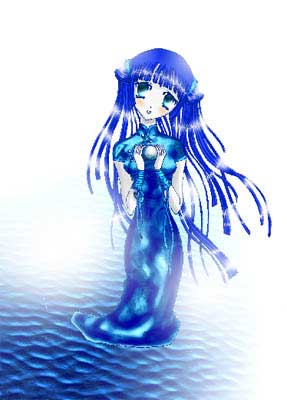
Introduce on a new layer, above the layer with the background’s painting, the water’s texture:
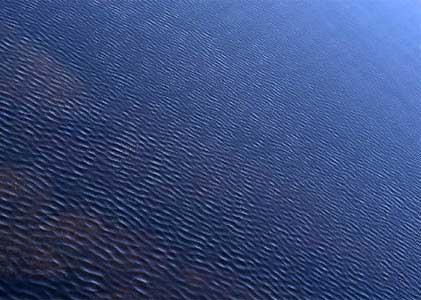
Place it on the necessary angle and correct the size (ctrl+t). Select the Gradient Tool to decolorize the upper part of the texture:
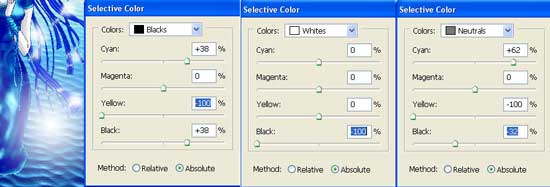
Change its color selecting Image ? Adjustments ? Selective Color.
Using the Gradient Tool on the water, hide the unnecessary flares:
Apply on a new layer, above the rest of the layers the next filters: Clouds, Plastic Wrap and Glowing Edges, the same way we did with the sphere. Then create a mask out of this layer: Layer ? Add Layer Mask ? Hide all. Select a white gradient and make the layer visible this way:
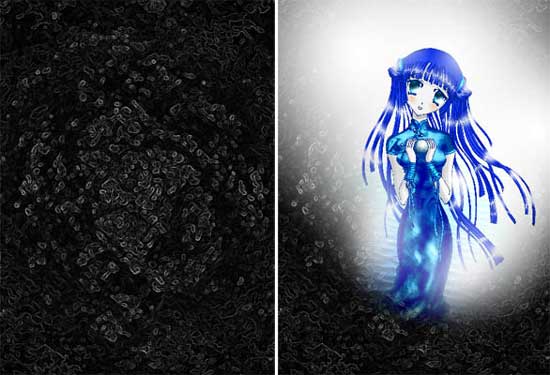
Select the next command: Layer ? Remove Layer Mask ? Apply and give a nuance to this layer, using next combination: Image ? Adjustments ? Hue/Saturation (ctrl+u).
Change the layer’s type on Hard Light and you may insert the picture in a frame by selecting the Crop Tool and Rectangular Tool.
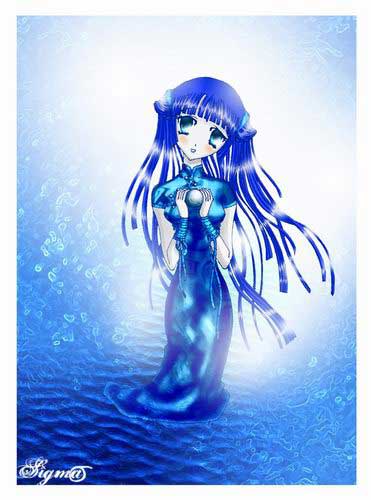
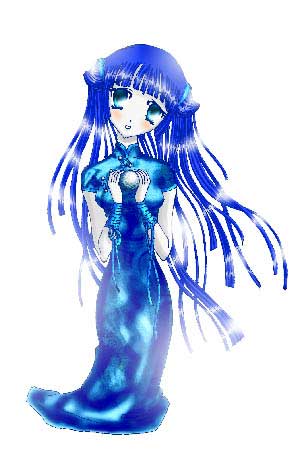
The work is finished!
Made by Sigma
Comments