
Smoke Effect
This lesson I’ll show you how to
represent colored ornaments from the smoke by choosing a prepared set of
brushes and certainly, the possibilities of the Photoshop program.
For
the beginning, open a new file of the necessary size: File –
New (ctrl+n).
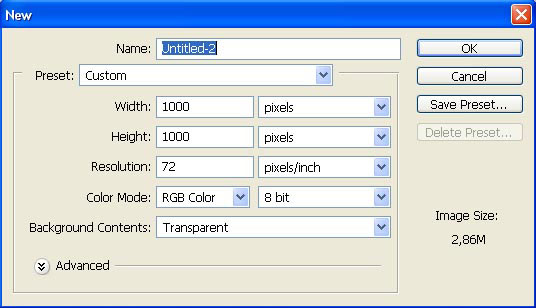
Then paint the background’s layer in white, selecting the Paint
Bucket Tool.

Download now the brushes of the smoke shape (they may be
downloaded
here: http://www.deviantart.com/deviation/29341741/
?qo=13&q=by%3Afalln-brushes&qh=sort%3Atime+-in%3Ascraps
and here: http://www.deviantart.com/deviation/29341959/
?qo=12&q=by%3Afalln-brushes&qh=sort%3Atime+-in%3Ascraps).

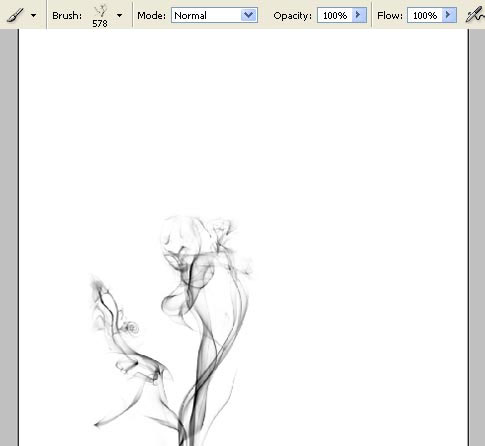
Select the Brush Tool of black color and
create a new layer: Layer – New – Layer.
All that
we have to do now is representing the ornament.
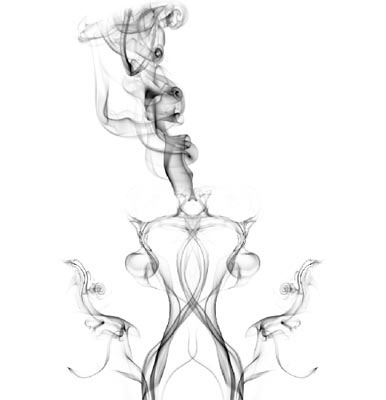
First represent a
dot with one of the brushes.
Then pass to another window Filter – Liquefy
(shift+ctrl+x) and choose the Turbulence Tool to add in
the pictured smoke more curves.
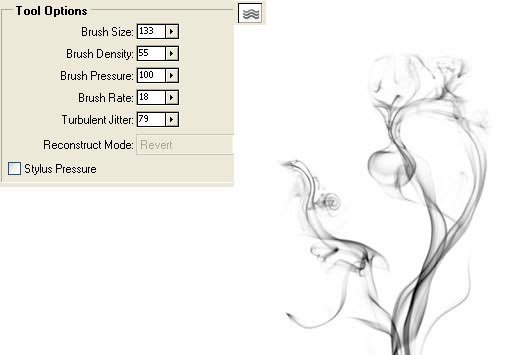
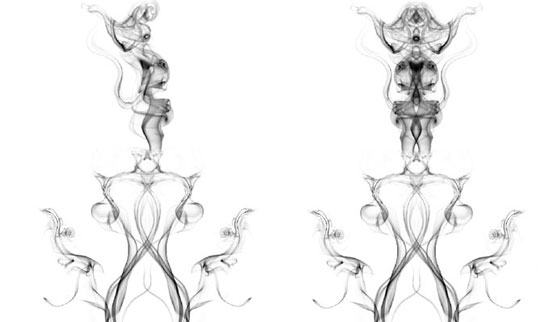
Take the Eraser Tool of a small
size and erase the unnecessary curves if having them. Then copy this
layer: Layer – Duplicate Layer (ctrl+j). Flip this copy
horizontally by applying this command: Edit – Transform – Flip
Horizontal. The Move Tool will help us to move
the pictured smoke on the necessary place.
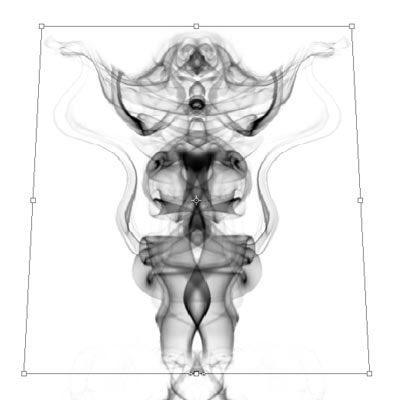
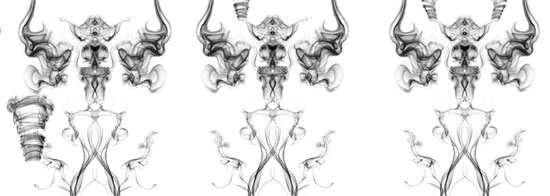
Create now a new layer and represent another dot with another
bush’s type. If you are not satisfied with the smoke’s sizes, you may
change it when using the next operation: Edit – Free Transform
(ctrl+t).

Distort it a little by selecting the Turbulence Tool
(shift+ctrl+x), then copy the layer and flip it horizontally.
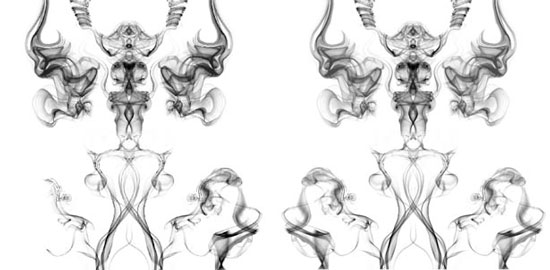
Now we may give to this part of the ornament a special
perspective: Edit – Transform – Perspective by
combining preliminary these two layers: Layer – Merge Down (ctrl+e).
If a part of the ornament doesn’t correspond to
that one pictured already, then we may minimize a little the layer’s Opacity.
The new ornament’s part must be flipped horizontally and vertically
also (Edit – Transform – Flip Vertical).
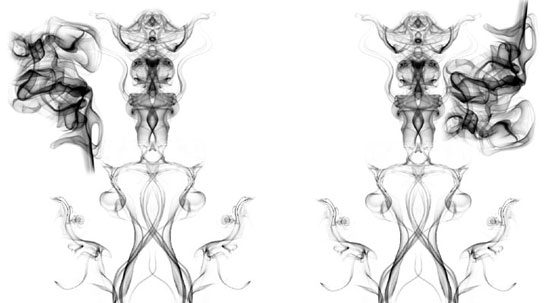
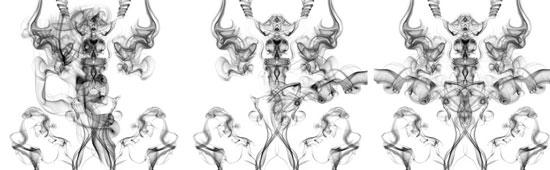
Do the same manipulations you did with the other previous parts
of the ornaments.

Then several other ornaments’ parts:


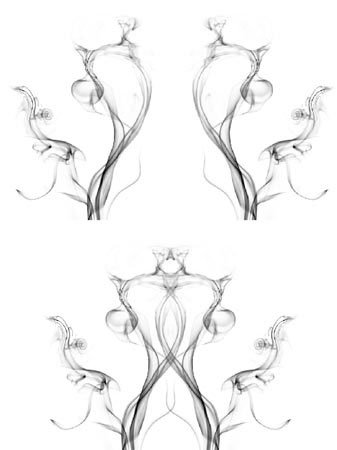
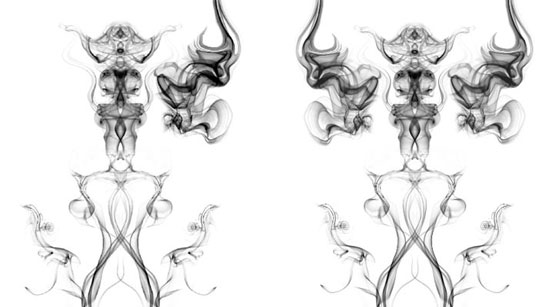
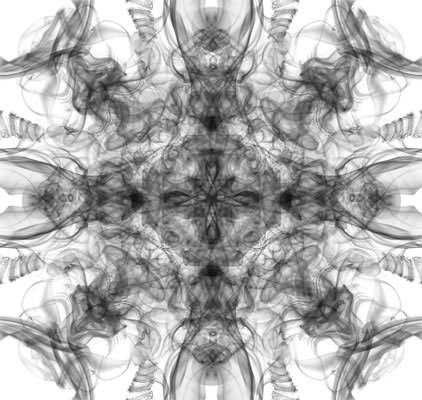
Merge down all the layers with the smoke now (ctrl+e) and make
three copies of the new layer (ctrl+j). Flip the copies horizontally and
vertically as for them to be situated on all four sides equally.
Minimize the Opacity of each of the layers till 65%.

Combine now all the layers: Layer –
Merge Visible (shift+ctrl+e) and continue by inverting the
colors: Image – Adjustments – Invert (ctrl+i).
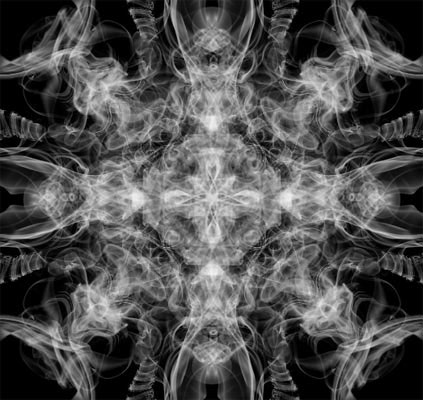
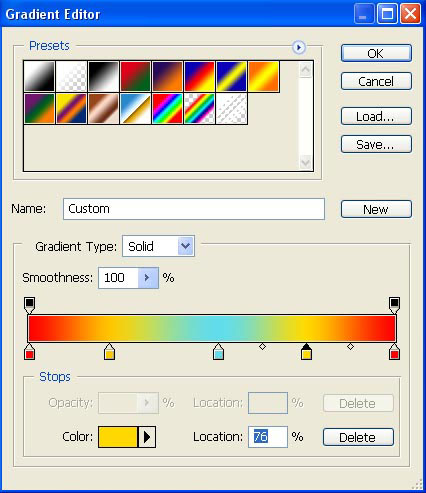
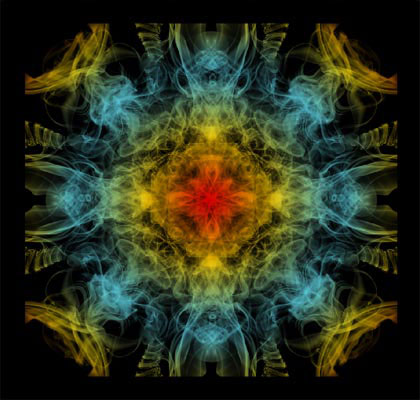
We have to create now a new layer, set the necessary colors in
the Gradient Tool‘s adjustments and paint the smoke
with these colors.
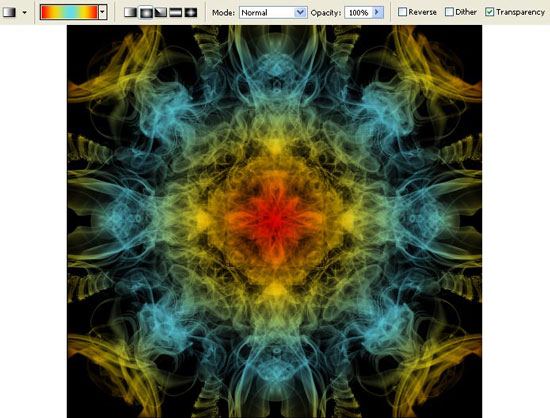
Stretch out the gradient from the center to one of the corners
and change the layer’s Blending Mode on Multiply.
When inserting the colors more chaotically, you
may choose the Brush Tool and the next filter’s
options: Filter – Blur – Gaussian Blur. If you want,
you may insert the picture in a frame by using the Crop Tool
and Rectangular Tool.

Finished!
Made
by Sigma Take the Eraser Tool of a small size and erase the unnecessary curves if having them. Then copy this layer: Layer ? Duplicate Layer (ctrl+j). Flip this copy horizontally by applying this command: Edit ? Transform ? Flip Horizontal. The Move Tool will help us to move the pictured smoke on the necessary place.

Create now a new layer and represent another dot with another bush’s type. If you are not satisfied with the smoke’s sizes, you may change it when using the next operation: Edit ? Free Transform (ctrl+t).
Distort it a little by selecting the Turbulence Tool (shift+ctrl+x), then copy the layer and flip it horizontally.

Now we may give to this part of the ornament a special perspective: Edit ? Transform ? Perspective by combining preliminary these two layers: Layer ? Merge Down (ctrl+e).

If a part of the ornament doesn’t correspond to that one pictured already, then we may minimize a little the layer’s Opacity. The new ornament’s part must be flipped horizontally and vertically also (Edit ? Transform ? Flip Vertical).

Do the same manipulations you did with the other previous parts of the ornaments.
Then several other ornaments’ parts:
Merge down all the layers with the smoke now (ctrl+e) and make three copies of the new layer (ctrl+j). Flip the copies horizontally and vertically as for them to be situated on all four sides equally. Minimize the Opacity of each of the layers till 65 %.
Combine now all the layers: Layer ? Merge Visible (shift+ctrl+e) and continue by inverting the colors: Image ? Adjustments ? Invert (ctrl+i).

We have to create now a new layer, set the necessary colors in the Gradient Tool‘s adjustments and paint the smoke with these colors.

Stretch out the gradient from the center to one of the corners and change the layer’s Blending Mode on Multiply.

When inserting the colors more chaotically, you may choose the Brush Tool and the next filter’s options: Filter ? Blur ? Gaussian Blur. If you want, you may insert the picture in a frame by using the Crop Tool and Rectangular Tool.
Finished!
Made by Sigma
Comments