
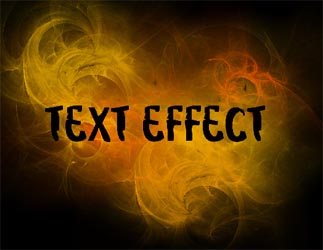
Plasma Text Effect
This new lesson we’ll see how is it possible to create a wavy text out of burning liquid using also fractal ornaments.
Open a new file with the necessary sizes: File – New (ctrl+n)
Paint the new layer with the color shown below, applying also the Paint Bucket Tool.
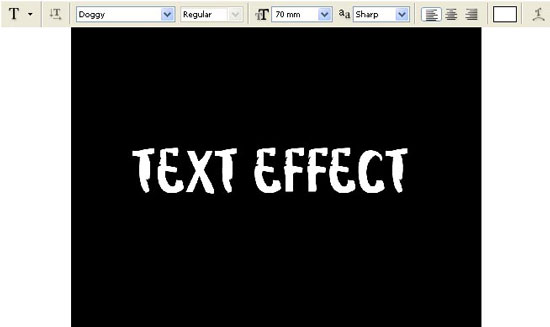
Select then the Text Tool and write several words, using one of the types (I have selected the Doggy type).

Plasma Text Effecst – Part 2
Make use of the next command now: Layer – Rasterize – Type and create a new layer (Layer – New – Layer). Now we have to choose a set of ready to use brushes with fractals (download them here: http://www.deviantart.com/deviation/20482619/).
Select for the picture several ornaments and place them above the text.
If that is necessary, you may turn them around by applying this
selection: Edit – Free Transform (ctrl+t).
Place this layer under the text’ layer and get back to the text’s layer to invert its colors: Image – Adjustments – Invert (ctrl+i).
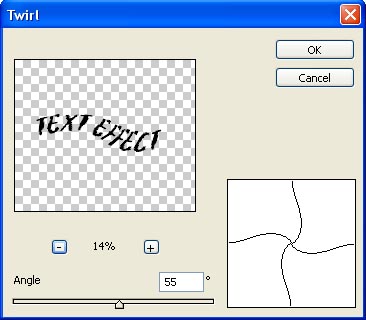
Apply the next shown filter to distort the image: Filter – Distort – Twirl.
Plasma Text Effecst – Part 3
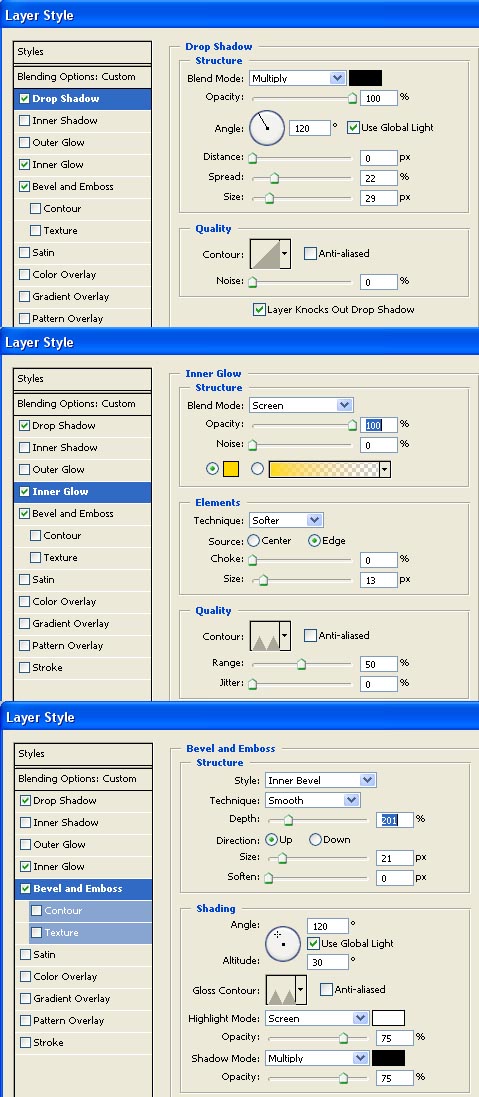
Continue by entering the next window Layer – Layer Style – Blending Options and set the following adjustments shown here:
Change the layer’s Blending Mode on Linear Dodge.

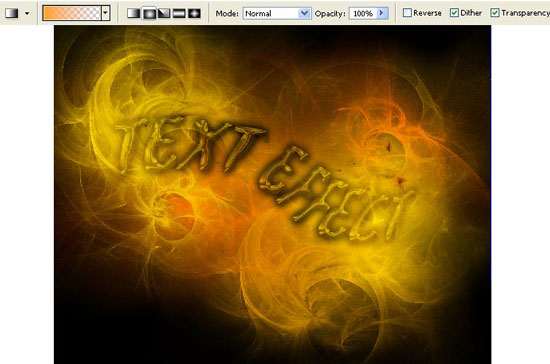
Make a copy after that of the fractals’ layer: Layer – Duplicate Layer (ctrl+j) and place the copy above the text’s layer. Change the layer’s Blending Mode on Screen and create a mask out of this layer: Layer – Add Layer Mask – Reveal All. Then make use of the Gradient Tool of black color to hide a part of it:
Plasma Text Effecst – Part 4
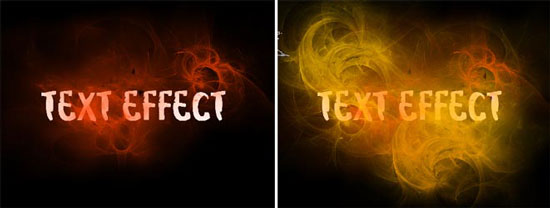
Merge down all the layers: Layer – Merge Visible (shift+ctrl+e) and insert the picture in a frame:
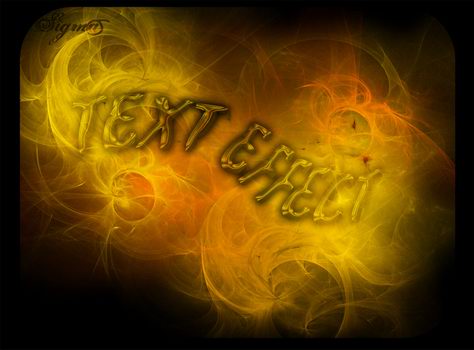
The picture is finished!
Made by Sigma
Comments