
Galaxy Angel
The new lesson we’ll see how to retouch the skin of a model, imitate the make-up, draw the tattoos, represent the hair out of the smoke, use different textures, represent the clouds and insert the wings on the picture, enlarge the background the model is situated on, not cutting it out and create the effect of an old picture, at least on its edges.
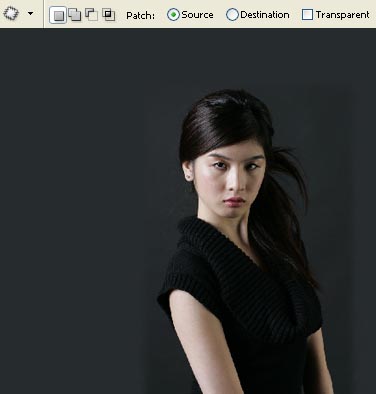
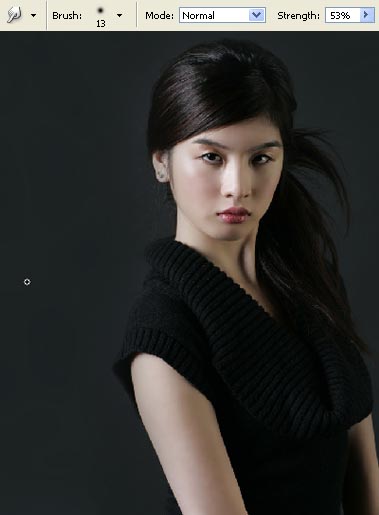
Open in a new window the picture of a girl, situated on a single nuance background: File ? Open (ctrl+o).

Select the Eyedropper Tool to copy the background’s color and place it on the palette as “background color”. Choose the Crop Tool also to enlarge the picture’s size.

As we may see the picture’s edges are clearly visible, that is why we’ll get rid of them. Blur them out for the beginning, using the Patch Tool.

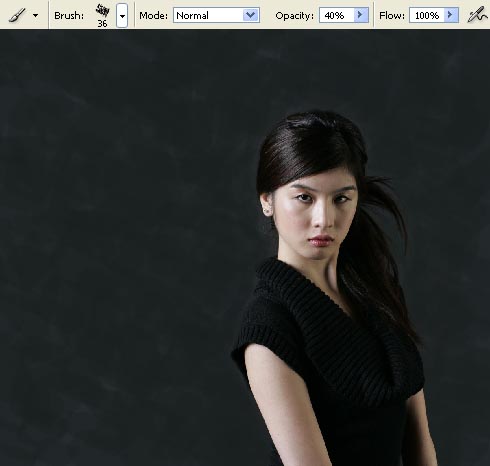
Select in the Brush Tool option a brush type named Chalk and start applying it on a new layer (Layer ? Mew Layer), selecting a darker color that we’ll use on the whole background.
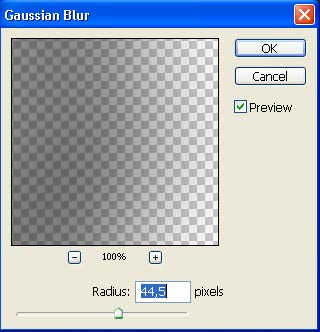
Blur out the layer, using Filter ? Blur ? Gaussian Blur.
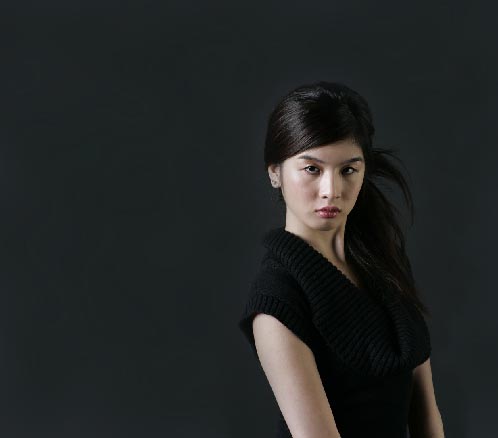
Merge down the layers: Layer ? Merge Down (ctrl+e) and we’ll have a whole background of one nuance.
Continue by retouching the girl’s skin. Choose the Clone Stamp Tool firstly and apply pointed motions to hide the most visible skin’s defects (the colors must be copied near the place we want to retouch).
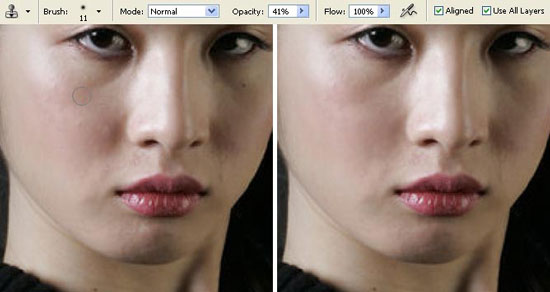
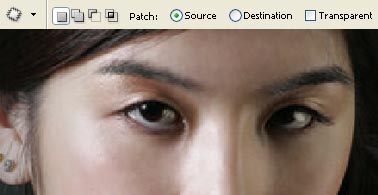
The Patch Tool will be helpful in hiding the swellings under the girl’s eyes.
Copy now the layer: Layer ? Duplicate Layer (ctrl+j) and apply the next option on the copy – layer: Filter ? Blur ? Smart Blur.
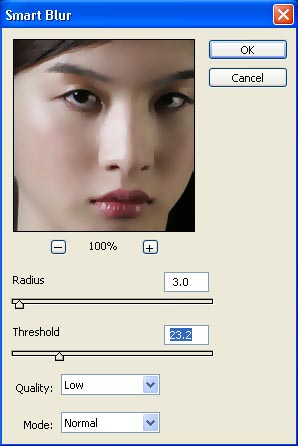
Create now a mask out of the layer: Layer ? Add Layer Mask ? Hide All and make use of the Brush Tool of white color with smooth edges to make the layer visible only on the smoothest skin places (the face, the neck, arms, but don’t paint the folds).
Merge down the layers (ctrl+e) and select the Smudge Tool to blur out the interrupted lines, remained when applying the filter.
Paint the girl’s lips on a new layer, selecting the Brush Tool:
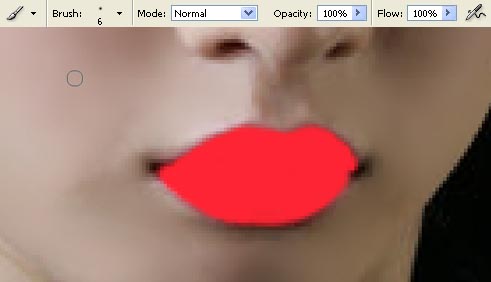
Change the layer’s Blending Mode on Color Burn and blur out a little the edges of the lipstick, using the Blur Tool.
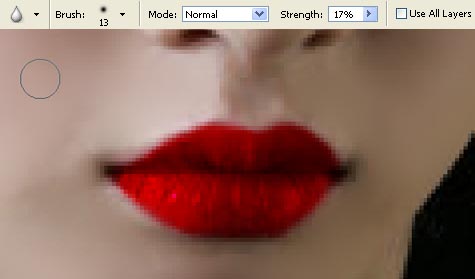
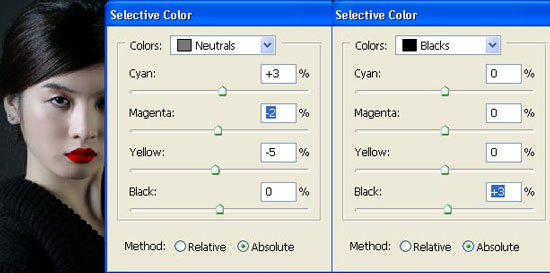
Merge down the layers (ctrl+e) and make the corrections of the layer’s color, applying next options: Image ? Adjustments ? Selective Color.
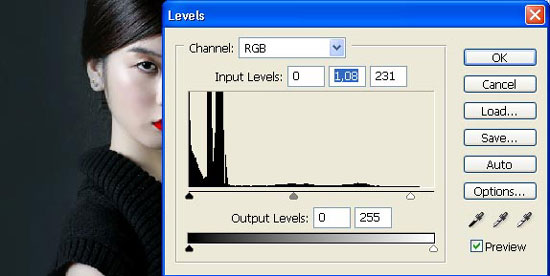
Change also the brightness and the level of the contrast, applying Image ? Adjustments ? Levels (ctrl+l).
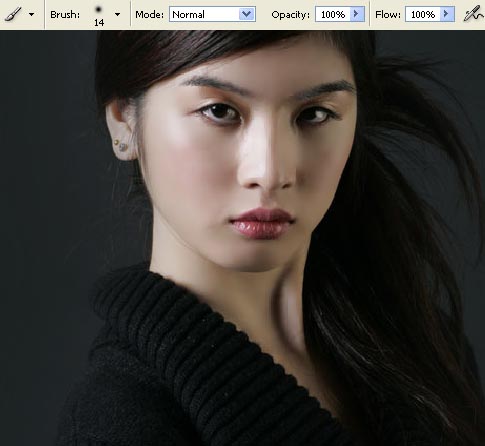
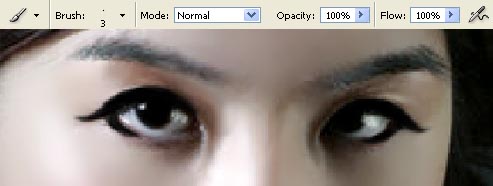
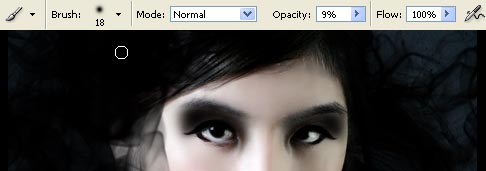
We have to accentuate the girl’s eyes on a new layer, applying the usual Brush Tool.
Change the layer’s Blending Mode on Multiply and merge down the layers (ctrl+e). Download now a set of ready to use brushes of smoke shape (http://www.deviantart.com/deviation/29341959/? qo=12&q=by%3Afalln-brushes&qh=sort%3Atime+-in%3Ascrapsor from here: http://www.deviantart.com/deviation/29341741/? qo=13&q=by%3Afalln-brushes&qh=sort%3Atime+-in%3Ascraps) and represent the girl’s hair out of the smoke, using the next combinations: Edit ? Free Transform (ctrl+t), Edit ? Transform ? Distort, Edit ? Flip Horizontal, and also the Eraser Tool, but we have to insert each lock on a new layer, transform it and combine the layer with the rest of them.
Now we have to download a set of ready to use brushes of wing’s shape (http://www.deviantart.com/deviation/15260491/? q=by%3Aspiritsighs-stock+wings&qh=sort%3Atime+-in%3Ascraps) and insert on a new layer a wing behind the girl.
We have to make a copy of this layer, just to make its color more intensive (ctrl+j) and merge down the layers (ctrl+e). Make another copy of this layer and correct its size and the distort level of the second wing, using Edit ? Transform ? Distort and Edit – Free Transform (ctrl+t).
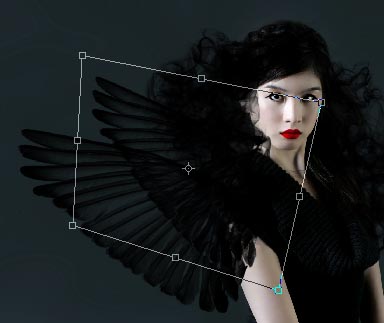
We have to erase the unnecessary parts of both wings, choosing the Eraser Tool.
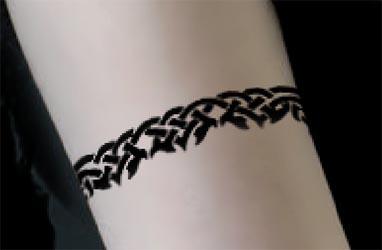
Insert on a new layer the already scanned picture of a tattoo. Open it firstly in a new window (ctrl+o), mark it out with the Rectangular Marquee Tool and make a copy of it Edit ? Copy (ctrl+c). Get back to the girl’s window and insert it on a new layer (ctrl+v).

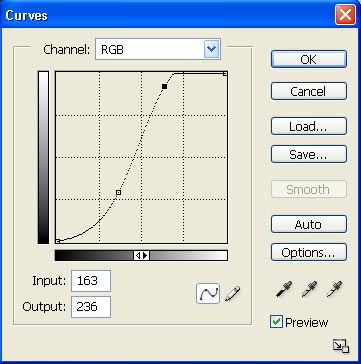
Decolorize this layer: Image ? Adjustments ? Desaturate (shift+ctrl+u) and increase the layer’s contrast, applying next option: Image ? Adjustments ? Curves (ctrl+m).
Insert the picture on the necessary place (in this case we have to put it on the forearm), using the Free Transform selection (ctrl+t) and change the layer’s Blending Mode on Multiply.
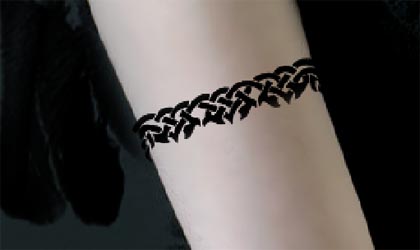
Just to make the tattoo look more real, we have to create the illusion that the picture repeats the arm’s volume. It’s possible to do this manipulation by applying the Turbulence Tool in the next window: Filter ? Liquefy (shift+ctrl+x).
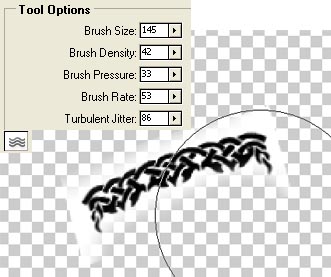
Erase now that part of the picture situated outside the skin’s borders (Eraser Tool).
Select a ready to use brush now to introduce the moon in our picture (the brush may be downloaded on this address: http://www.deviantart.com/deviation/9890582/? qo=65&q=by%3Alarafairie-stock&qh=sort%3Atime+-in%3Ascraps).

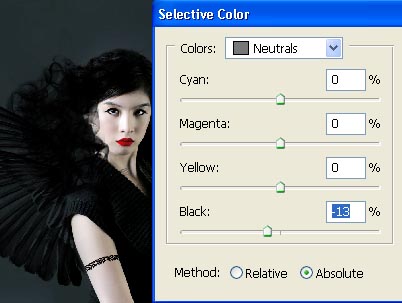
Make the color’s correction of the basic layer (Selective Color).
Insert now the texture of an old paper, placed above all the layers:
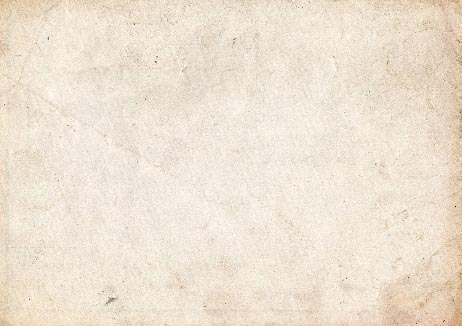
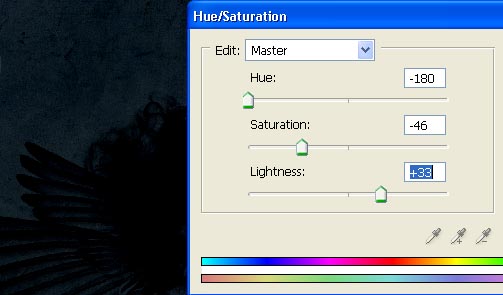
Change the layer’s Blending Mode on Linear Burn and change also the texture’s color, selecting Image ? Adjustments ? Hue/Saturation (ctrl+u).
Create a mask out of the layer: Layer ? Add Layer Mask ? Reveal All and make use of the Brush Tool of black color to make the texture invisible above the girl’s skin.
Select the Brush Tool on a new layer to insert the shadows on the girl’s eyelids.
Then we have to create a mask out of this layer and choose after that the Gradient Tool to make them almost invisible:

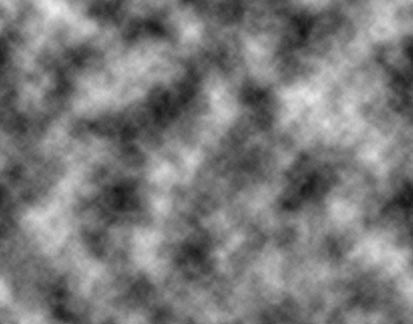
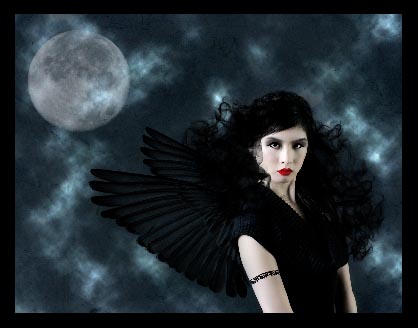
Merge down all the layers: Layer ? Merge Visible (shift+ctrl+e) and when creating a new layer, apply the next combination on it: Filter ? Render ? Clouds (selecting on the color palette the white and black colors).
Accentuate the black color, making use of next option: Select ? Color Range:
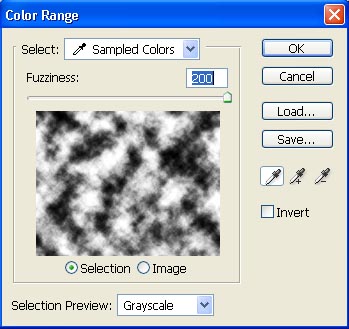
Erase it and move off the markings after that: Select ? Deselect (ctrl+d). Change the layer’s Blending Mode on Color Dodge. Select the Crop Tool and Rectangular Tool to insert the picture in the frame. Everything must be done on a new layer.
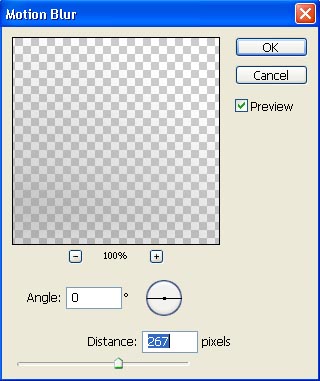
We have to make the clouds bigger, that is why we need to copy the layer containing the clouds (ctrl+j) and blur out the copy ? layer, using the next combination: Filter ? Blur ? Motion Blur.
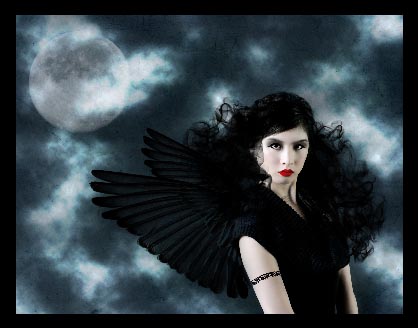
Merge down all the layers again (shift+ctrl+e) and make the picture’s edges a little teared, making use of the Burn Tool and Chalk brush type.
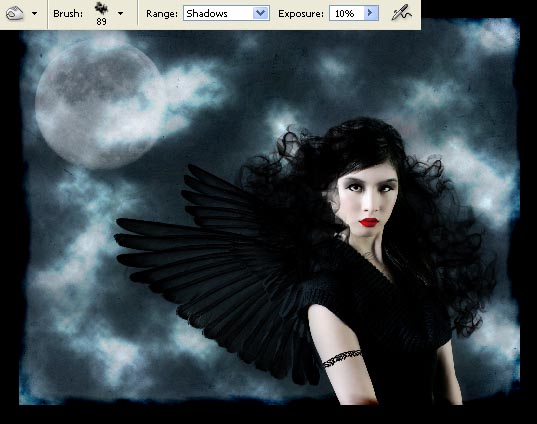
Make them look lighter in several places, applying the Dodge Tool.
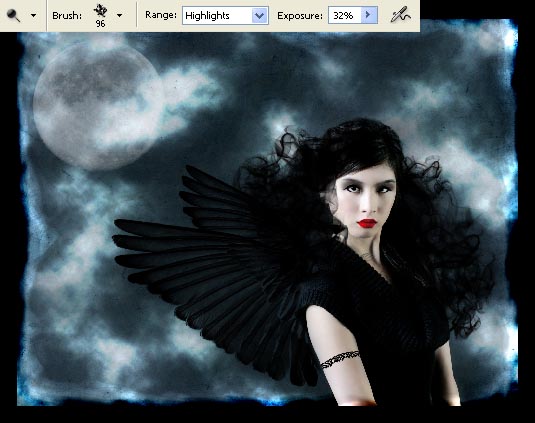
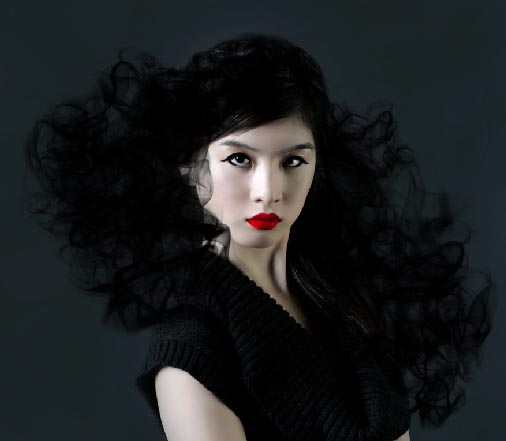
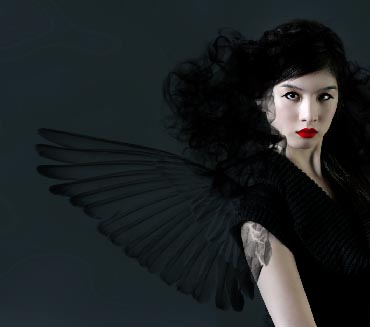
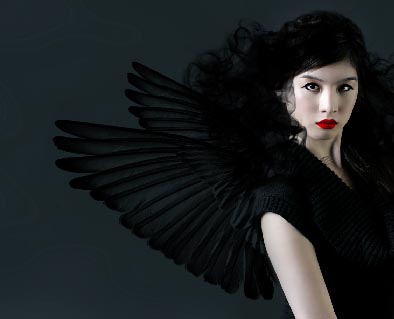
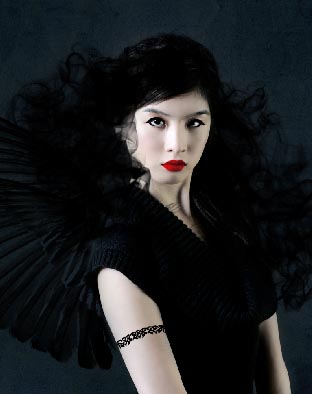
And that is what we’ve got:

Finished!
Made by Sigma
Comments