
Windows XP wallpaper
In this tutorial I’ll teach you how to represent the wallpapers for Windows XP, use different gradients, imitate the metal surface and write the text.
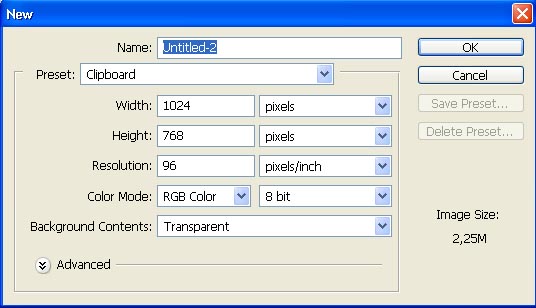
Create a new file of standard size wallpapers: File ? New (ctrl+n).
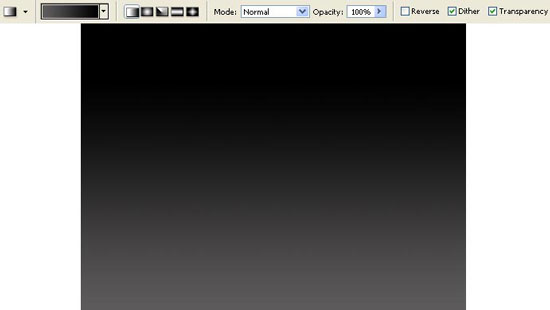
Paint the background’s layer with the Gradient Tool.
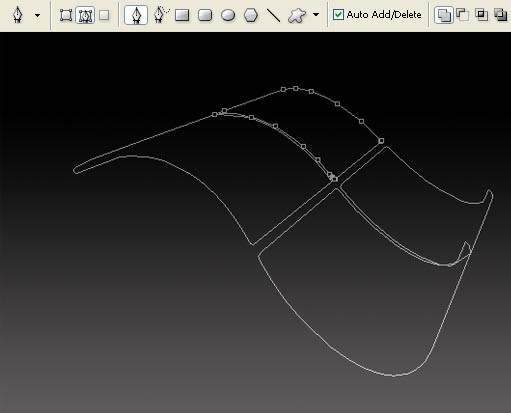
Create now a new layer: Layer ? New ? Layer and choose the Pen Tool to draw a logotype for Windows.

Represent the marking, applying the Make Selection option and paint the marked zone with the Paint Bucket Tool.

Move off the markings, selecting next command: Select ? Deselect (ctrl+d) and create a new layer that we’ll group with that one the logotype’s primary elements are situated on: Layer ? Create Clipping Mask (ctrl+g). Choose now the Gradient Tool and set the following adjustments for it:
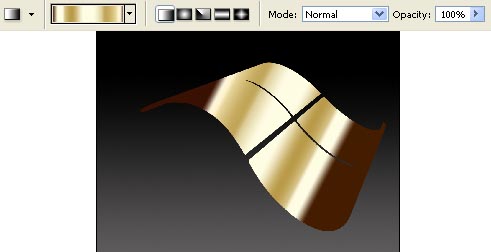
Paint the grouped layer:
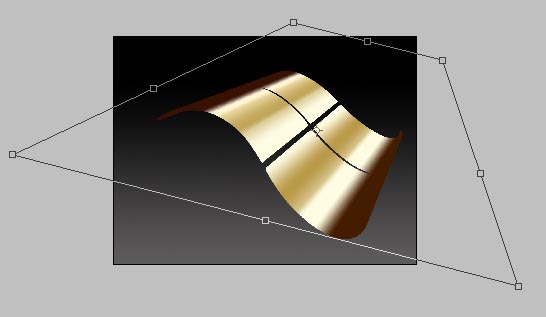
Applying the next combination Edit ? Transform ? Distort, it’s possible to make the corrections on the layer’s distort level.
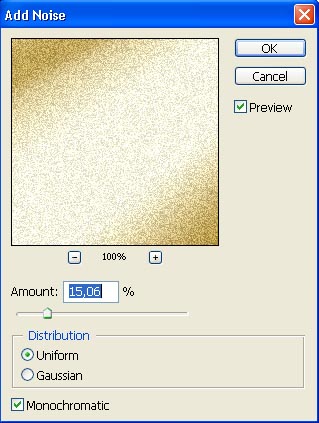
Make a copy of this layer: Layer ? Duplicate Layer (ctrl+j) and apply the next filter’s option for this copy: Filter ? Noise ? Add Noise.
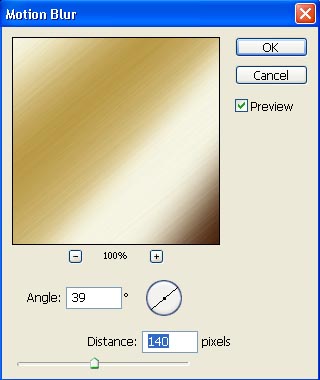
Mark out by turn now the upper part and the lowest part of the logotype, choosing the Polygonal Lasso Tool and apply the next filter’s option on each marked zone: Filter ? Blur ? Motion Blur, changing the adjustments. The next ones are for the upper part:
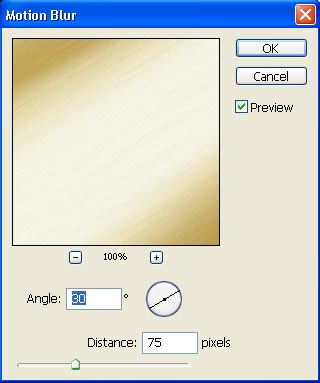
The next ones are for the lowest part:
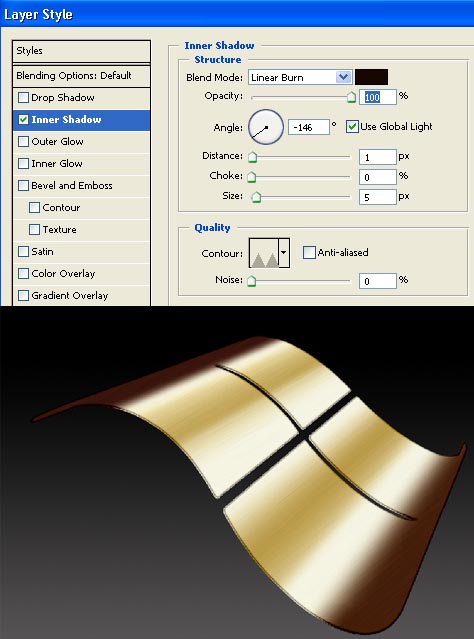
Merge down the layers containing the window’s part: Layer ? Merge Down (ctrl+e) and select the next option on the new layer: Layer ? Layer Style ? Inner Shadow:
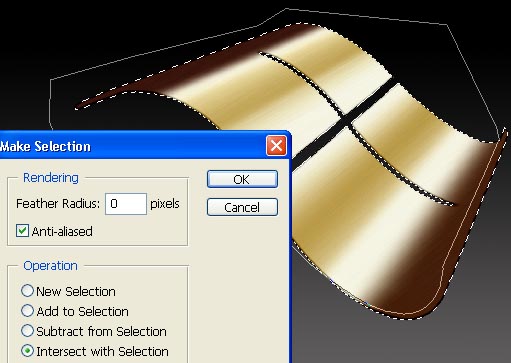
Next we have to create one more new layer and ?bend? one of the logotype’s corners. Firstly we need to mark out the whole logotype, clicking on its layer and pressing the ctrl button in the same time and then apply the Pen Tool and the command Make Selection ? Intersect with Selection to move off the markings from those zones we don’t need to be processed.
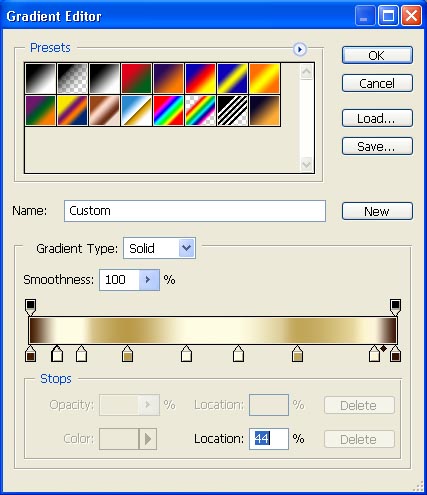
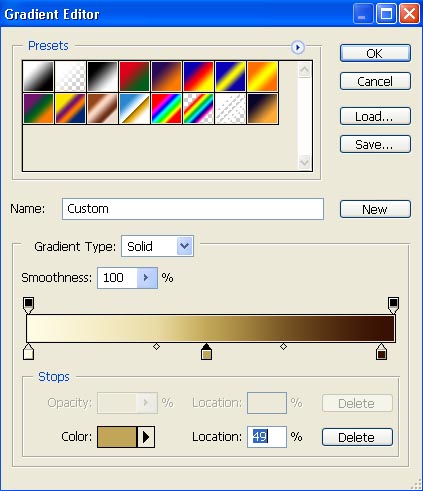
Change the Gradient Tool‘s adjustments the way it is indicated below:
Paint the marked logotype’s zone:

Move off the markings (сtrl+d), and apply on this layer the next selection: Layer ? Layer Style ? Inner Shadow.
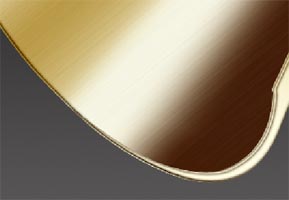
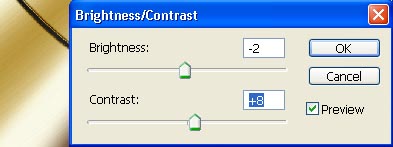
Merge down the layers containing the logotype’s parts (ctrl+e) and make the corrections on the brightness and on the contrast: Image ? Adjustments ? Brightness/Contrast.
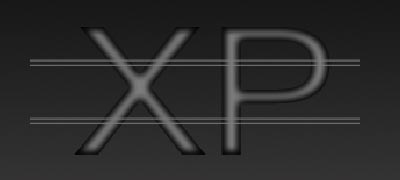
Select the Text Tool and start writing the next inscription:

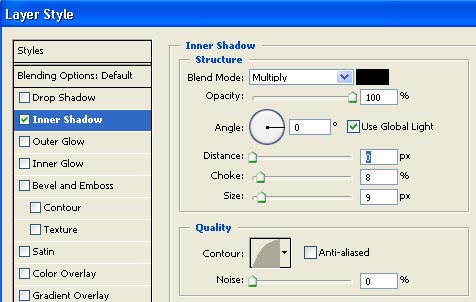
Correct the letters’ size, if that is necessary, selecting Edit ? Free Transform (ctrl+t) and apply the next command on this layer: Layer ? Layer Style ? Inner Shadow with the following adjustments:
Choose now the Line Tool on a new layer and represent several stripes on the written letters already:
Change the layer’s Blending Mode, containing the stripes on Color Dodge:
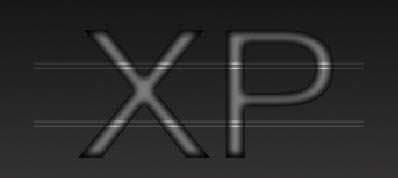
Write now the rest of the text, applying the same Text Tool.

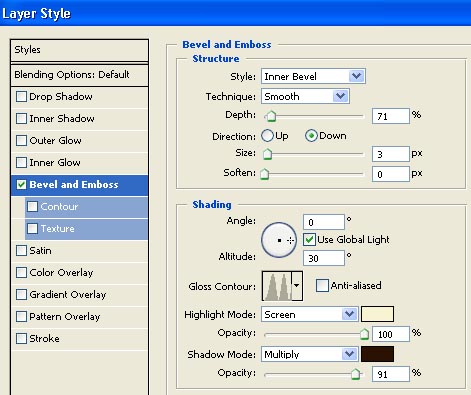
And select the next combination for this layer: Layer ? Layer Style ? Bevel and Emboss.
That is what we’ve got:
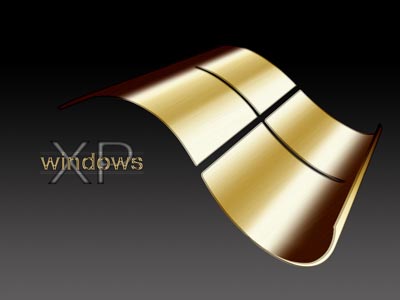
The wallpaper is finished!
Made by Sigma
Comments