
Making of Eze Wallpaper
May 5, 2007 | 0 comments
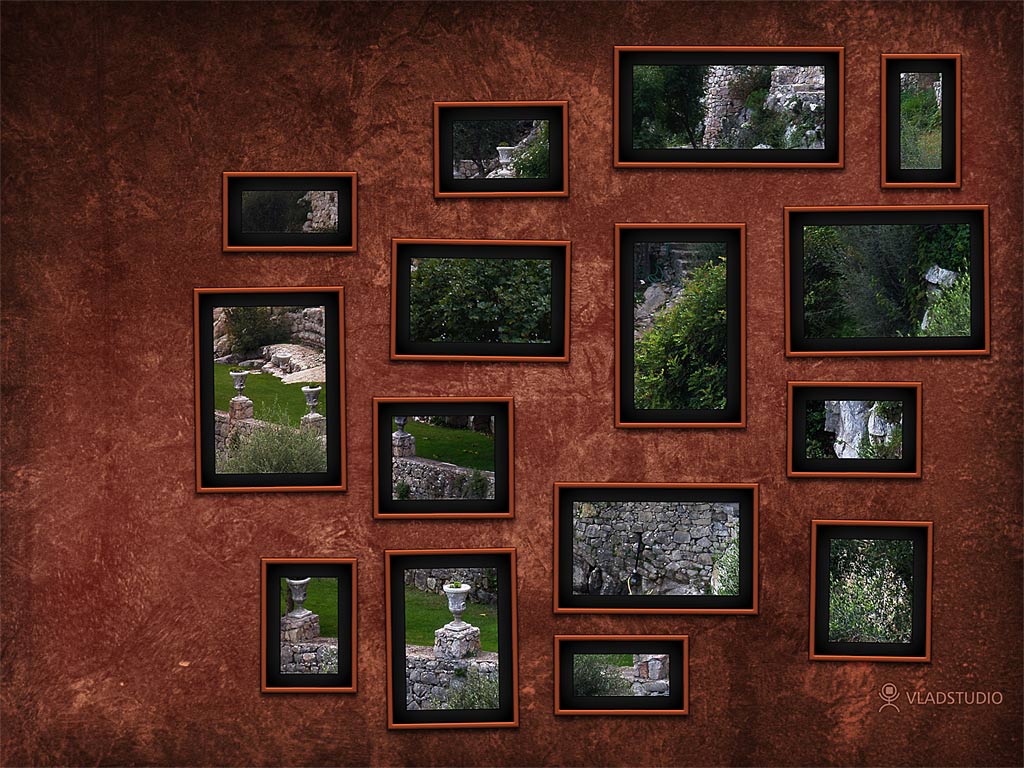
Tips about how I made the Eze wallpaper ( see wallpaper ).
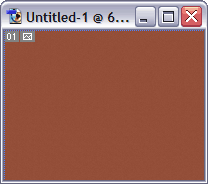
Let’s start with the background image. Fill the layer with solid color…
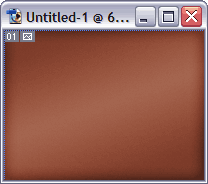
… double click on layer to open its blending options, add gradient (overay) and a bit of inner glow (black, overlay).
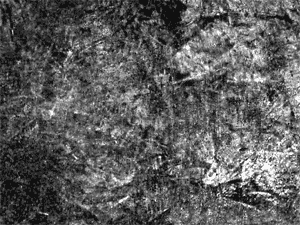
To make this background look like a wall, I took the real photo of a wall (taken by me some time ago), turned it to grayscale (Ctrl-Shift-D) and sharpened the wall texture by increasing image contrast.
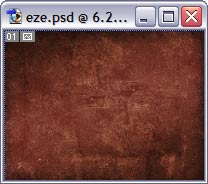
then I pasted this image to our file and set its blend mode to soft light.
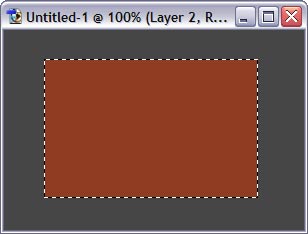
Next, we’ll need a picture in a frame. Let’s start with the frame itself. Create a new layer set, new layer inside it, and draw a dark-red rectangle.

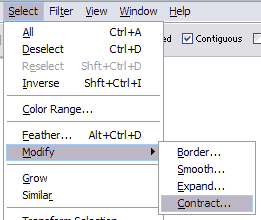
in menu, find select > modify > contract and contract selection by around 20 pixels.
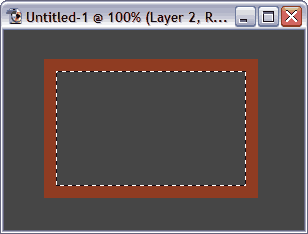
hit Del to remove selected image.
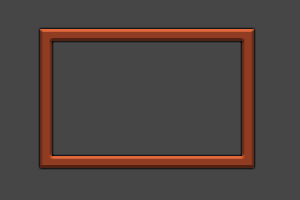
Add the following layer effects:
Stroke (1pixel, outside, almost black), bevel (3-4 pixels, overlay mode), shadow (not too big). Tweak settings carefully, to make frame as realistic as possible.
Stroke (1pixel, outside, almost black), bevel (3-4 pixels, overlay mode), shadow (not too big). Tweak settings carefully, to make frame as realistic as possible.
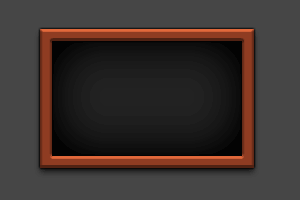
underneath this layer, create new layer, fill it with darker grey, and add black Inner glow effect.
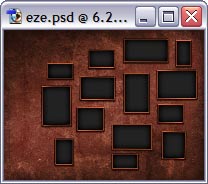
Now simply duplicate this layer set several times and distribute the copies here and there. For each frame, hit Ctrl-T (transform) and rotate but very slightly (not more than 1 degree).

Our frames are empty – we need pictures inside them. My idea is to have one photo sliced into pieces. But before that, I need a single layer which would be “container” for this photo. Select all frames (to do so, click layers one by one holding Ctrl-Shift).
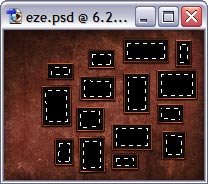
go to menu Select – Modify – Contract, and contract by around 40 pixels.
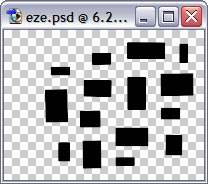
Create new layer and fill with solid color (doesn’t matter which).
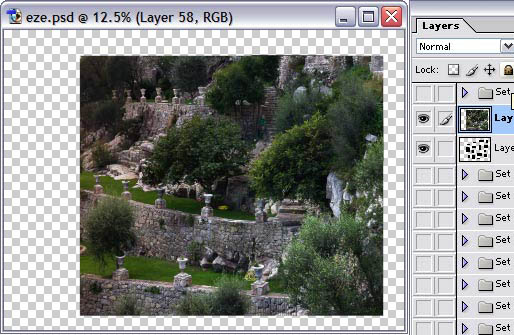
Paste the photo that you’d like to put inside the frames…

…and then simply hit Ctrl-G to group this layer with previous. Voila!
Eze wallpaper ( see wallpaper ).
Author: Vlad Gerasimov
URL: http://www.vladstudio.com
URL: http://www.vladstudio.com
Comments