Tips about how I made the
Eos wallpaper (
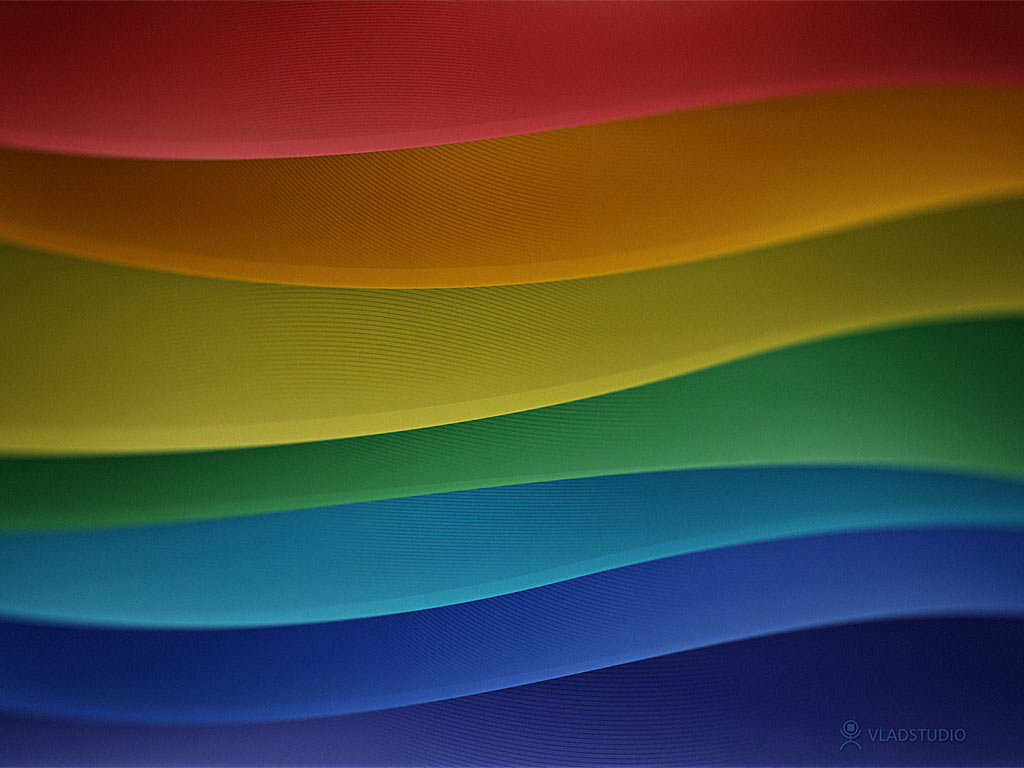
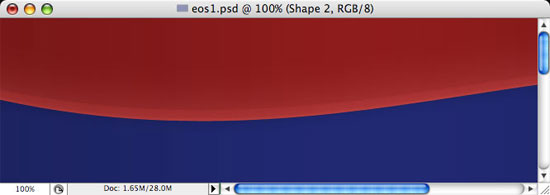
see wallpaper ).
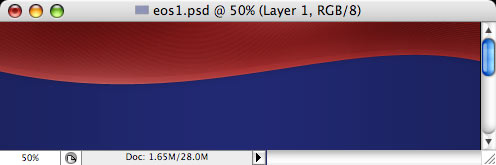
As always, create new document 🙂 Fill it with solid color of your preference (dark blue for example).
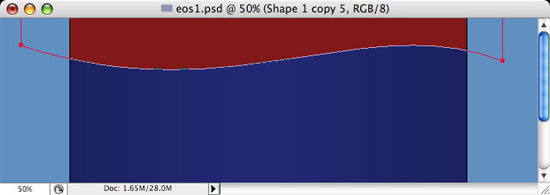
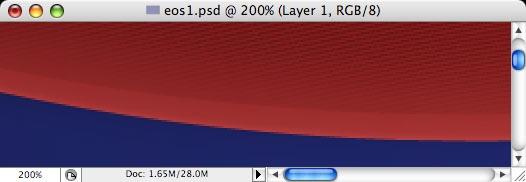
With Pen tool (P), create a new shape that looks similar to shown here: wave on bottom, and outside image borders on right, left and top. Double-click layer icon to set its color – dark red, for example.
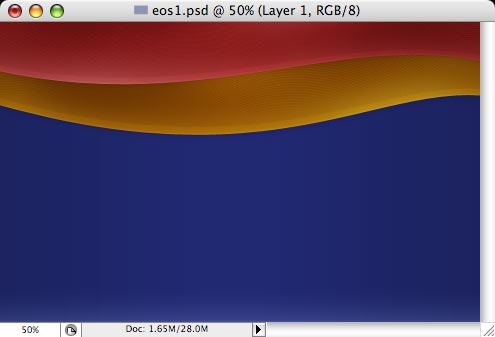
Apply the following layer effects (
Layer menu – Layer style – Blending options):
1) Drop shadow: blend mode=overlay, opacity=25%, distance=1, size=1;
2) Inner shadow: color=white, blend mode=overlay, opacity=40%, distance=0, size=5 (this way it is kinda another inner glow)
3) Inner glow: color=white, blend mode=soft light, size=75px, opacity=50%
4) Outer glow: color=black, blend mode=overlay, opacity=10%, size=20px
5) Gradient overlay: blend mode=overlay,opacity=10%, style=reflected, angle=0, reverse checked.
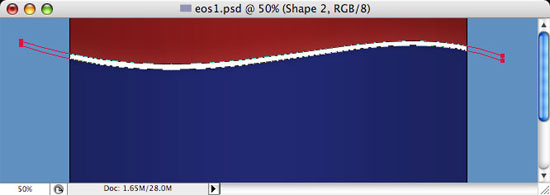
In new layer, use white color and Pen tool to draw the shape similar to bottom edge of previous shape.
Group its layer with previous layer (Ctrl-Shift-G), and set its blend mode to Soft Light.
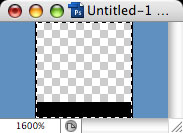
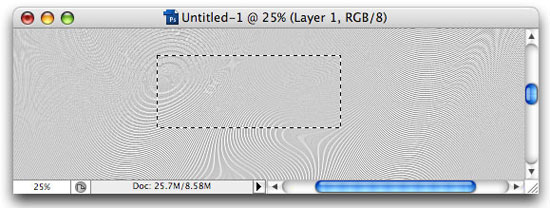
Create new document with 6×6 pixels size. With 1px black pencil tool, draw a line on bottom of image.
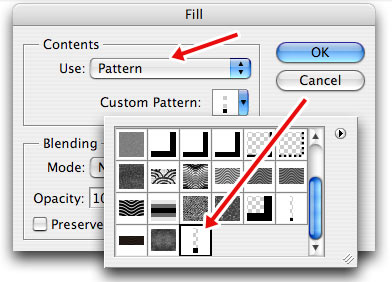
Go to Edit – Define Pattern, click OK
Close this document without saving (will not need it anymore), then create new document, square and about 3 times bigger than your original artwork – so if you made it 1024×768, make new document 3000×3000 pixels. Go to Edit menu – Fill, set Use to Pattern, then in Custom Pattern list find the pattern you just created.
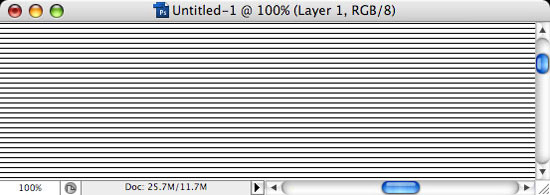
Now entire document is filled with lines.
Go to Filter menu – Distort – Twirl. Set Angle to about 100-150, apply. Now we have nice curved lines, shown here at 25% zoom. select part of this image, somewhere near center, copy to clipboard (Ctrl-C).
Then return to original image and paste (Ctrl-V). Group this new layer with shape layer (Layer menu – Create clipping mask), so that curved lines are limited with red wave. Set lines layer blend mode to Soft light.
Switch to Eraser tool (E), set mode to Brush, select large soft brush, and erase lines near edge of red wave.
Create new layer, group it with previous layers (Layer menu – Create clipping mask), then use very large black and white soft brush (B) to put dots here and there. Apply some Gaussian Blur (Filter menu – Blur – Gaussian Blur) if necessary.
Set this layer blend mode to Soft light.
Now, create new shape with different color (underneath red wave layer) and simply repeat all steps above!
Then again, again again again and again!
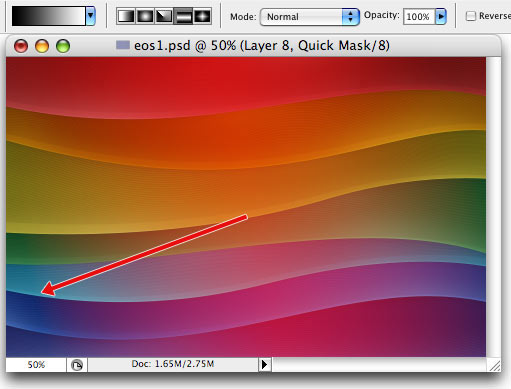
Now, save copy of document (always good idea), then merge all layers (Ctrl-Shift-E, or Layer menu – Merge visible), then sqitch to Quick mask mode (Q), select Gradient tool (G or Shift-G), set mode to Reflected, and make the gradient by clicking mouse in the center and dragging to lower-left edge.
Turn off Quick mask mode – you should get nice selection similar to this.
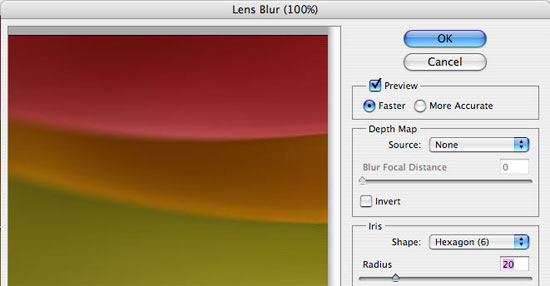
Go to Filter menu – Blur – Lens blur. Play with Radius setting, until you like the effect.
That’s all, the artwork is ready!
Eos wallpaper ( see wallpaper ).
Author: Vlad Gerasimov
URL: http://www.vladstudio.com
Comments


Comments