
Creating a character
Creating a character This is a lesson how to create a futuristic funny character. It explains basic principles of drawing, designing and coloring.
Create a new file, not too big, for better PC performance. Let’s say 800 X 800 / 72 pixel/inch. Immediately create a new layer (Ctrl + Shift + N). This is going to be our Background layer.
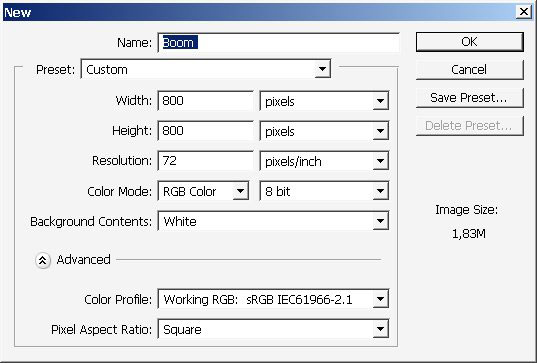
Now fill background layer (layer 1) with any color you want – I have chosen yellow-orange color scheme (RGB 239-201-136).
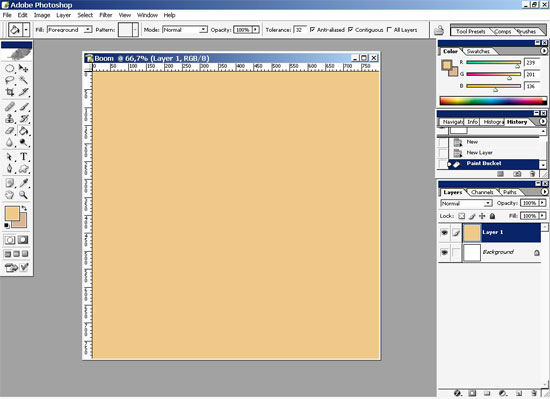
As for me i prefer to draw with white background – so just turn off visible our background layer ( layer 1 ) – create another ( Painting )layer( Ctrl + Shift + N) and begin to draw. that is when all the magic happens )).

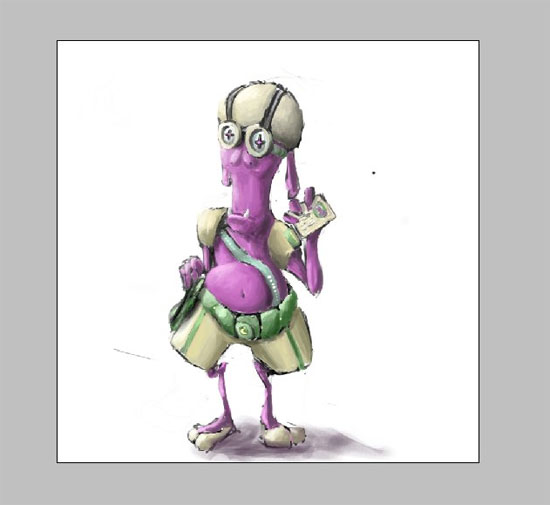
Our subject for today is a funny alien mailman (supposed to be a some kind of soldier) of some kind – let’s see for this painting I’m using my Wacom Graphire 4.
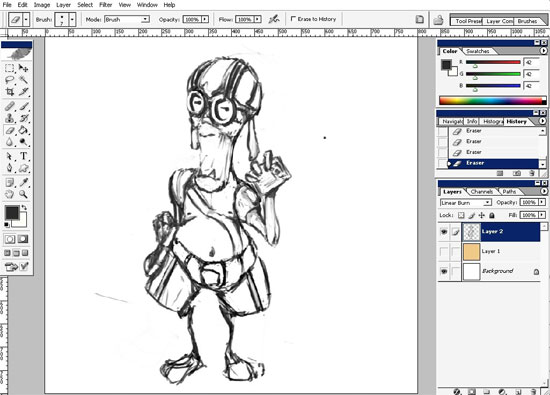
Stage 1 – Rough sketch. Here just draw basic forms, some perspective guide lines, if you need those and basic design features using. mi using standard PS (PhotoShop) 5 pixel rounded , Hard brush ( with brush opacity jitter, flow jitter in the other color dynamics section is turned to PEN PRESSURE + in the Shape Dynamics Section ? the Angle Jitter is set to pen Tilt and the Roundness jitter also set to Pen Pressure) .
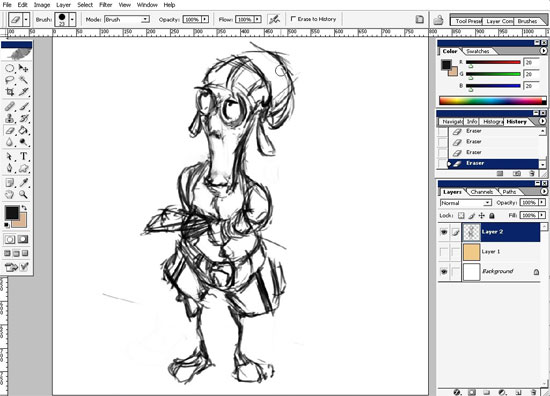
and here it is – our rough 10 minutes sketch with some design features such as – funny legs – boxer shorts – and of course the glasses. It is very hard to design something on the run. It is a long process. Remember that you can change anything you want. Free your mind).
Note: to fix some lines Use Eraser (E) instead of White color. It is very important if you are using many layers in your artwork.
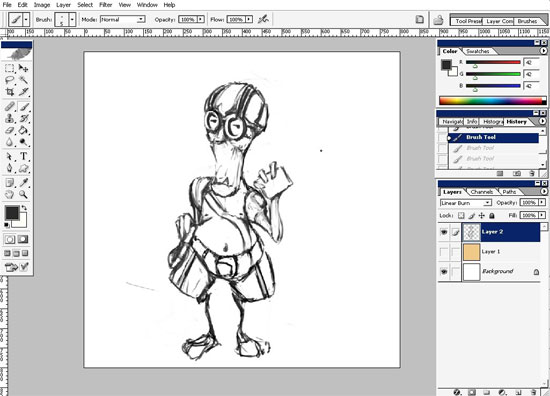
The second step is to refine the sketch. Define all the base lines, stature and mimics. I suppose this is the most technique demanding part. Try to define some design features as well. Actually the painter decides when the sketch is done. You can draw some basic lines and shapes OR refine it perfectly. It is a matter of techniques and knowledge.
It’s done. I have changed a little bit of design. Now let’s put the basic color scheme. Stage3 ? basic colors.
Create another layer (color) ?ctrl + shift +n.
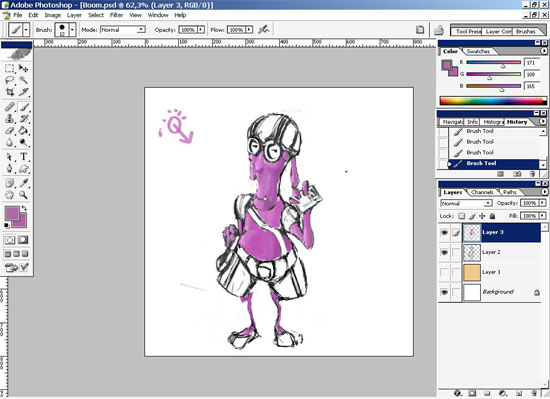
And here it is – purple skin and yellow – green equipment. Plus to that I have decided to put basic lights on the fly.
Note: decide from which side the light is eliminating the character. The color from the Lighten side is much lighter then from the opposite side. You have to consider that all the time. This is one of the basic value rules.
Refine the colors. Make them look good and realistic.
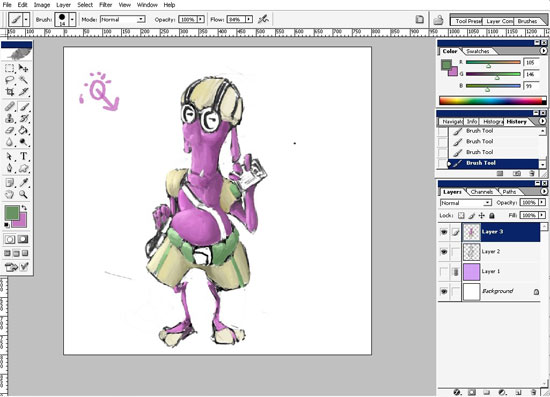
AE – our character is basically done.
The colors are where they suppose to be- I think it’s almost perfect. But one little thing remains unfinished about this guy. He has no shadows. So let’s fix this. With all that I have changed the color of our (layer1) background layer from yellow to purple.
For this I use basic Rough 6 – 10 pixels BLACK brush with opacity about 10 – 15 %. And we also need a little more lightning. We can use the same brush with the same settings but IT will be white this time. Try to think how the light is effecting out character. The more the Objects POP from center ( in 3d) – the more they will be affected by the light ) ?
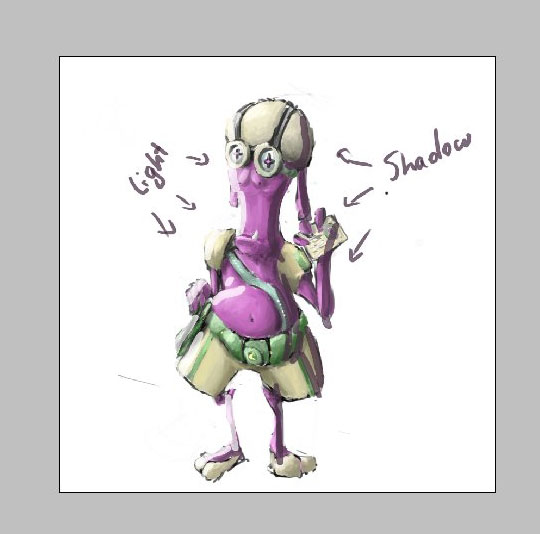
For example – The NOSE or shall we say woman breast is affected by light more than the neck or belly. It has different so called value.
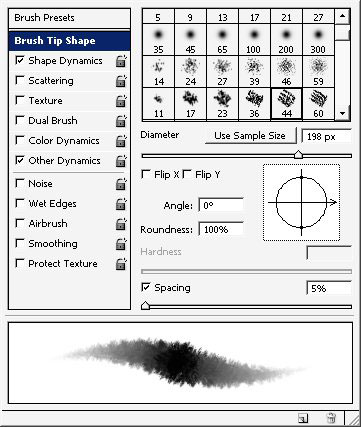
So, as I have said our character is now finished, so let’s take care of the background. Remember that we have created our First layer (layer 1). This is our background layer. For this operation – i will use any abstract brush from my private set.
Let’s say this one ( standard round sponge brush ? with brush opacity jitter, flow jitter in the other color dynamics section is turned to PEN PRESSURE + in the Shape Dynamics Section ? the Angle Jitter is set to pen Tilt and the Roundness jitter also set to Pen Pressure) I have also cropped my artwork (about 600×800) for better composition.
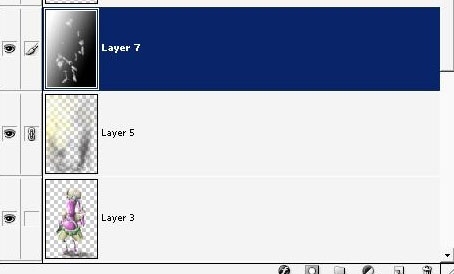
For painting our background I have used 2 layers ? but this can easily be dome by using only one single layer. The idea was to separate the surface lighting from background. Remember to put the character layer between background and lights layers.
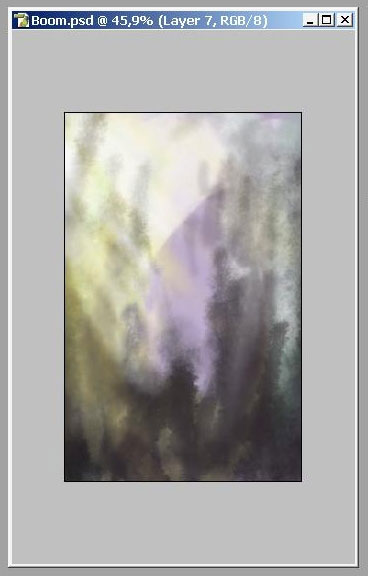
So here it is – our environment sketch – no details just abstract shapes.
NOTE – remember- as for the environment – the closer object is the more contrast it has Keep the eyes on the ambient light as well.
I used black (tone) ? and yellow (have used color dodged mode, with flow turned to 5- 10 to draw these surface lights) colors for my environment sketch. Remember that out layer was filled with purple that is why we see purple as well.
That is it the painting part is basically done. Now it all about composing.
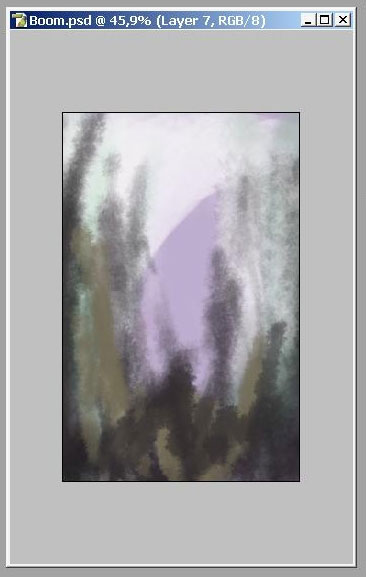
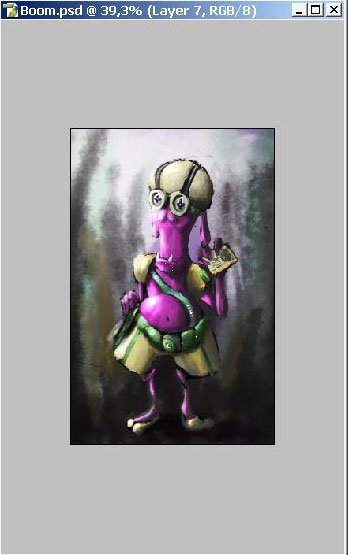
Than I have decided to put a layer and to fill it with standard white-to-black gradient. ( I have turned the opacity of this layer to about 50-60 ? and fill to about 60 as well. The color mode is set to COLOR BURN. (Layer 7).
Than I have used a very good technique. I have erased (eraser flow ? 10-15%) the parts I would like to be lighter effected.
Compare and see for yourself how. See how important lighting can be:
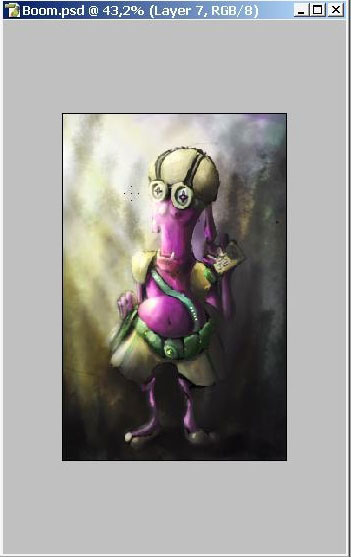
Put a little bit of surface lights on your character for more realistic picture.
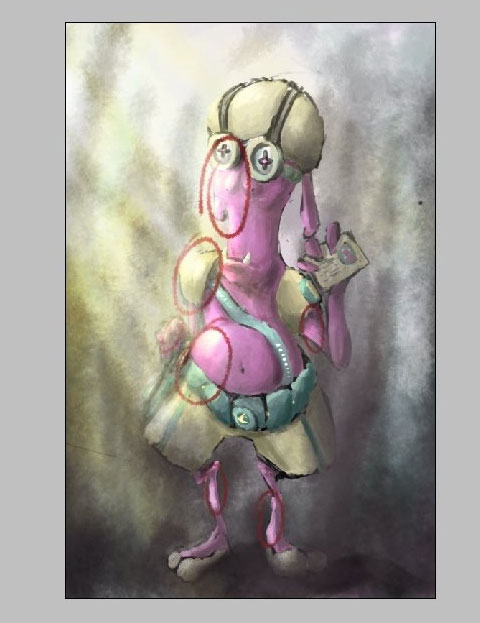
Than comes the final step for today. Think about ? is these the colors we really want. As for me ? I think not ? I didn’t really like the color of our ambient light. So create an adjustment SELECTIVE COLORS layer (can be found on the bottom of layer-channel- path menu box
And play with controls. You can actually change to any color you want. Here is what I have done.
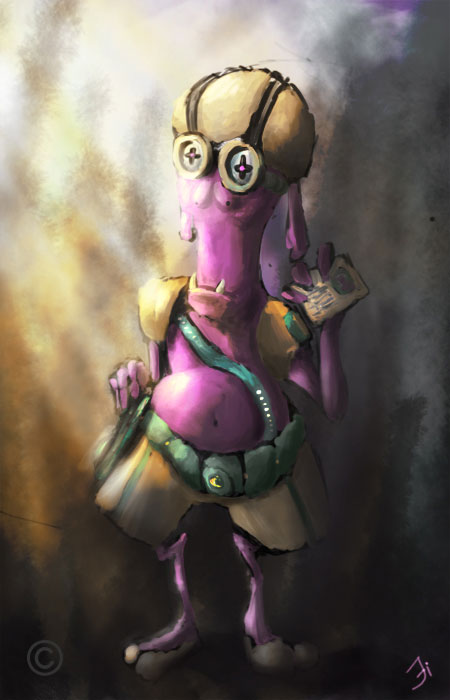
So here we have it – our mail man from outer. Space is finished now.
All that remains now is to sign it).
Enjoy!!
Comments