
The hidden power of Photoshop brush tool
November 10, 2008 | 0 comments
In this micro tutorial, I will describe my favorite features of Adobe Photoshop Brush tool. To learn all features, you can simply open Brush palette (Window menu – Brushes), change each setting and try the result when you draw a stroke.
The first setting is Tip Shape. You can choose from pre-loaded shapes or you can create your own… more on that later!

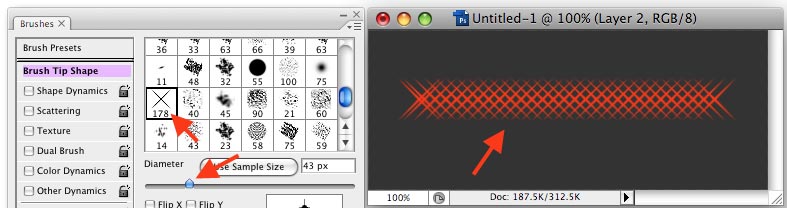
Brush Tip Shape has one interesting setting: Spacing. It is usually around 20-25% but when you set it larger than 100-150% you will get very different result.

Using Shape Dynamics checkbox, you can randomize sizes and angles of brush dots.

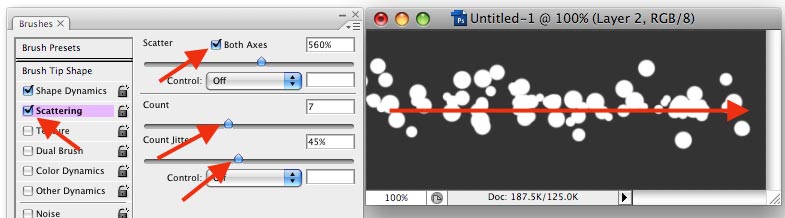
Using Scattering, you can randomize locations of brush dots – as you draw a straight stroke, dots are added randomly around your mouse.


You can use Count setting to control amount of dots.
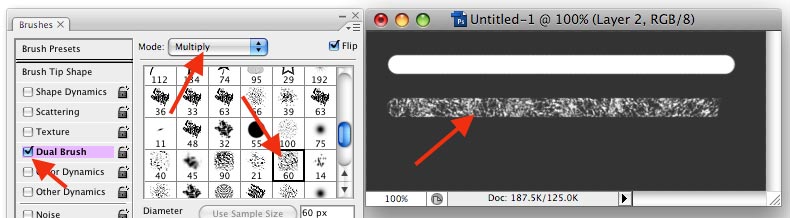
Dual Brush is very interesting feature, which will get you very different results depending on which brush and which mode you choose. Compare the two lines on this screenshot – first line made with simple brush, second – with Dual Brush enabled.
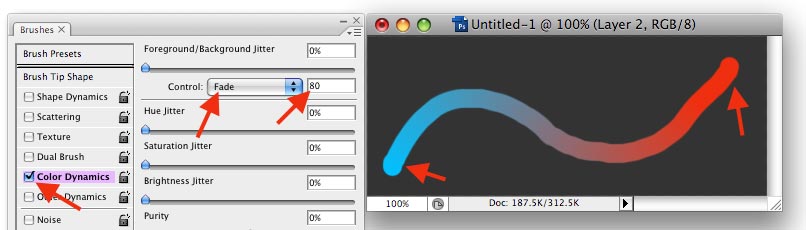
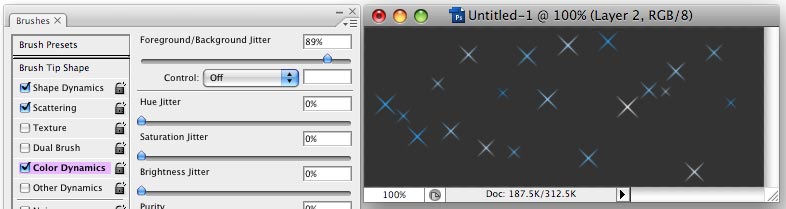
You can use Color Dynamics to randomize (or fade, or control with tablet pen) brush color. I do not use this often, though 🙂

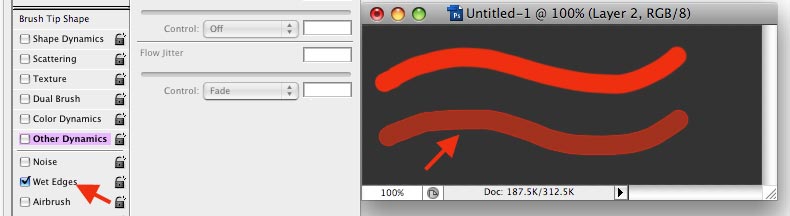
Wet Edges is simple and self-explanatory feature 🙂
The most exciting thing is that you can easily create your own brush. Let’s make a star brush for example. Create new image with transparent background (square for our star). Set foreground color to Black, switch to Shape tool (U), select Polygon tool on toolbar, open Polygon options, check Star checkbox, set Indent sides = around 90%, and sides = 4.

Draw a shape, rasterize it (Layer – Rasterize – Shape). Select all (Ctrl-A).

Go to Edit menu – Define Brush preset. Choose name for new brush, click OK.

Now, when you open Brushes palette window (from Window menu), you can see your new brush in Brush Tip Shape list.
Now you can enable and adjust Size Jitter, Scattering and Color Jitter, and with single mouse move, get result such as this!
Another example – I took the shape of snow flake, created brush preset from it. With Size Jitter, Scattering and Color Jitter, this is what single brush stroke looks like.

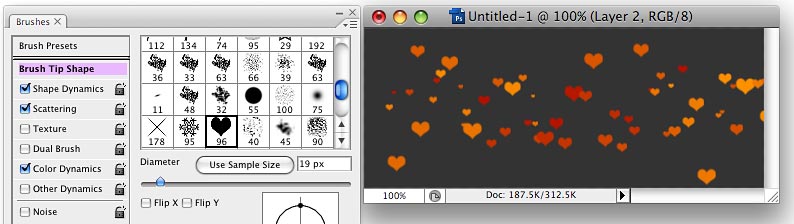
And another example – heart-shaped brush. Again, this screenshot made with only one brush move!
Author: Vlad Gerasimov
URL: http://www.vladstudio.com
Comments