
Photoshop Elements 2 Crop Tool
Photoshop Elements 2 Crop Tool |
|
|
|
|
| Used for cropping image borders |
|
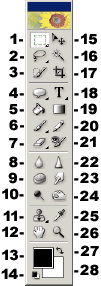  |
[In Elements 1, the crop tool is found at position #3 on the toolbox diagram.] Please note: If you have entered anything in the Width and Height text boxes on the crop tool’s options bar, your crop box will be constrained to the proportions of those measurements. The side handles on the crop box will disappear (see the section below explaining how this works). If you want to get your crop box resizing handles back, you will need to click the Clear button on the end of the options bar to get rid of the Width and Height entries, even if you have already deleted them from the text boxes. Elements will continue to constrain proportions of your crop boxes to whatever you had or have entered in those boxes until you either click the Clear button or reset the tool. 
You may move the entire crop selection outline by placing the pointer inside the selection, and dragging. To rotate, hold your cursor near the corner of the crop selection until it becomes a curvy arrow, then drag in a circular direction. Note that you cannot rotate a 1 bit Bitmap mode image. Tip – If you drag an outline around your image with the crop tool, you can then drag on any of the resizing handles to make the document larger thus increasing your canvas size. If your document has a background layer, the new canvas area will be filled with the background color currently showing in the toolbox. If your bottom layer is a regular layer and not a background layer, the new canvas will be transparent. Dragging on a corner handle while pressing the Shift key to constrain proportions is a quick way to add a solid colored border to an image. If you make a selection with the crop tool, and then don’t want to crop it, press the Esc key, or the Cancel button (circle with a line across it) at the far right end of the options bar to escape. An alternative to the crop tool is found by choosing Image > Crop after making a selection with any of the other selection tools. However, you cannot rotate or resample your image. The User Guide recommends that you be sure and set feathering to 0 when using this option. The keyboard shortcut key for the crop tool is the letter C.
|
|
The illustrations below, are of the crop tool’s options bar. As you can see, you may choose to crop to a fixed size by typing values into the Height and Width boxes. This is useful if you need to fit an image into a particular size spot in a layout. When no numbers are entered in Width, Height, or Resolution you can drag a crop selection to any size. This is the default setting. There seems to be a lot of confusion about how the Width and Height boxes work with the crop tool. Here is an example. If you enter 2 in for Width, and 2 in for Height, this does not mean that you can only drag a 2 inch square crop outline with the tool. Or, as many people think, a two inch square outline will be drawn on click. With those settings entered in the options bar, you can drag a crop outline of any size, though the proportions will be constrained to those of your settings, in this case, a square. When you accept the crop by clicking the big check box at the end of the options bar, or by pressing the Enter key, the area within your crop outline will be 2 inches by 2 inches. If you have entered your current image resolution in the resolution box, this necessarily involves resampling. If the resolution box has been left empty, the image resolution will increase or decrease to accommodate the new size, and no resampling will occur. If you are cropping images for the Web, or don’t want your image resolution changed, this may not be what you want. If you need to draw the same size crop outline over and over again, and do not want to have your image resized or resampled, or have its resolution changed, use the rectangular marquee selection tool. In its options bar, choose Fixed Size and enter the size you want. Click in the image, and your selection will be drawn to the dimensions you have set. Place the marquee tool within the selection outline and drag to move it into place, or use the arrow keys to nudge it, one pixel at a time. Then choose Image > Crop. By clicking the Front Image button, the width, height, and resolution boxes will show the values of the current image. You have the option of leaving either the resolution, or sizes blank, while filling in the other value. Elements will then alter the image to compensate for the entered parameter. For example, if you specify a new size, but leave the resolution box blank, the resolution will change automatically to compensate for the altered size. The second options bar, shown below the first, is what you will see after you have made a crop outline by dragging. Areas which will be cropped from the image are covered with a semitransparent color if you have the Shield box checked. The color of the overlay can be changed by double clicking the color box, showing black in the illustration. Opacity changes the transparency of the overlay. Clicking the large check mark at the right end of the options bar will accept or perform the crop. You can also accept the crop by pressing Enter on your keyboard. Clicking the Cancel button or pressing the Esc key on your keyboard will refuse the crop and deactivate the crop outline. |
|
|
|
|
|
If you have doodled with a tool’s options and want to get back to the default settings, click that tool’s icon at the far left end of its options bar. Choose either Reset Tool to reset only the current tool, or Reset All Tools to restore default settings to every tool. Please note that all descriptions, and illustrations featured refer to files which are in Photoshop’s .psd format, and which are in RGB color mode. Other file formats, and color modes may generate different options. Some Photoshop features are not available for images not in .psd format, or RGB color mode. To find what color mode your image is in, choose Image > Mode. |
|
Comments