Photoshop Elements 2 Smudge Tool
Photoshop Elements 2 Smudge Tool |
|
|
|
|
|
Used for smudging pixels |
|
  |
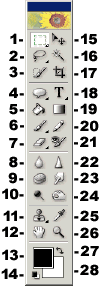
This tool is supposed to simulate finger painting. Color is displaced, or “smudged” from the place where the pointer is clicked. It is moved in the direction the cursor is dragged. How far the initial color is moved depends on the setting in the Strength box in the tool’s options bar. To use the smudge tool, select it in the toolbox, choose your settings [see below], choose a brush from the pop-up palette in the options bar, and drag in the image. Unlike the sharpen, and blur tools, the smudge tool works on click, but does not have any further effect until it is dragged. A shortcut for changing brush sizes while using this tool is to press the left bracket [ to decrease brush size, and the right bracket ] to choose a larger brush. When editing an image with any tool that uses brushes, you can right click on the image and the brushes pop-up palette will appear right next to your cursor. The keyboard shortcut for the blur tool is the letter F.
|
|
The illustration below is the smudge tool’s options palette (split in two because it’s so long). To choose a brush size and type, click on the brush thumbnail. A pop-up palette of available brushes will appear. For more information on brushes. The box titled Mode, and showing Normal is a drop down menu of the blend modes you can choose from. To set the Strength value, you can type a number into the text box, or access a slider by clicking on the arrow on its right side. This value determines how far the initial color clicked on is pushed, or smudged in the direction you drag. At 100 % the initial color stays with the pointer and acts the same as the paintbrush tool. At any lower setting, the initial color will fade, and later colors will be dragged and smeared. The Finger Painting check box will cause the foreground color currently selected in the color box of the toolbox to be used as the initial color of each stroke. When unchecked, the initial color will be that which is under the cursor when clicked. Choose the Use All Layers check box if you want to use colors from all layers. When unchecked, only the active layer’s colors will be smudged. Note that, while these two choices affect where color data is picked up, the smudged result exists only on the current active layer. |
|
|
|
|
|
If you have doodled with a tool’s options and want to get back to the default settings, click that tool’s icon at the far left end of its options bar. Choose either Reset Tool to reset only the current tool, or Reset All Tools to restore default settings to every tool. Please note that all descriptions, and illustrations featured refer to files which are in Photoshop’s .psd format, and which are in RGB color mode. Other file formats, and color modes may generate different options. Some Photoshop features are not available for images not in .psd format, or RGB color mode. To find what color mode your image is in, choose Image > Mode.
|
|


Comments