Why Layers (page 2)?
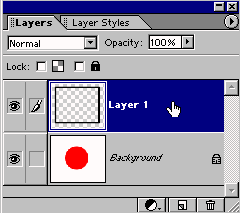
After stepping back in History, and with the rectangular selection active once again, I clicked the New Layer button at the bottom of the Layers palette to create a new layer.![]()
With that layer selected in the Layers palette (the selected layer is dark blue), I then stroked the selection, the same as before. However, this time, the stroked outline was created on its own layer, above the red circle’s layer.
Remember to press Ctrl-D to deselect after you’ve finished adding the stroke.
Now, to move the frame into alignment, I only have to select the move tool in the toolbox, and either drag the frame in the image, or use the arrow keys (with the move tool selected in the toolbox) to nudge it into position.
Note that if you have Auto Select Layers checked in the move tool’s options bar, you will have to click directly on the black pixels of the frame to move it.![]()
If you have that option unchecked, you can click anywhere in the image and move the layer, so long as it is selected in the Layers palette.![]()
If you have difficulty aligning layers, here are two tips that may help. Unlike Photoshop, Elements does not have guides or align commands so you may have a hard time lining things up.
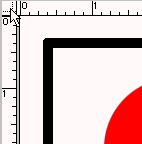
First, try using the grid. Choose View > Show Grid. Second, try moving the ruler’s origin to a central location. To do this, choose View > Show Rulers. Place your cursor in the upper left corner of the document, at the zero point of both the horizontal and vertical rulers. 
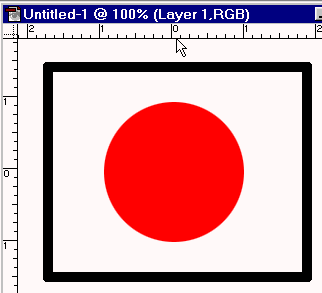
Click and drag. Drop the origin as near as you can to the center of one of the objects you are trying to align. You will then be able to use the offsets to position the other object. See the example below. The zero point for both the horizontal and vertical has been placed at the circle’s center.


transform options bar
Another option that you will have, when an object is on its own layer, is that of transforming it. If you select/check the Show Bounding Box option![]()
on the move tool’s options bar, your object will show a highlighted box, with handles. In case you don’t know, the little, hollow square, shown on the black frame, below, is a “handle.”
You can use these handles to transform your layer, and all its contents. The minute you make any kind of transformation (drag a handle), the move tool’s options bar changes to the transform options bar, shown above.
You will have the option of accepting or refusing the transformations you make, by clicking either the big X, or the check mark at the end of the options bar.
Hover the cursor over a handle to see how it can be used. The cursor shown below is the rotate cursor. Drag in a circular motion to twirl the layer.![]()
The icon, shown next, will scale the image both vertically, and horizontally. Press the Shift key to scale proportionally.![]()
And, this one, shown below, is a side handle. This will scale the width, only.![]()
All of this moving, and transforming can be done almost effortlessly because the frame is on its own layer. The red circle on its background layer has not been affected in any way by what I have done to the other layer.
Ninety-nine percent of the time, it is much, much better to put anything, and everything on its own layer. If you have the option of doing so, take it.

Comments