Redeye Removal II
Redeye Removal
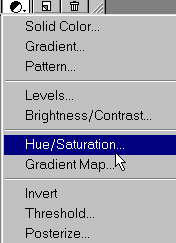
With the selection active, click on the New Adjustment Layer button at the bottom of the Layers palette (the black and white circle), and choose Hue/Saturation from the menu.
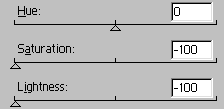
In the Hue/Saturation dialog box, move the Saturation and Lightness settings to -100 % (that’s minus) or whatever minus settings give you a result that matches the remaining part of the pupil which is not discolored (if there is any left).
Make sure the Preview checkbox is selected so you can see how the eye looks. Click OK when you’re satisfied with the coloring of the pupil.
Now, click on the Hue/Saturation layer’s mask thumb.
Clicking on the mask thumb puts the layer into mask edit mode. You’ll be editing how much of the Hue/Saturation effect is visible by painting with black to remove, and white to add.
The reason the mask is currently almost entirely black except for the white spot over the redeye is because you had a selection active (the elliptical marquee) when you created the adjustment layer..

Comments